

Appearance
Configure Twilio SendGrid SMTP
Connect Twilio SendGrid so UpForm can send admin notifications, customer emails, verification emails, and follow-ups through your SendGrid account.
This guide covers the email provider connection. To sync form submissions to a SendGrid contact list, see Twilio SendGrid.
Watch the Twilio SendGrid SMTP setup video.
Before you begin
- You need a SendGrid account.
- In UpForm, the email provider is labeled Twilio SendGrid.
- Custom providers are managed under Settings → Email configuration → Custom email providers. You can also start from a form’s Email → SMTP section with Add provider.
Create a SendGrid API key
- Sign in to your SendGrid dashboard.
- Go to Settings → API Keys.
- Click Create API Key.
- Enter an API Key Name (for example,
UpForm Notifications). - Choose Full Access, or Restricted Access with at least Mail Send permission.
- Click Create & View.
- Copy the key immediately. SendGrid typically shows it only once.
Add Twilio SendGrid in UpForm
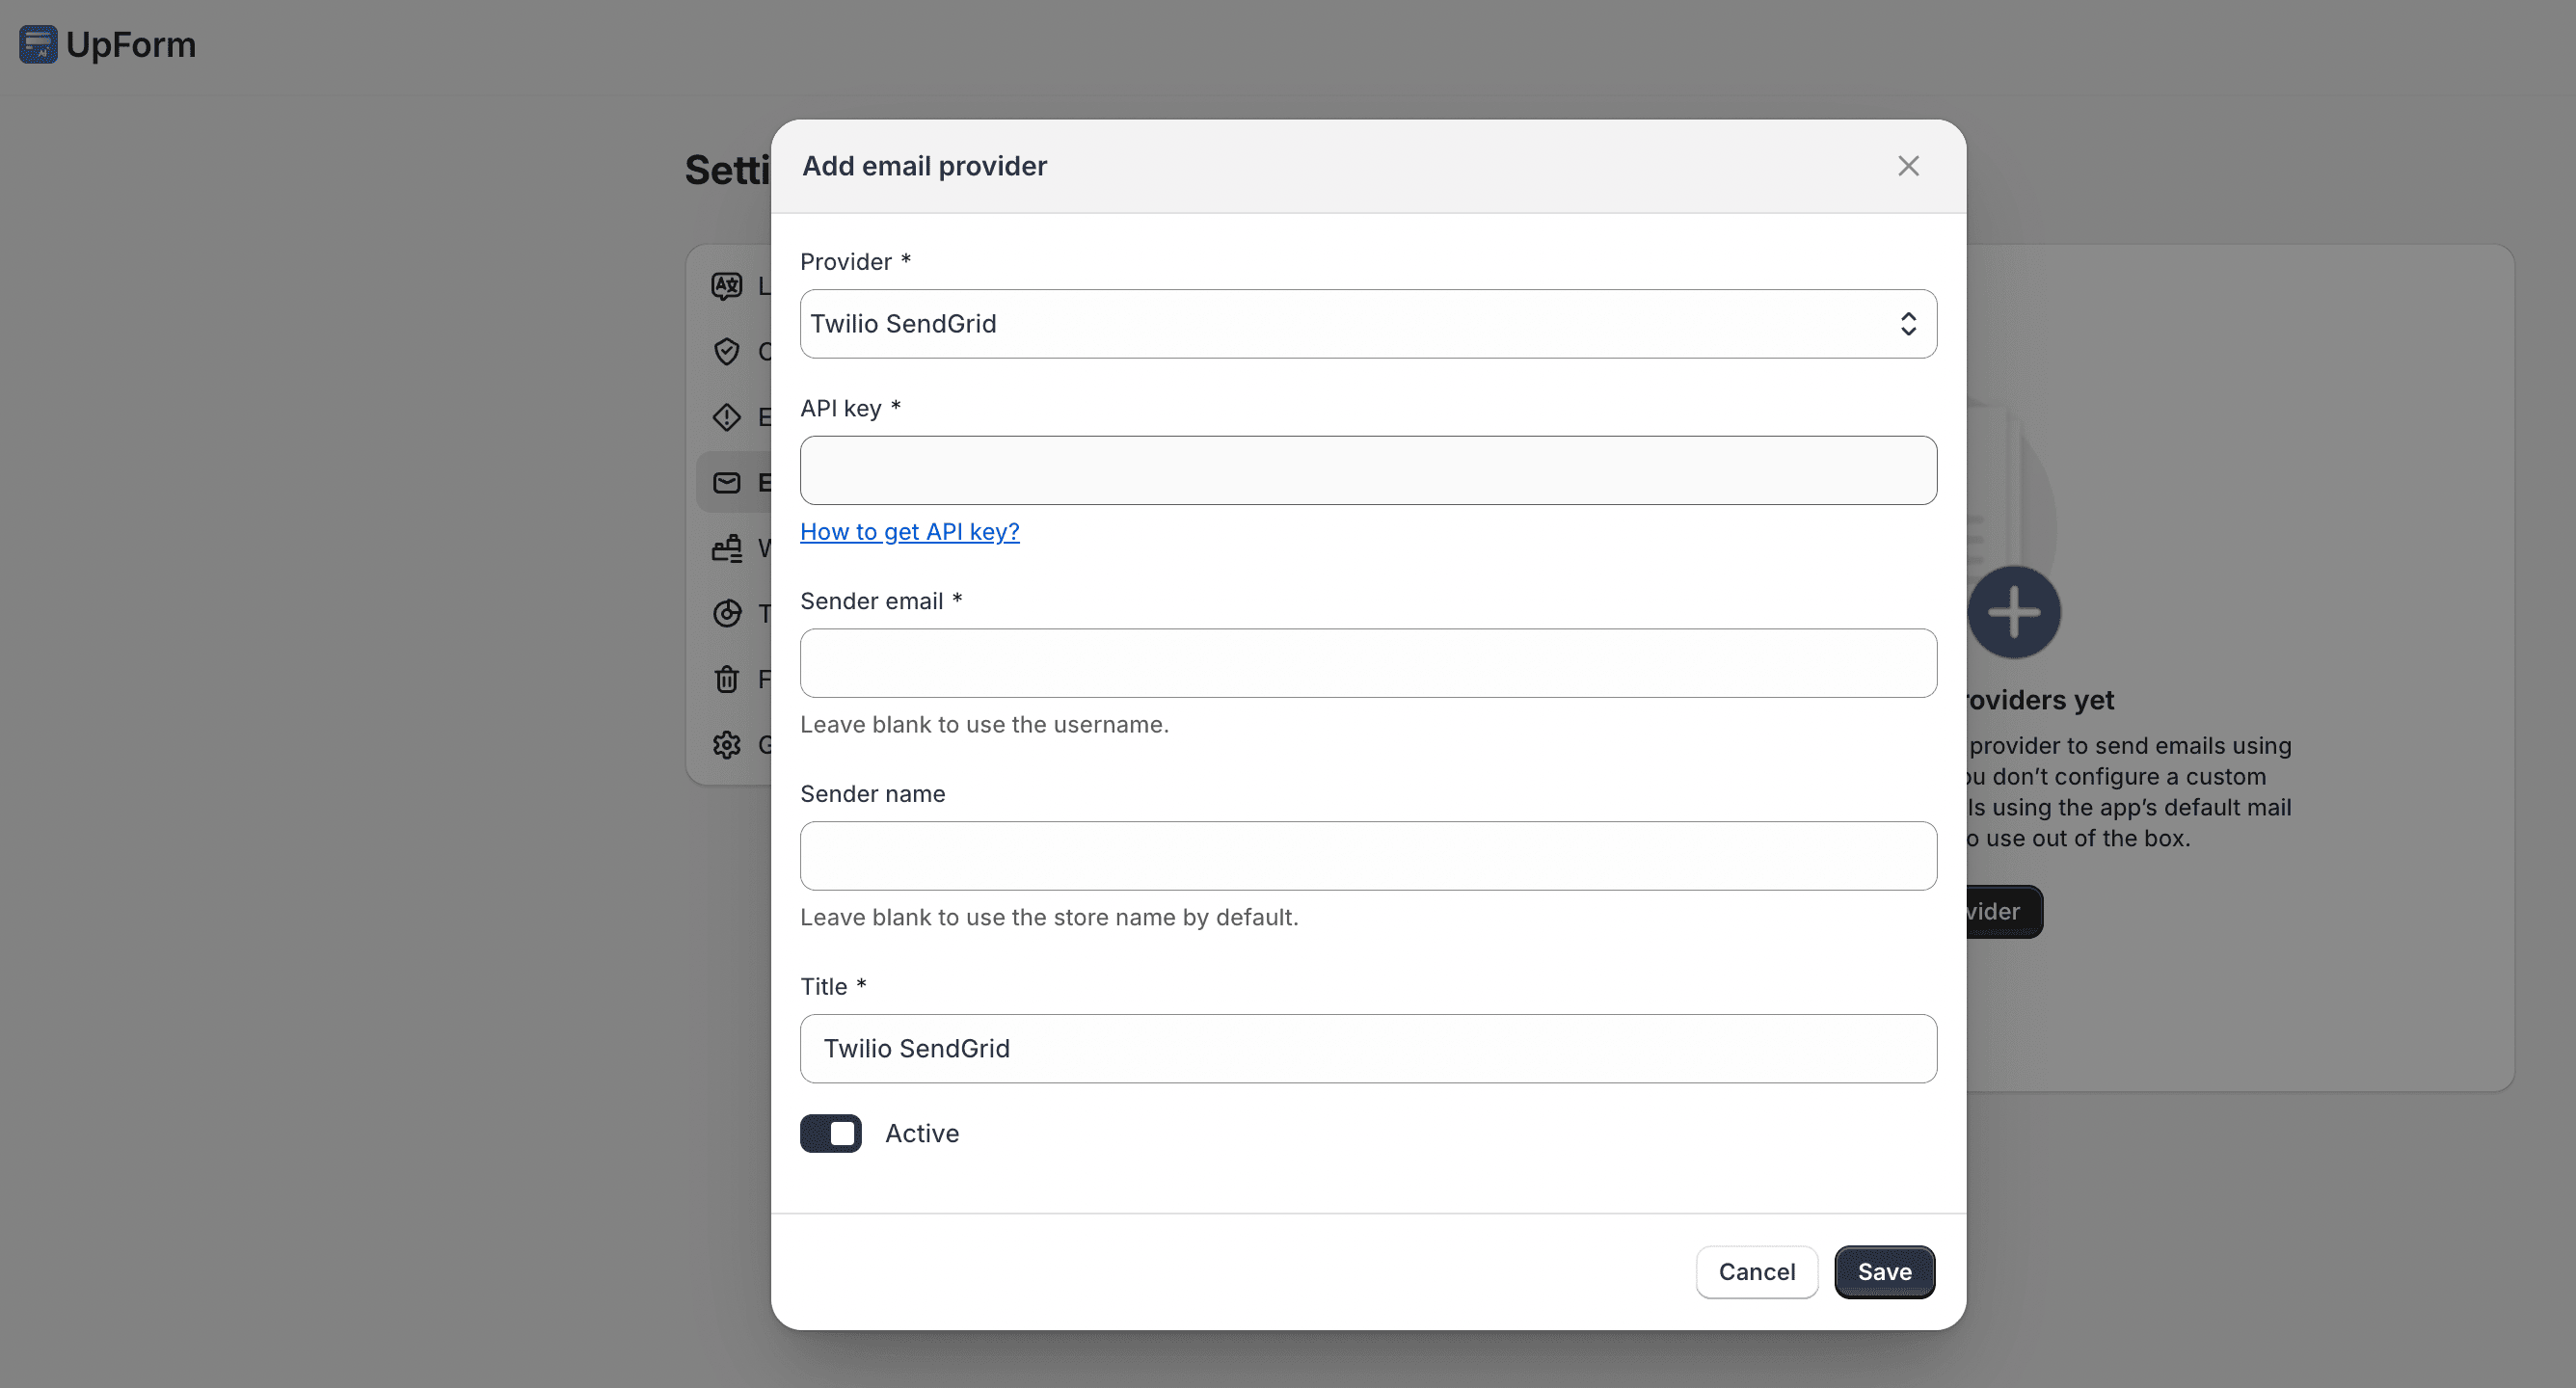
- In UpForm, open Settings → Email configuration → Custom email providers.
- Click Add email provider.
- Under Select provider, choose Twilio SendGrid.
- Enter a Title for this connection.
- Enter the SMTP details SendGrid requires (for example, host
smtp.sendgrid.net, usernameapikey, and your API key as the password), plus port and encryption as shown in the form. - Enable Active, then click Save.
You can also open Add provider from a form’s Email → SMTP section.
Test the connection
- Use Send test email in UpForm if it is available for the provider.
- Confirm the test message arrives.
- Optionally check SendGrid’s Activity feed for delivery status.
Optional: Authenticate your domain
To improve deliverability:
- In SendGrid, go to Settings → Sender Authentication.
- Authenticate your sending domain and add the DNS records your provider shows.
- Wait until verification completes.
If this does not work as expected, Contact for help.