

Appearance
IFTTT
Send form submission data from UpForm to IFTTT using Webhooks. After a customer submits a form, UpForm can pass up to three mapped values into an IFTTT applet so you can continue the workflow in other apps.
Before you begin
- You need an IFTTT account.
- Connect the IFTTT Webhooks service.
- In UpForm, enable Save submission data for the form. Workflow sync will not run if submissions are not saved. See General.
- IFTTT Webhooks accepts three values per request: Value 1, Value 2, and Value 3. Map only your most important form fields to these slots.
- IFTTT menus and labels can change. If something does not match exactly, search IFTTT help for Webhooks or Receive a web request.
Connect IFTTT in UpForm
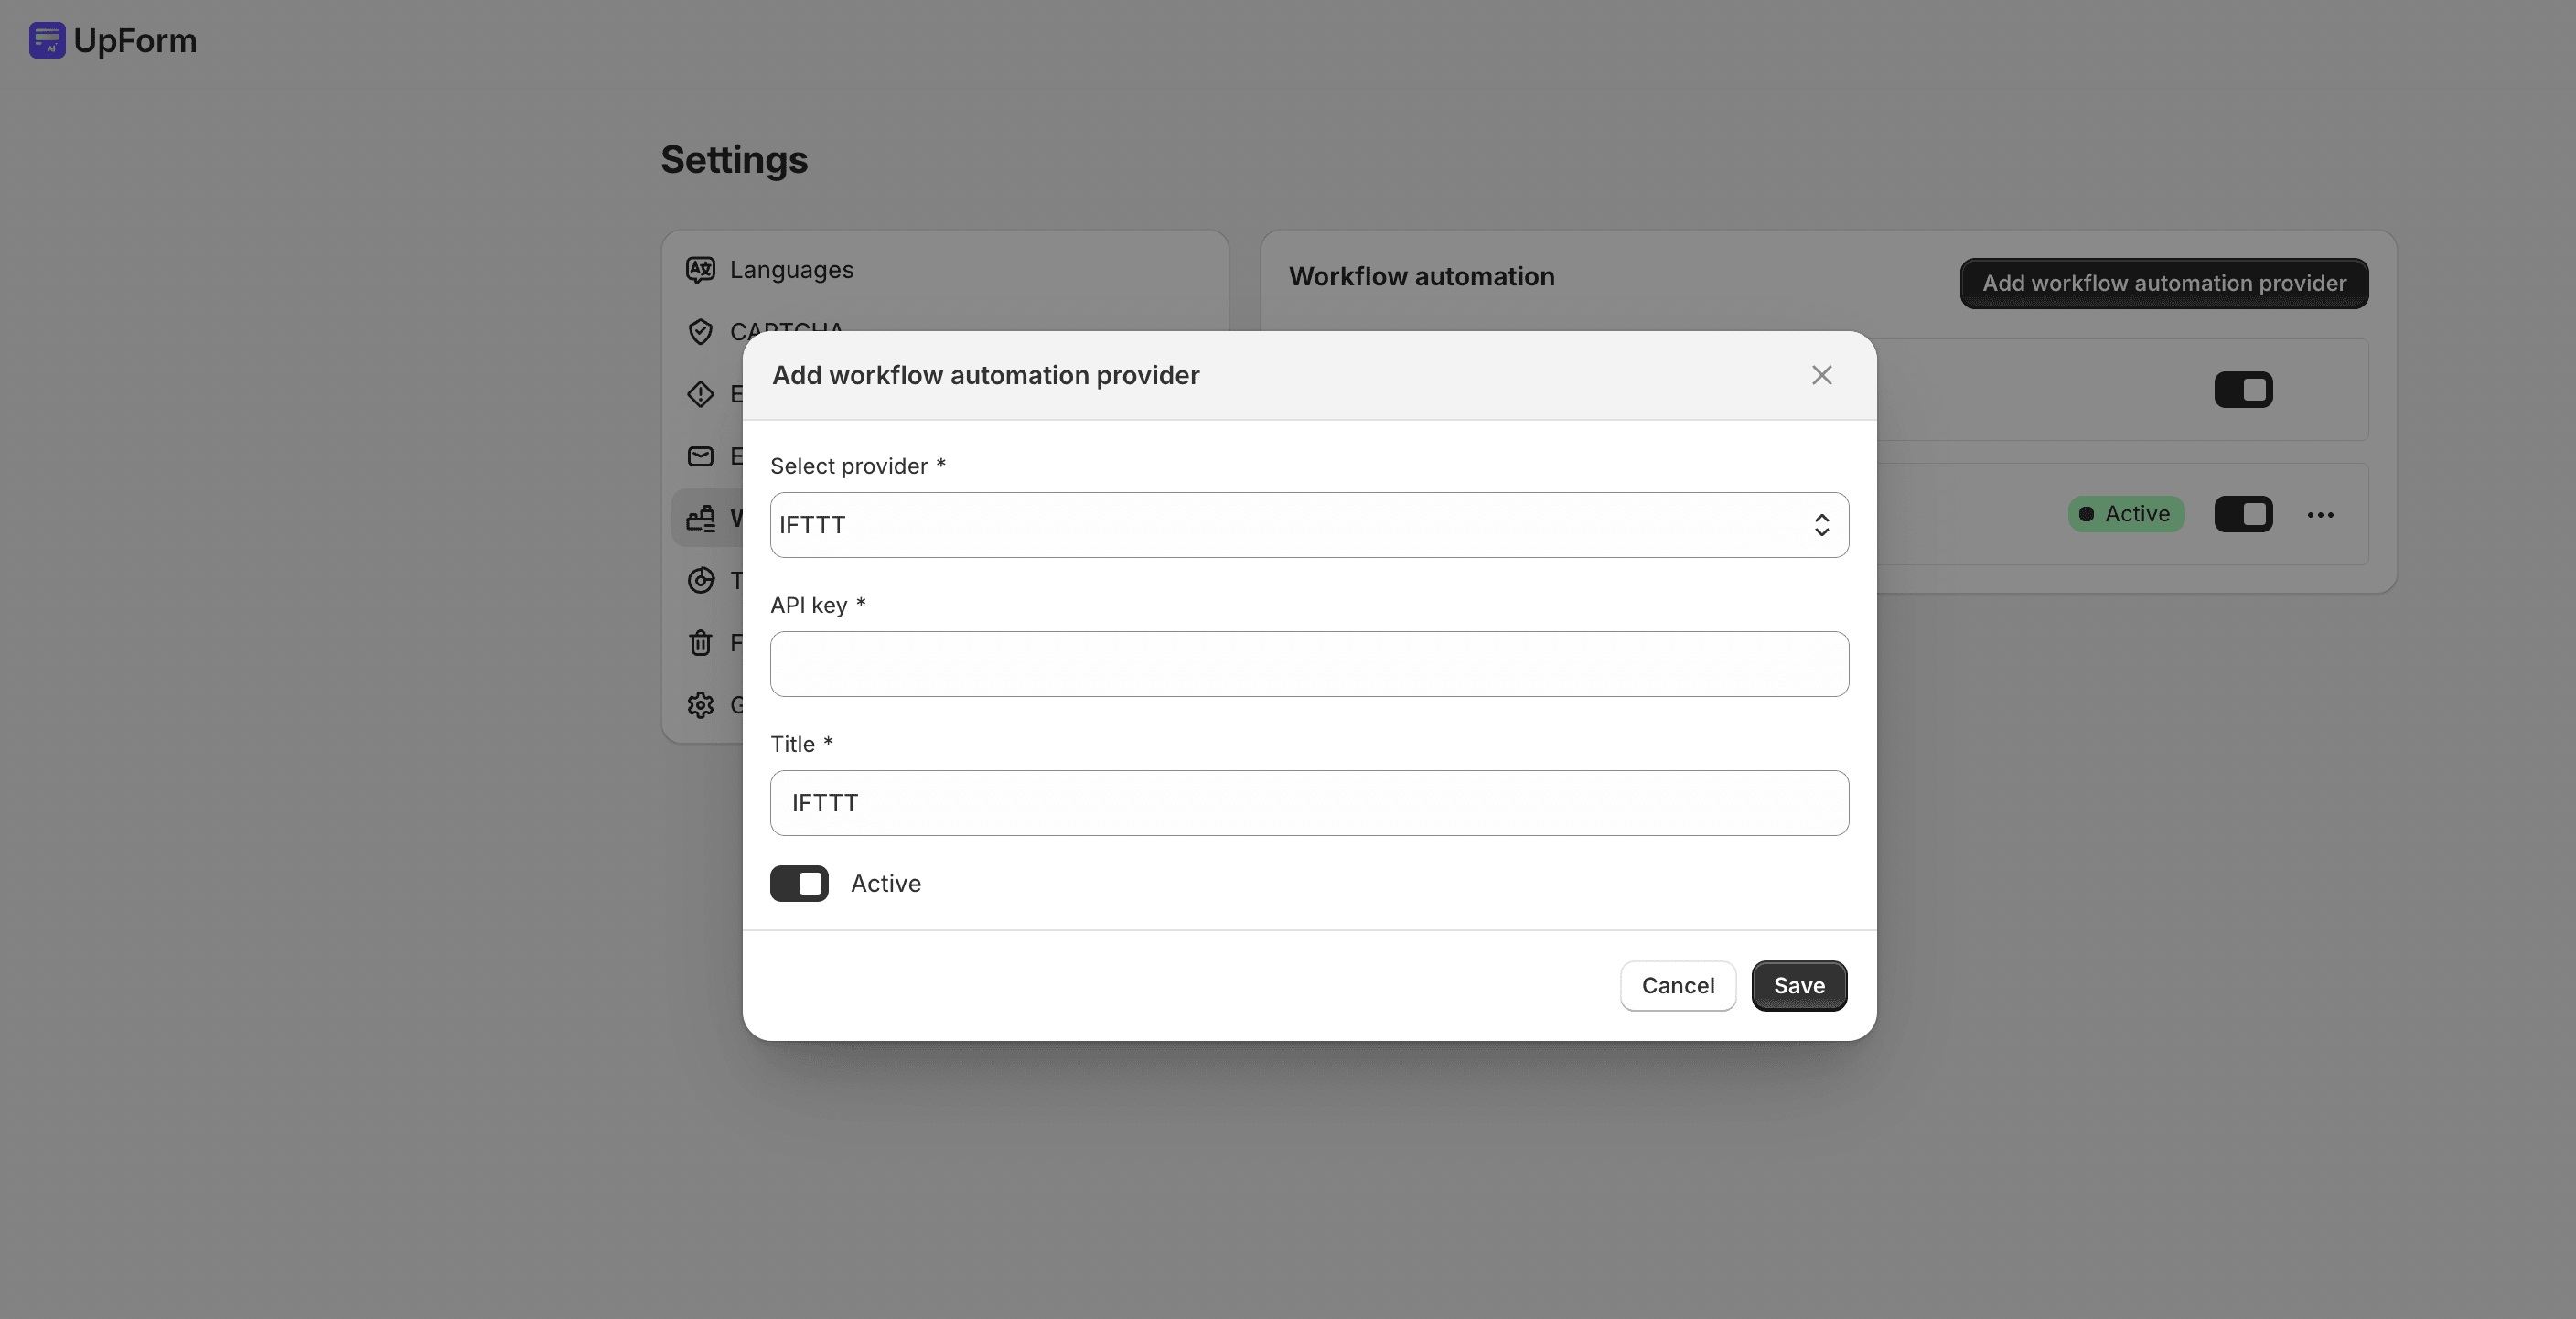
- In UpForm, open Settings → Workflow automation.
- Click Add workflow automation provider.
- Under Select provider, choose IFTTT.
- Enter a Title for this connection (for example,
IFTTT – UpForm). - Leave the modal open (or return after you copy the key), then continue in IFTTT.
Get your IFTTT Webhooks API key
- Open the IFTTT Webhooks page.
- Click Connect (or Connect Webhooks) if the service is not connected yet.

- Open Settings.
- In the URL section, copy the unique string after
/use/. That string is your API key.
Example: if the URL is https://maker.ifttt.com/use/fCuc0W3n..., the API key is fCuc0W3n....
- Return to UpForm, paste the key into API key, enable Active, then click Save.
Create an IFTTT applet
UpForm sends data to a fixed Webhooks event name: new_upform_submission. Your applet must use that exact event name.
- In IFTTT, create a new applet.
- For the If This trigger, choose Webhooks → Receive a web request.
- Set the event name to
new_upform_submission. - For Then That, choose the action you want (email, spreadsheet, Slack, and so on).
- In the action, use the webhook ingredients for the three values (often shown as Value1, Value2, and Value3).
- Save and turn the applet on.
If the event name does not match new_upform_submission, UpForm cannot trigger the applet.
Enable IFTTT on a form
- Open the form in the form builder (or create one from a template).
- Open the General tab → Workflow automation.
- Enable Sync submission data with IFTTT.
- Select the Provider you connected earlier.
You can also click Add for IFTTT from this section if you have not connected a provider yet.
Map form fields
In the mapping table, match each form field (Label / Name) to one of these IFTTT slots under Mapping:
- Value 1
- Value 2
- Value 3
Example:
| Form field | IFTTT mapping |
|---|---|
| Email address | Value 1 |
| Name | Value 2 |
| Message | Value 3 |
You can map only three fields. Choose the values your IFTTT applet needs most.
Then Save the form and Publish it to your storefront.
Test the sync
- On the live storefront, submit the form with complete test data.
- Wait a short time, then check whether your IFTTT applet ran (activity history or the destination app).
- If nothing happens, confirm:
- The Webhooks API key is correct and Active
- The applet event name is exactly
new_upform_submission - The applet is turned on
- Save submission data is enabled
- The form mapping uses Value 1, Value 2, and/or Value 3
If this does not work as expected, Contact for help.