

Appearance
Create a form
Create a form from a template or from a blank layout, then configure it in the form builder. After you save, publish the form so customers can see it on your store.
Before you begin
- Open the UpForm app in your Shopify admin.
- Creating and saving a form does not make it visible on the storefront. You still need to publish it. See Publish a form.
Create a form
- From UpForm, go to Forms.
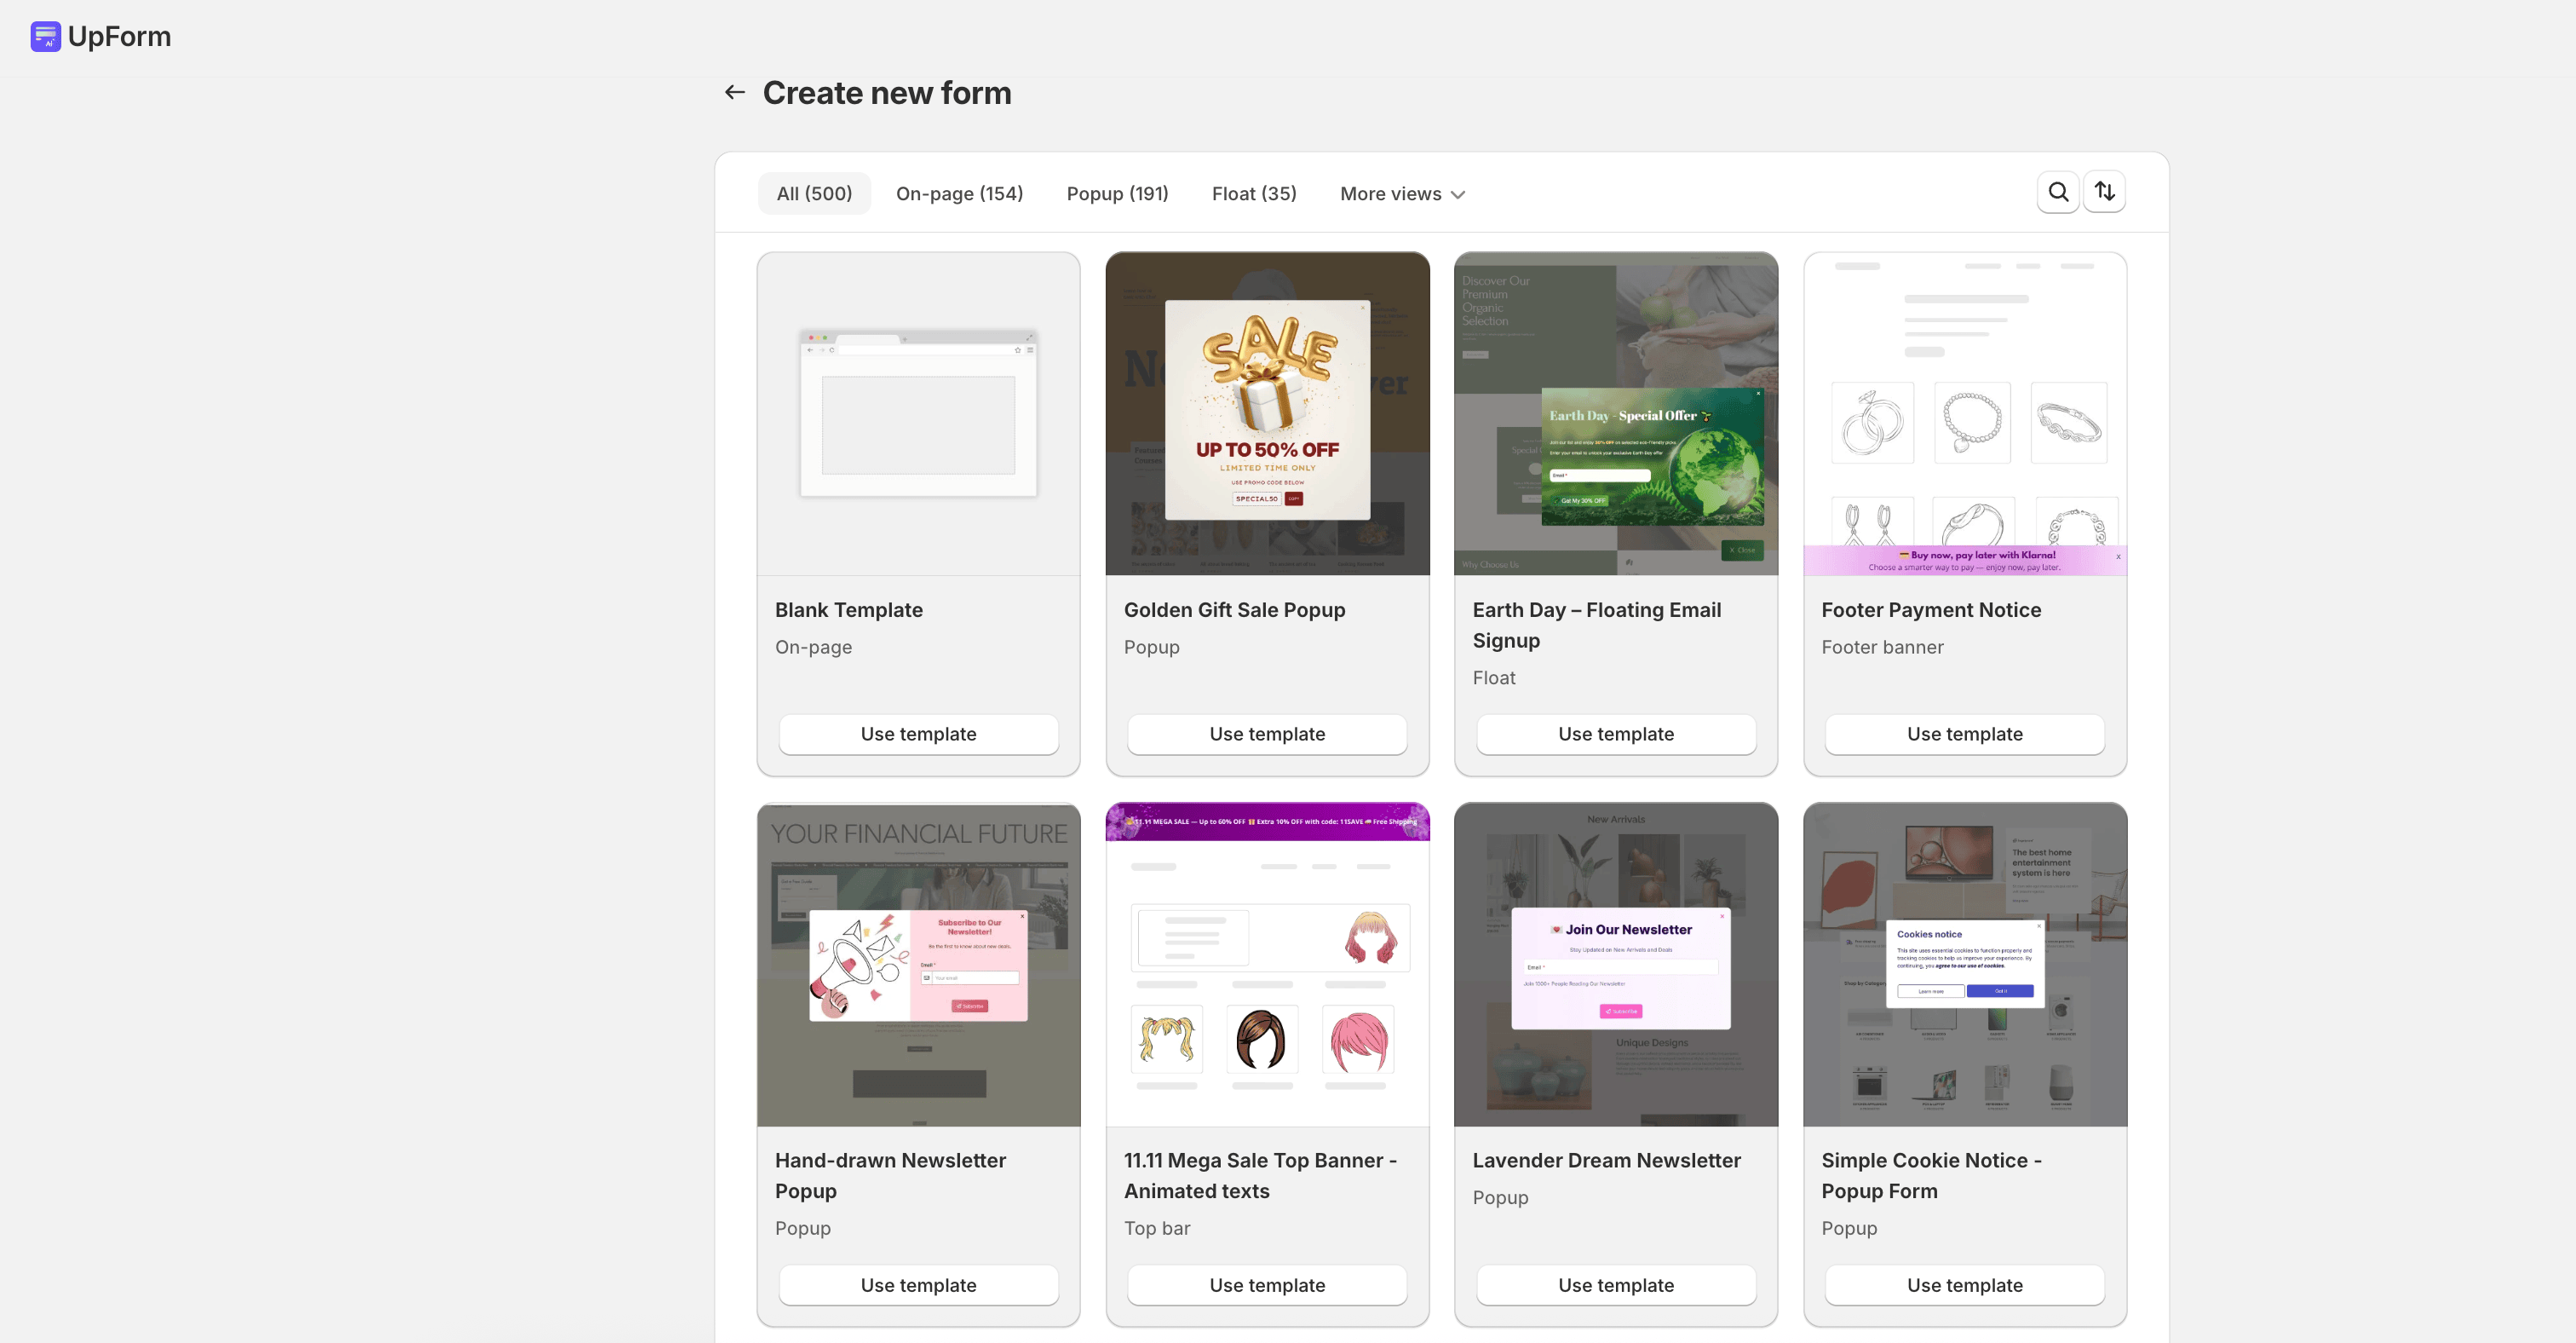
- Click Create new form.
- Browse templates by category, or choose a blank template.
- Click Use template.
The form builder opens so you can configure the form.
You can also click Import form on the Forms page to import a form from a JSON file exported from UpForm.
Form builder overview
The form builder uses a side menu. Tabs include:
| Tab | Purpose |
|---|---|
| Form info | Title, description, and active status |
| Form elements | Fields you can add to the form |
| Design | Form type, form style, and field style |
| Triggers | When and how the form appears (hidden for On-page forms) |
| Extra content | Optional content around the form |
| After submission | What happens after a customer submits |
| Admin, customer, follow-up, and SMTP settings | |
| Conditions | Show or hide fields based on customer input |
| General | CAPTCHA, automation, authentication, custom code, schedule, and more |
Hover over an element in the live preview and click the edit icon to open its settings.
Configure form info
Open the Form info tab to set the form title, description, and active status.
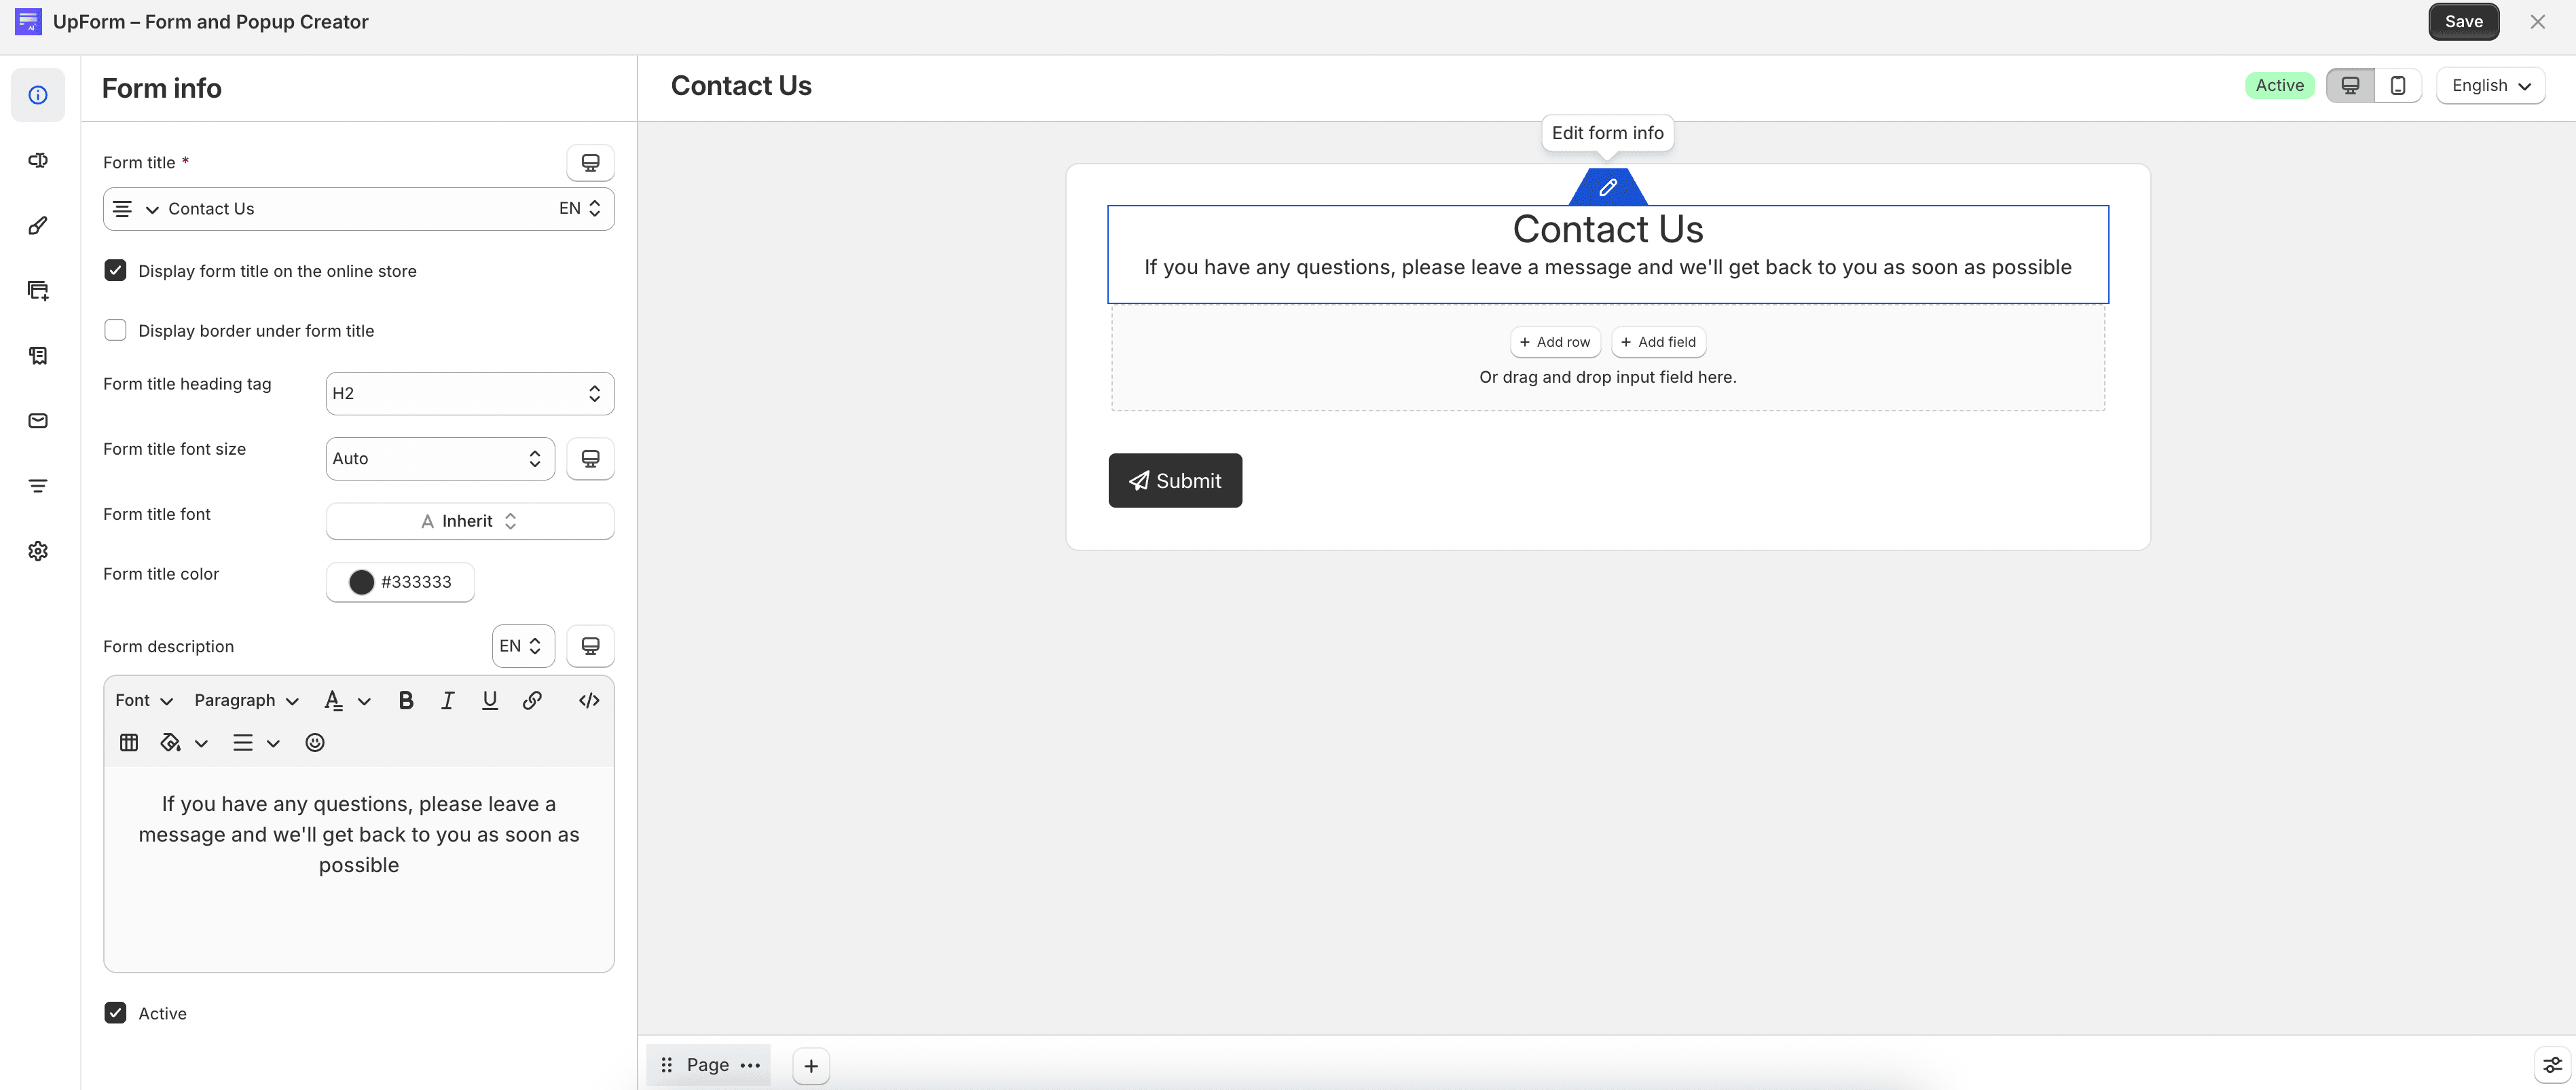
Enter a Form title and optional Form description. Enable Display form title on the online store if you want the title visible to customers. When the title is displayed, you can adjust alignment, heading tag, font, size, color, and an optional border under the title.
Enable Active so the form can appear when published. New forms are active by default. Click Save when you are done.
Add rows and fields
Forms are built with rows and fields:
- A row sets the column layout
- A field collects input or displays content inside a column
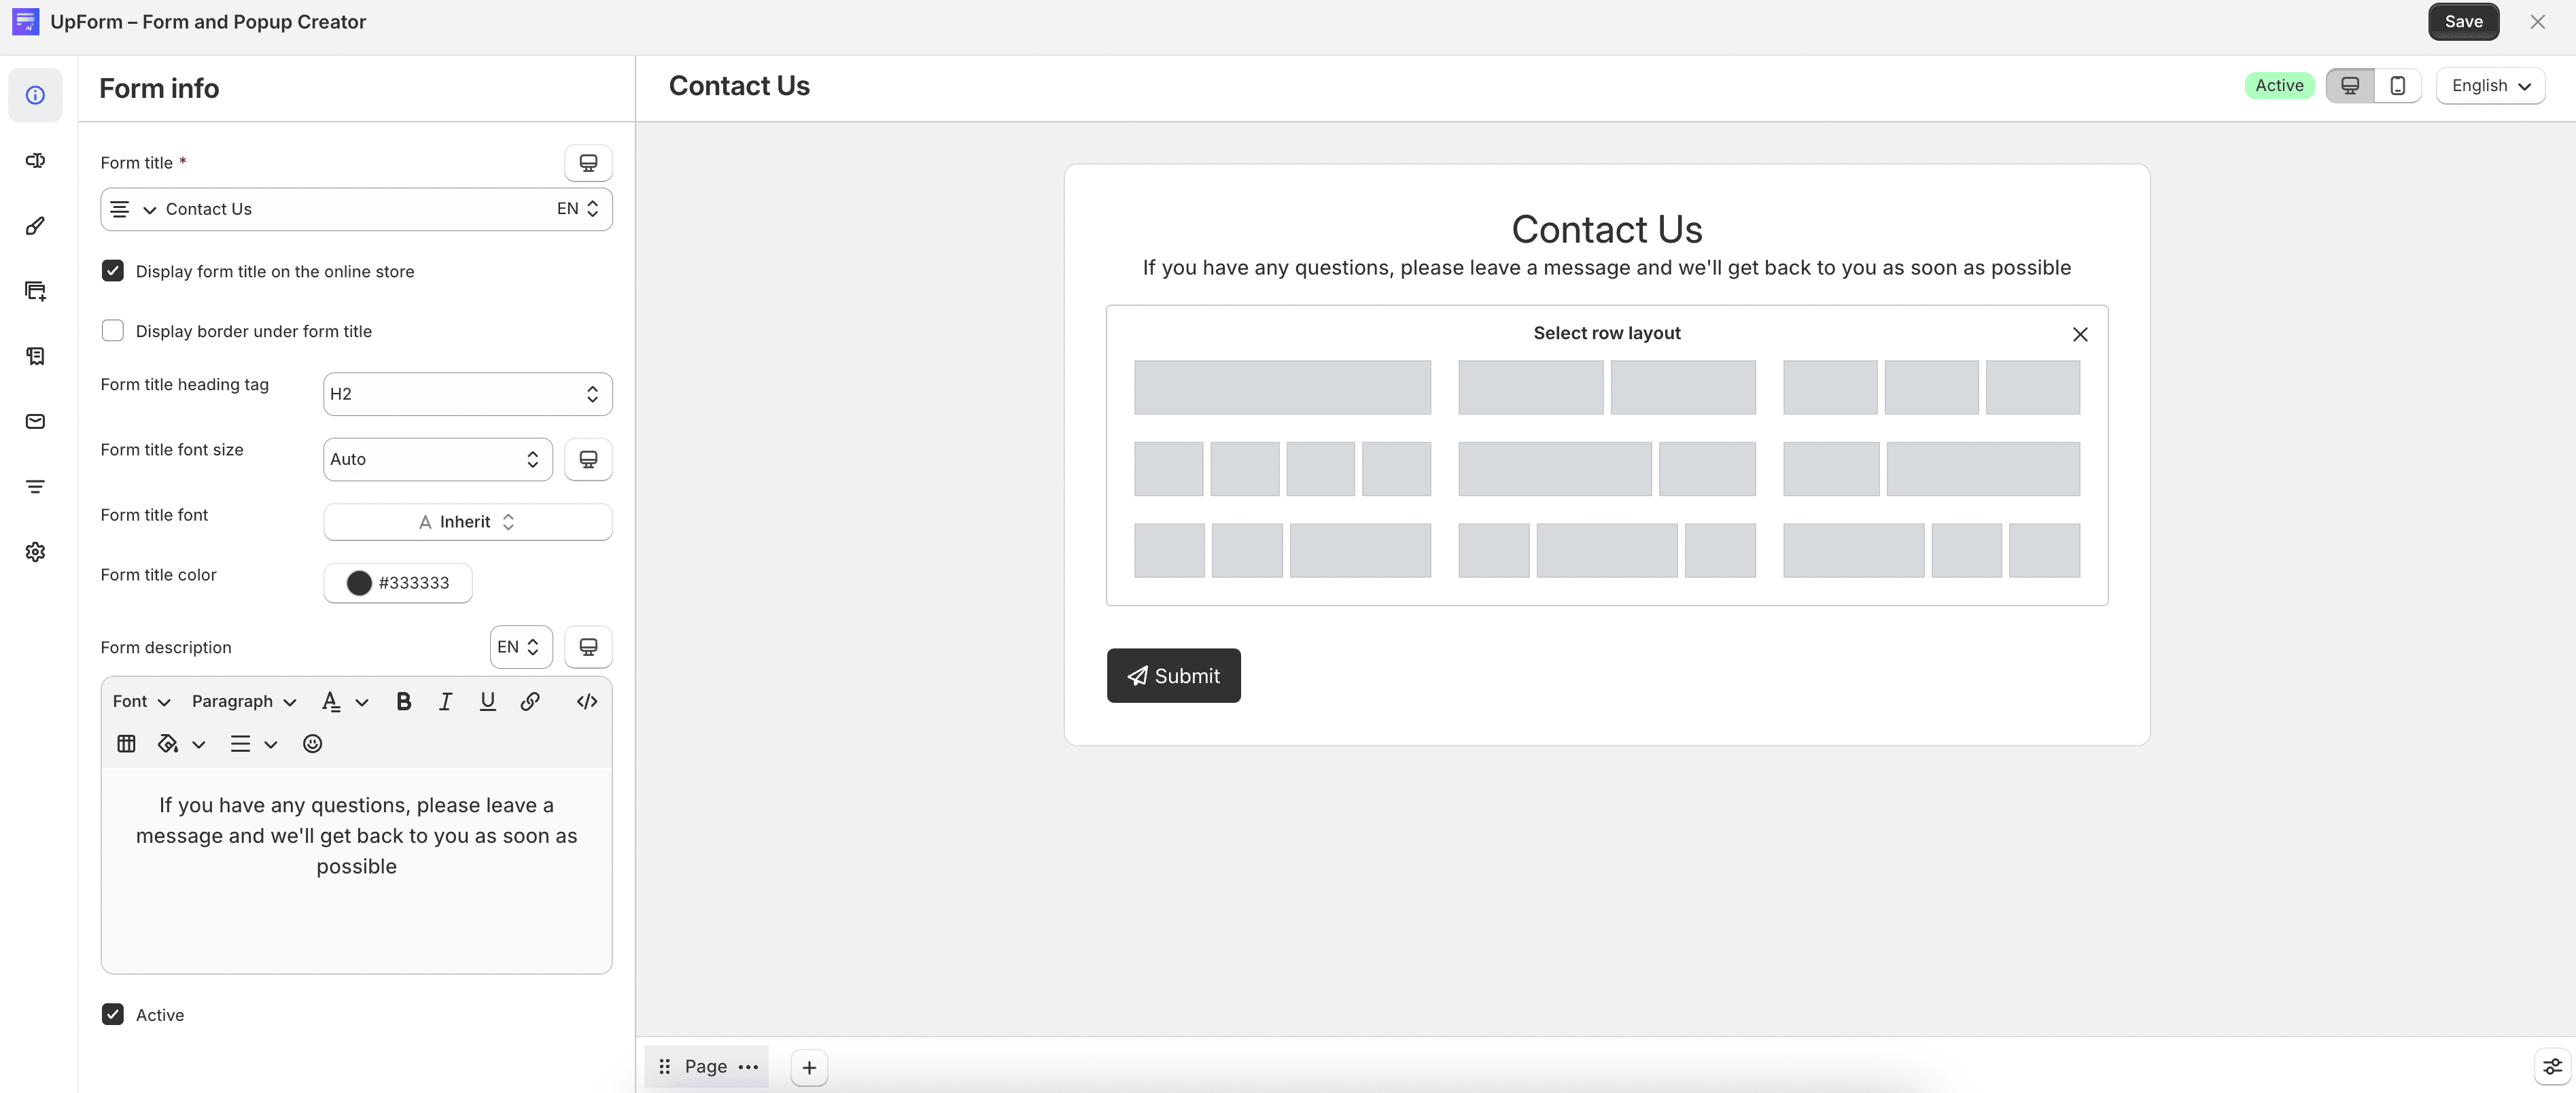
To add a row, click Add row in the live preview, then choose a layout such as one full-width column, equal columns, or mixed widths.
To add fields:
- Open the Form elements tab, or use the field picker after you add a row.
- Drag a field into a column, or click + under a column and choose a field type.
- Continue adding rows and fields until the layout is complete.
- Drag items to reorder them, or use field actions to edit, duplicate, or delete a field.
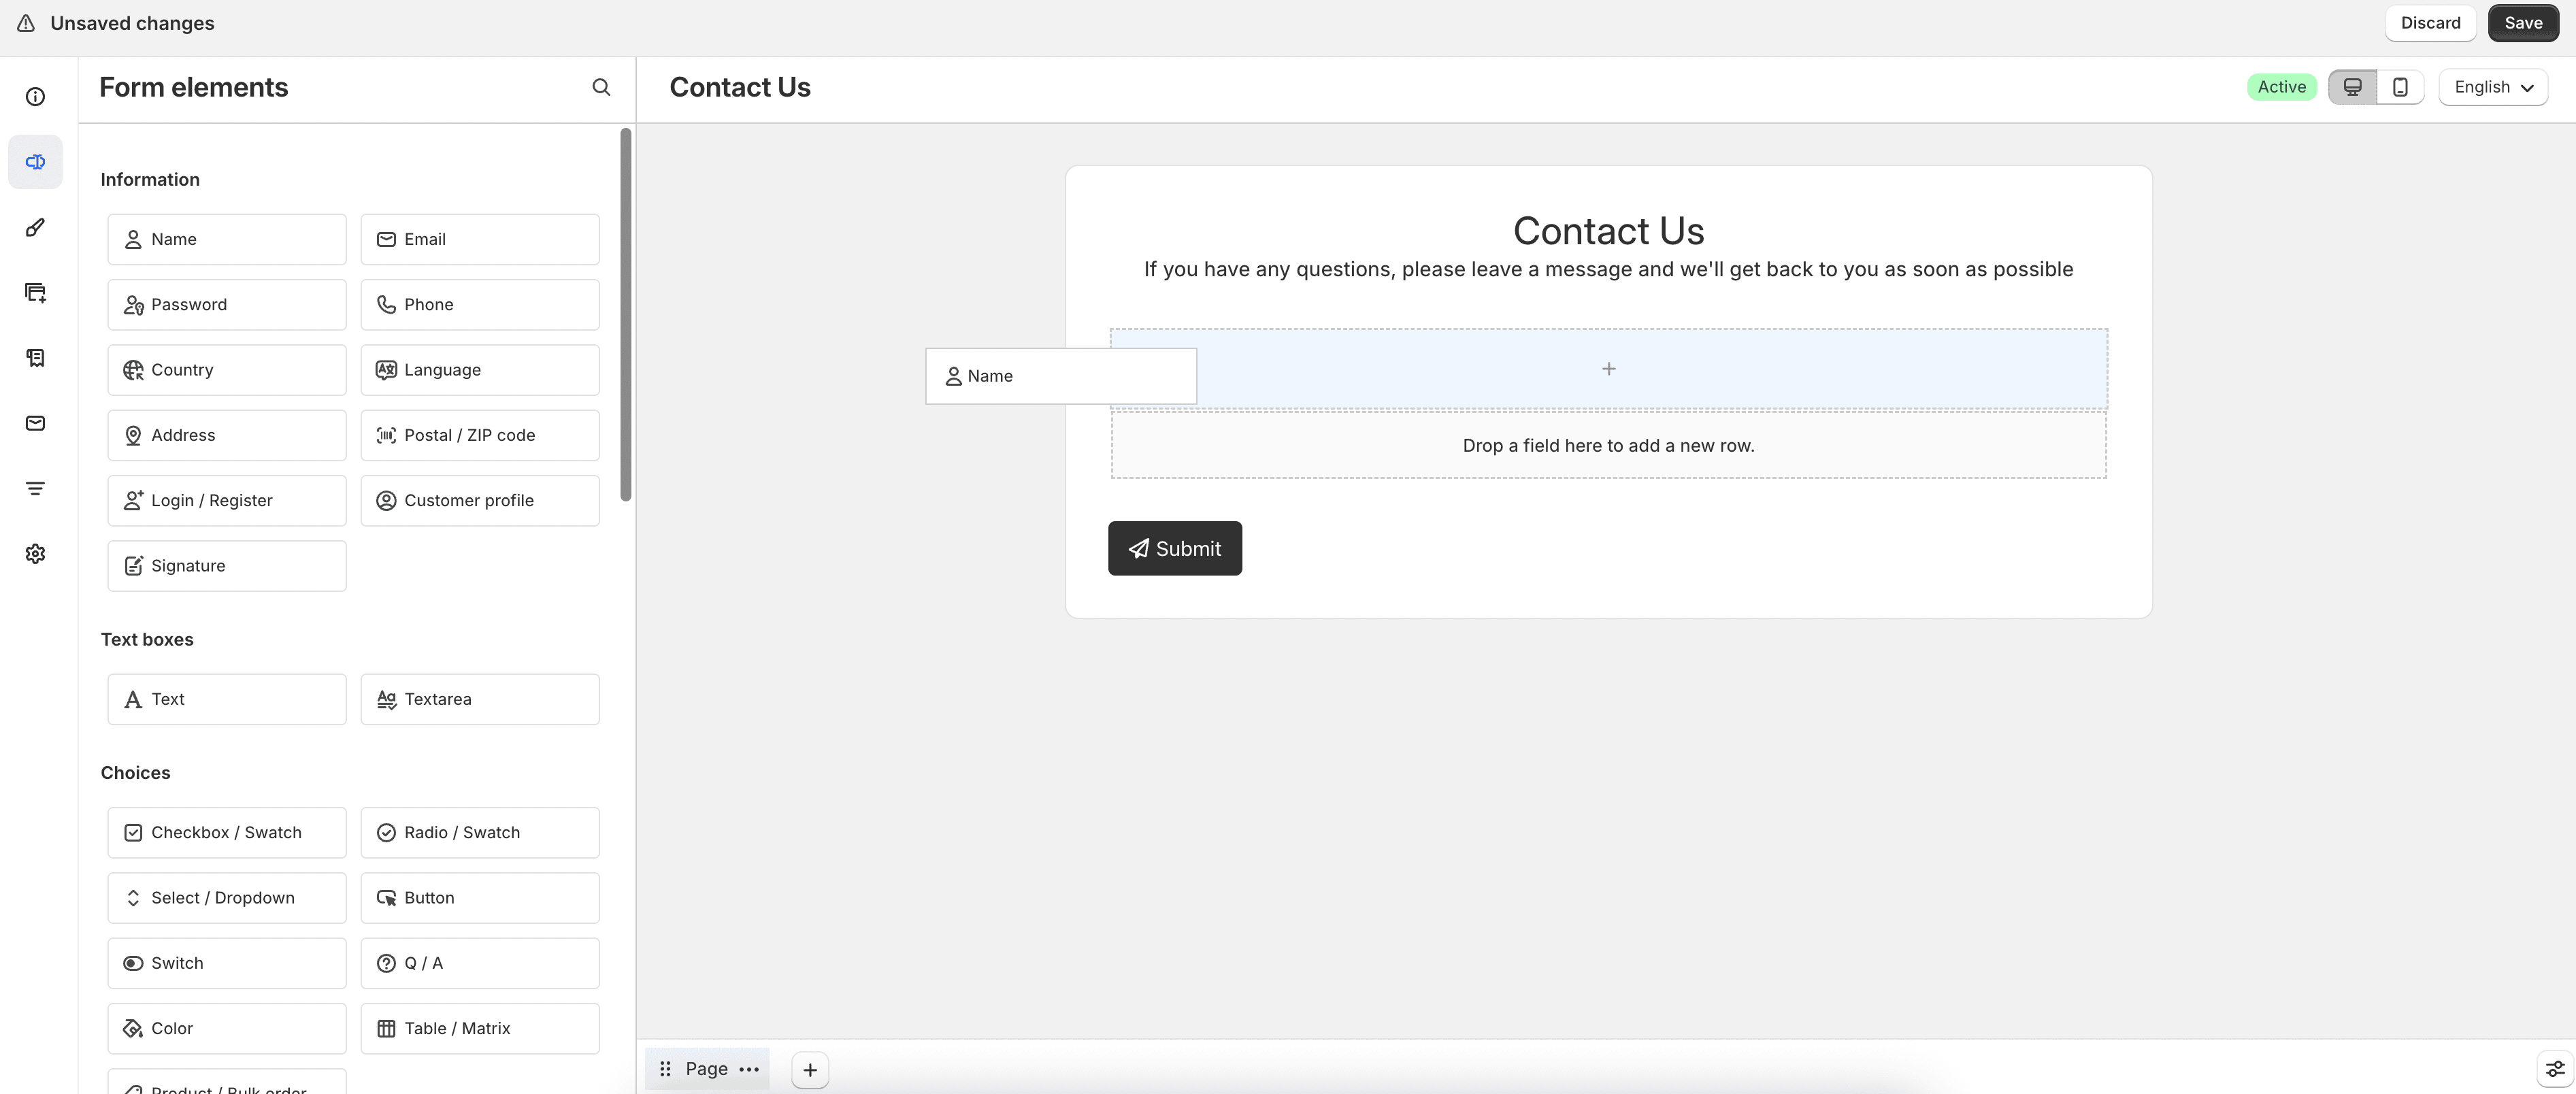
For details about each field type, see Builder elements.
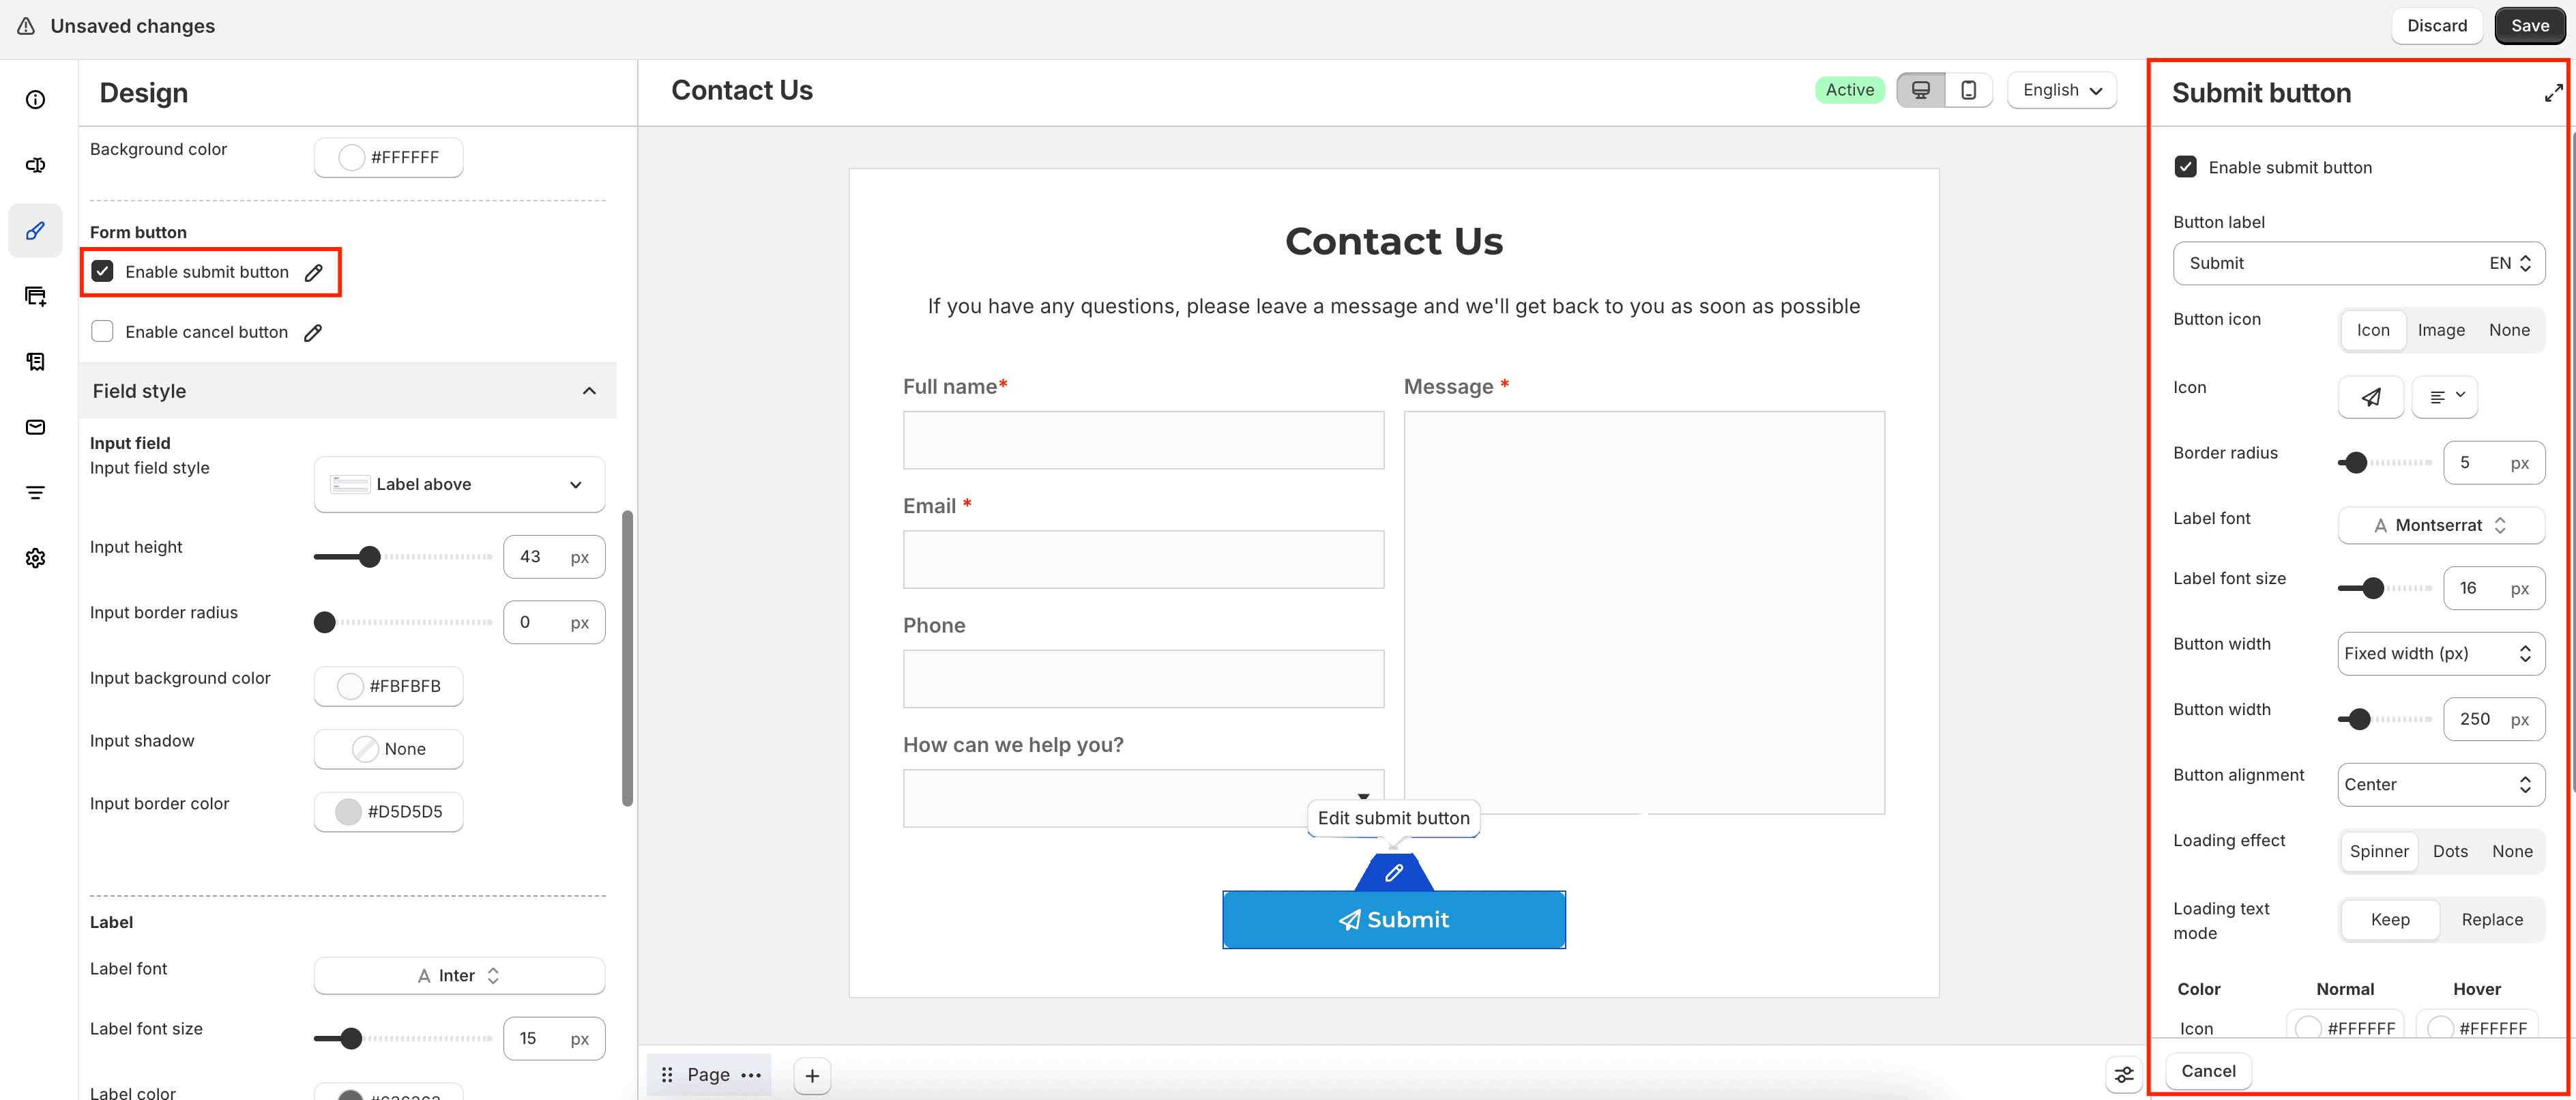
To customize the submit button, hover over it in the preview, click the edit icon, then set the label, icon, colors, width, and alignment.
Design the form
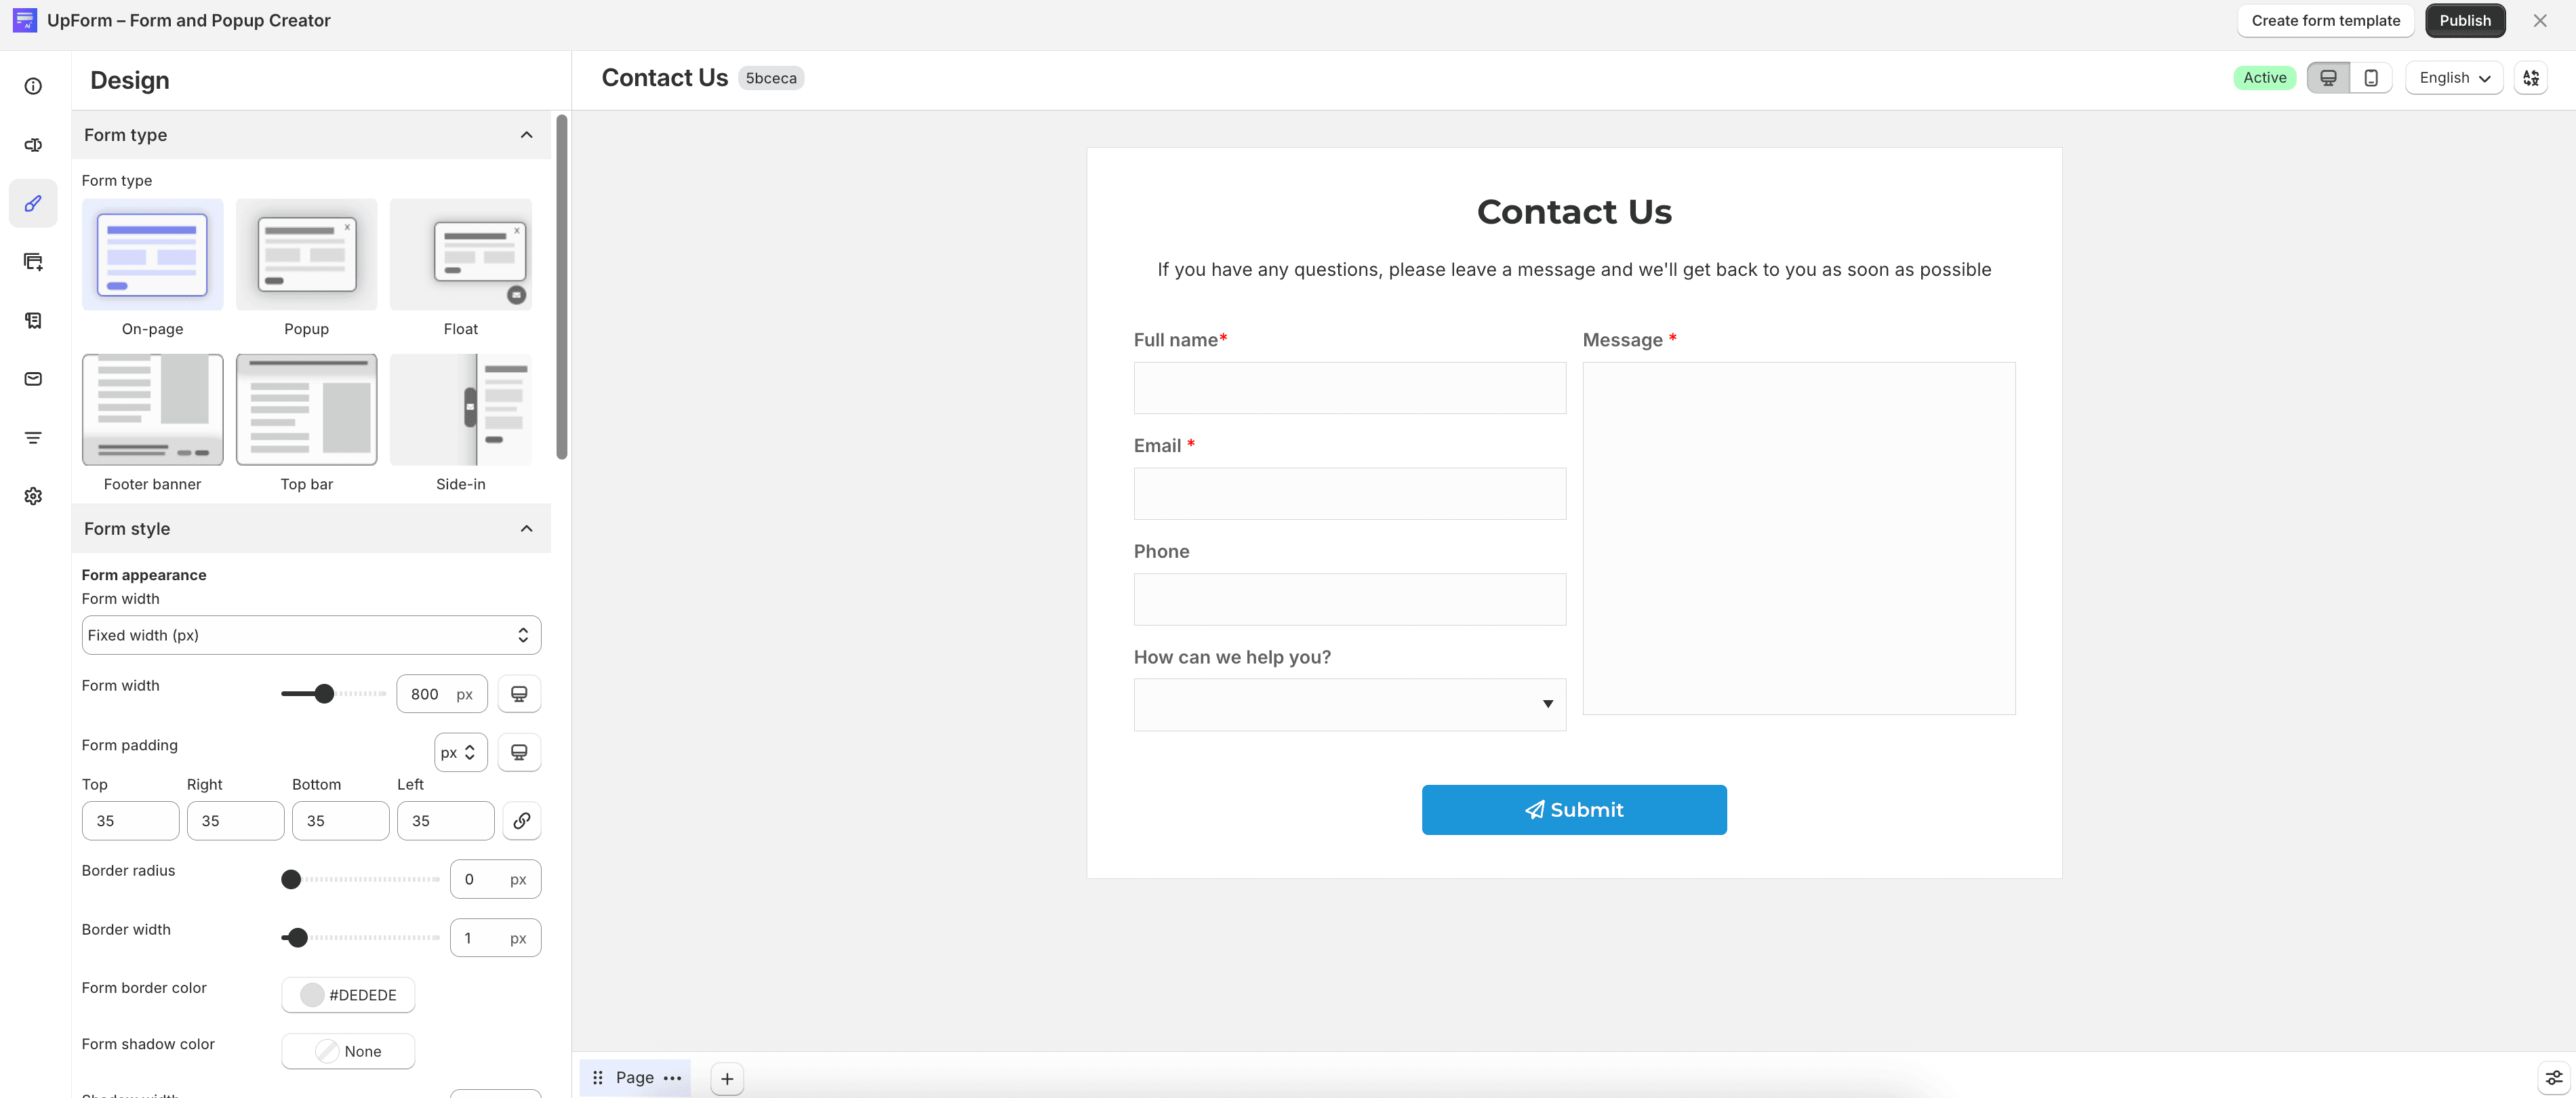
Open the Design tab to choose how the form appears and how fields are styled.
- Set Form type to On-page, Popup, Float, Footer banner, Top bar, or Side-in.
- Configure Form style for the form container, including width, padding, border, shadow, and background.
- Configure Field style for labels, inputs, values, and descriptions.
- Click Save.
For full design options, see Design.
Set triggers
If the form type is not On-page, open the Triggers tab to choose when the form appears and how any trigger button looks.
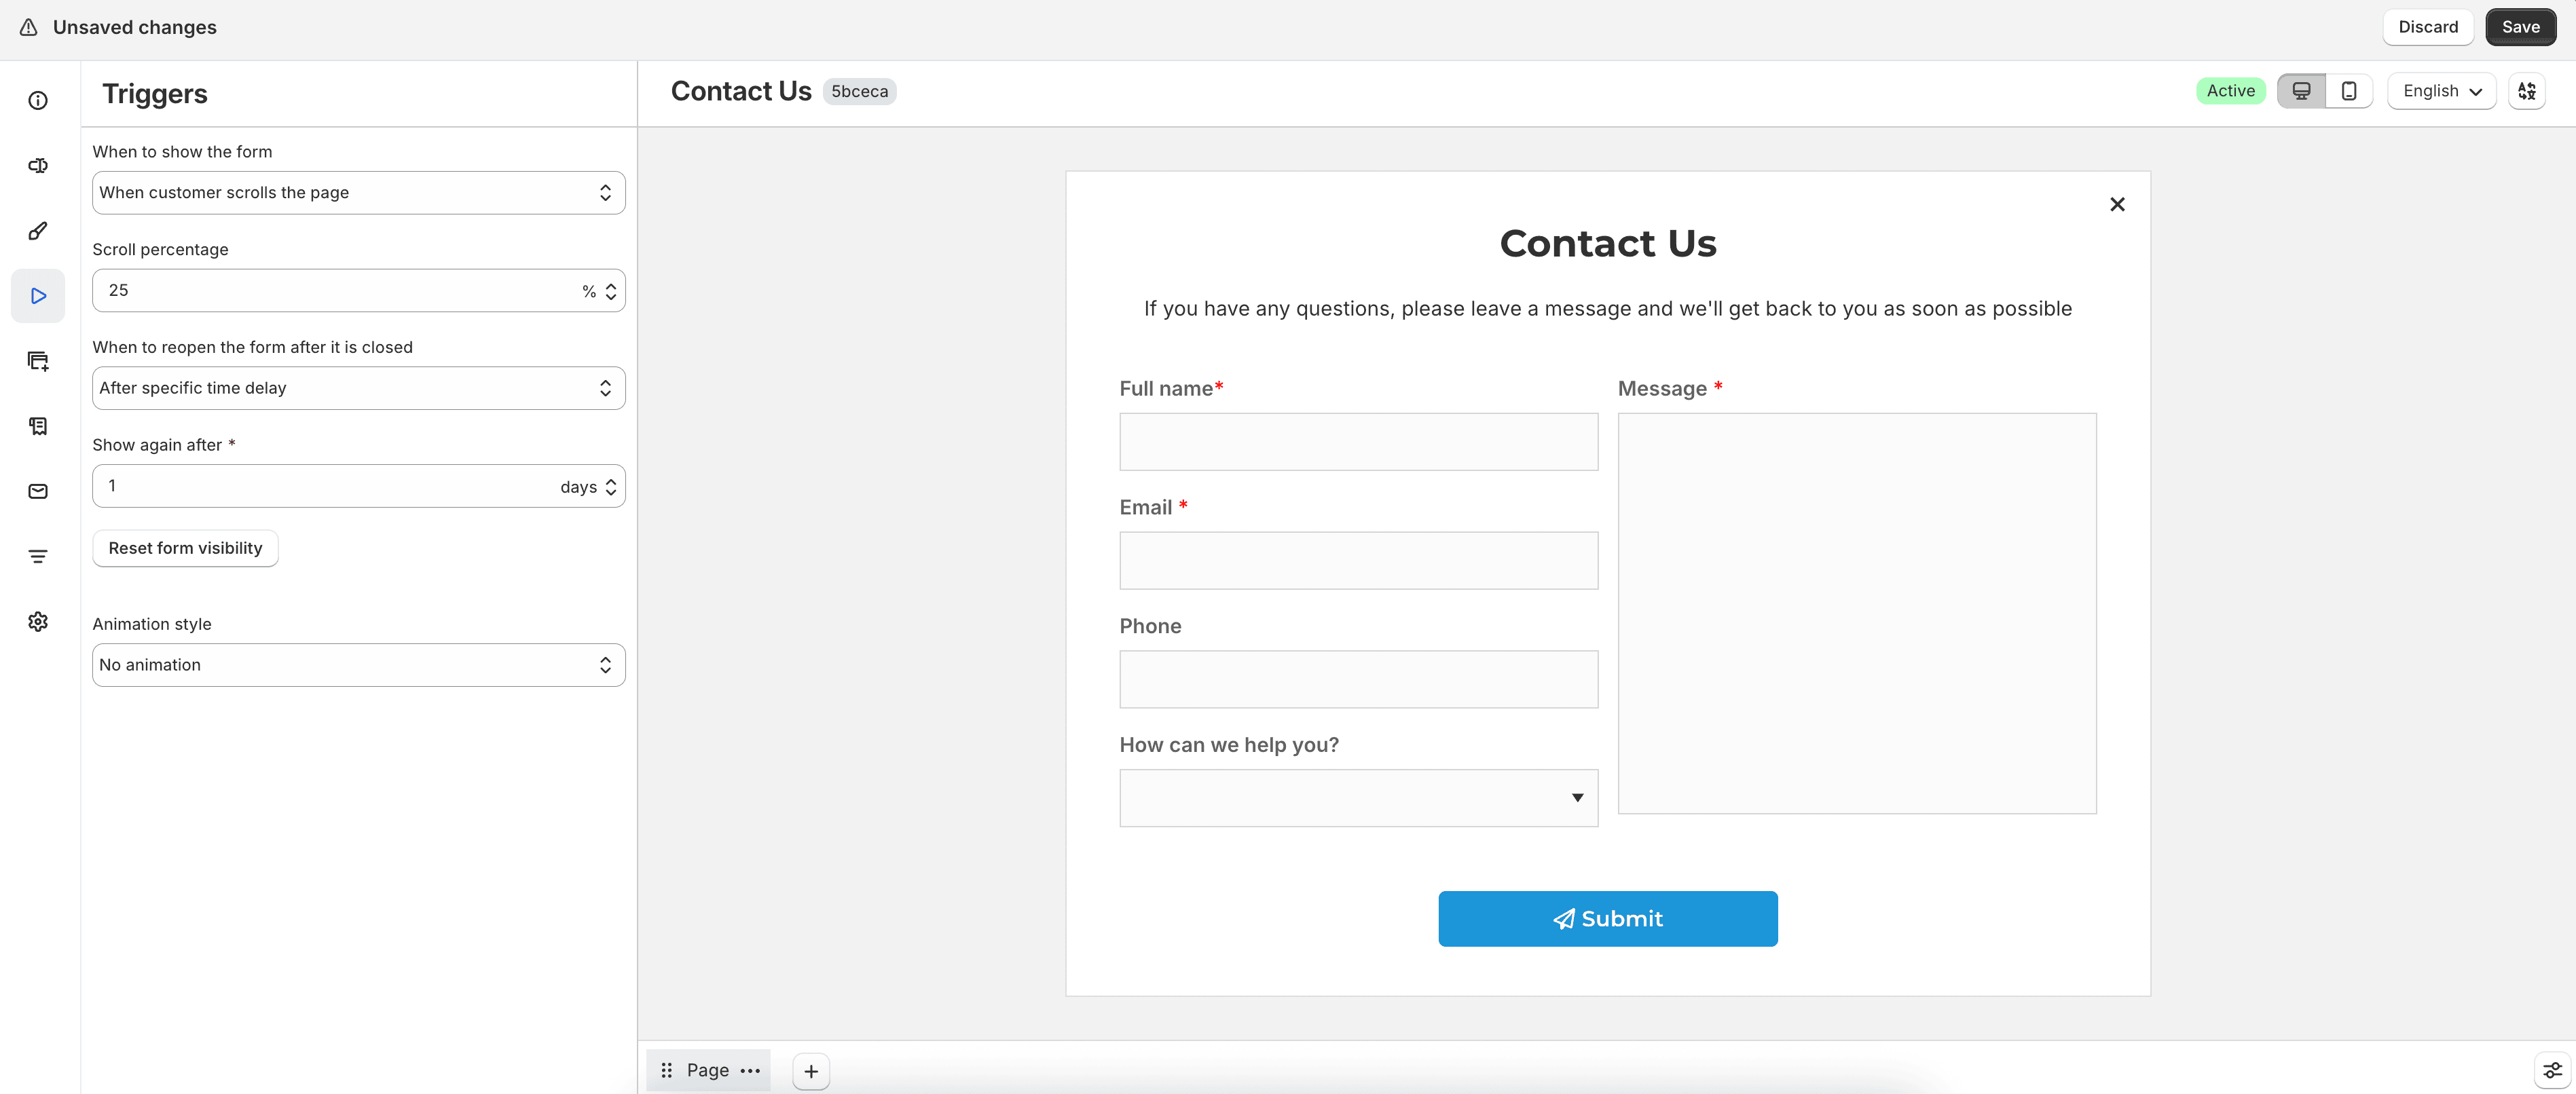
For detailed options, see Triggers.
Add extra content
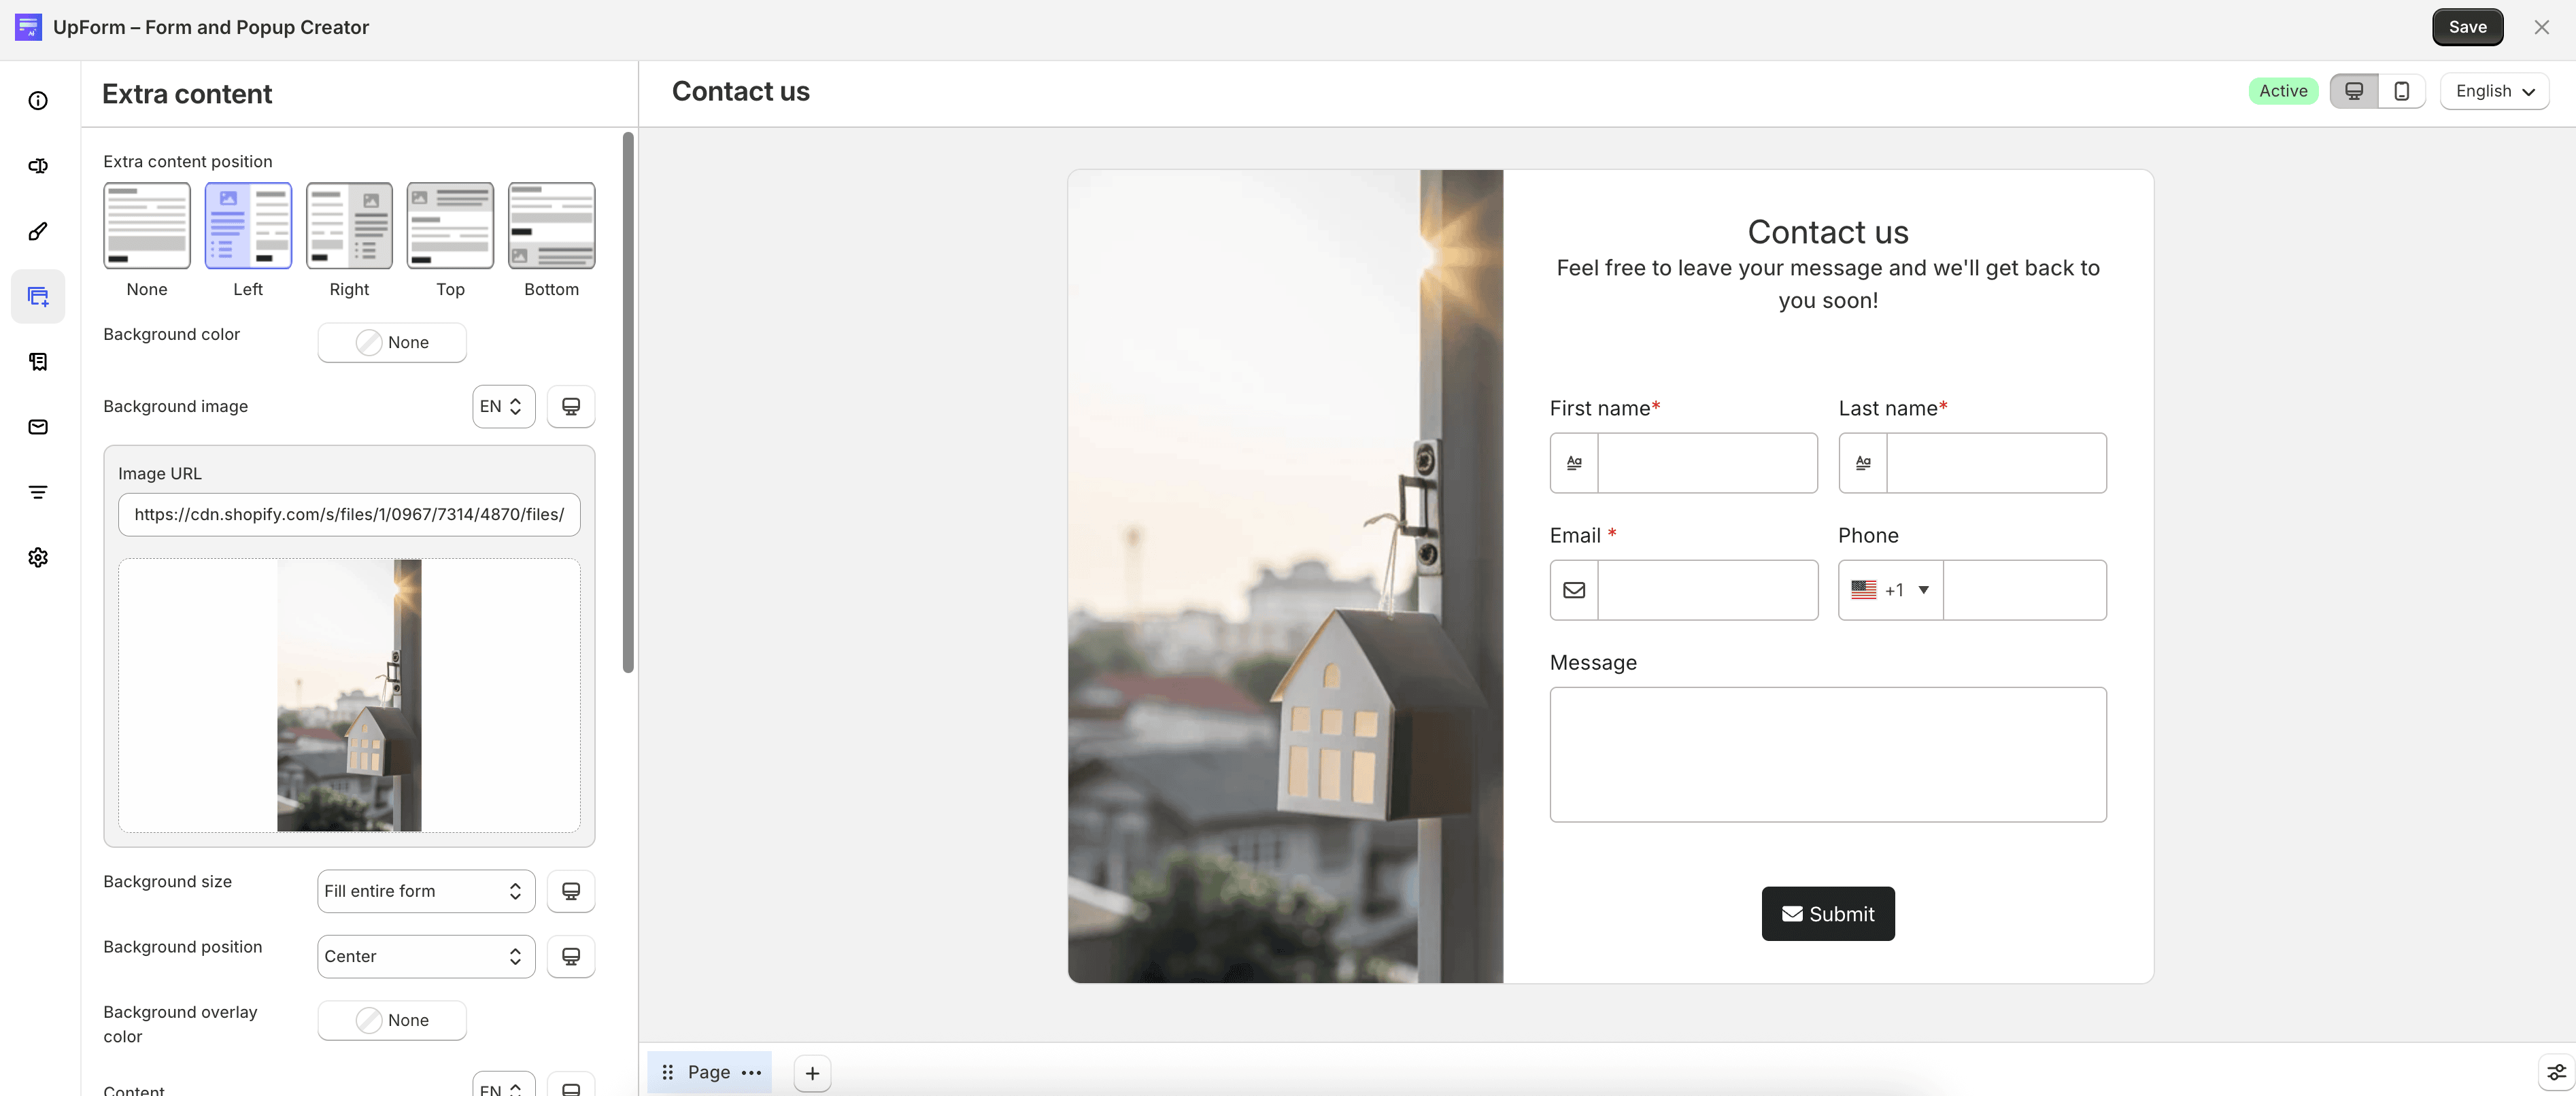
Use Extra content to add supporting text or media around the form.
- Open the Extra content tab.
- Set Extra content position to Left, Right, Top, Bottom, or None.
- Configure the content and styling for that position.
- Click Save.
For detailed options, see Extra content.
Configure after submission
- Open the After submission tab.
- Choose an option under After submission behavior:
- Show success message
- Show thank you page (replace form)
- Redirect to URL
- Close form for non–on-page forms, or Do nothing for On-page forms
- Configure the settings for the selected option.
- Click Save.
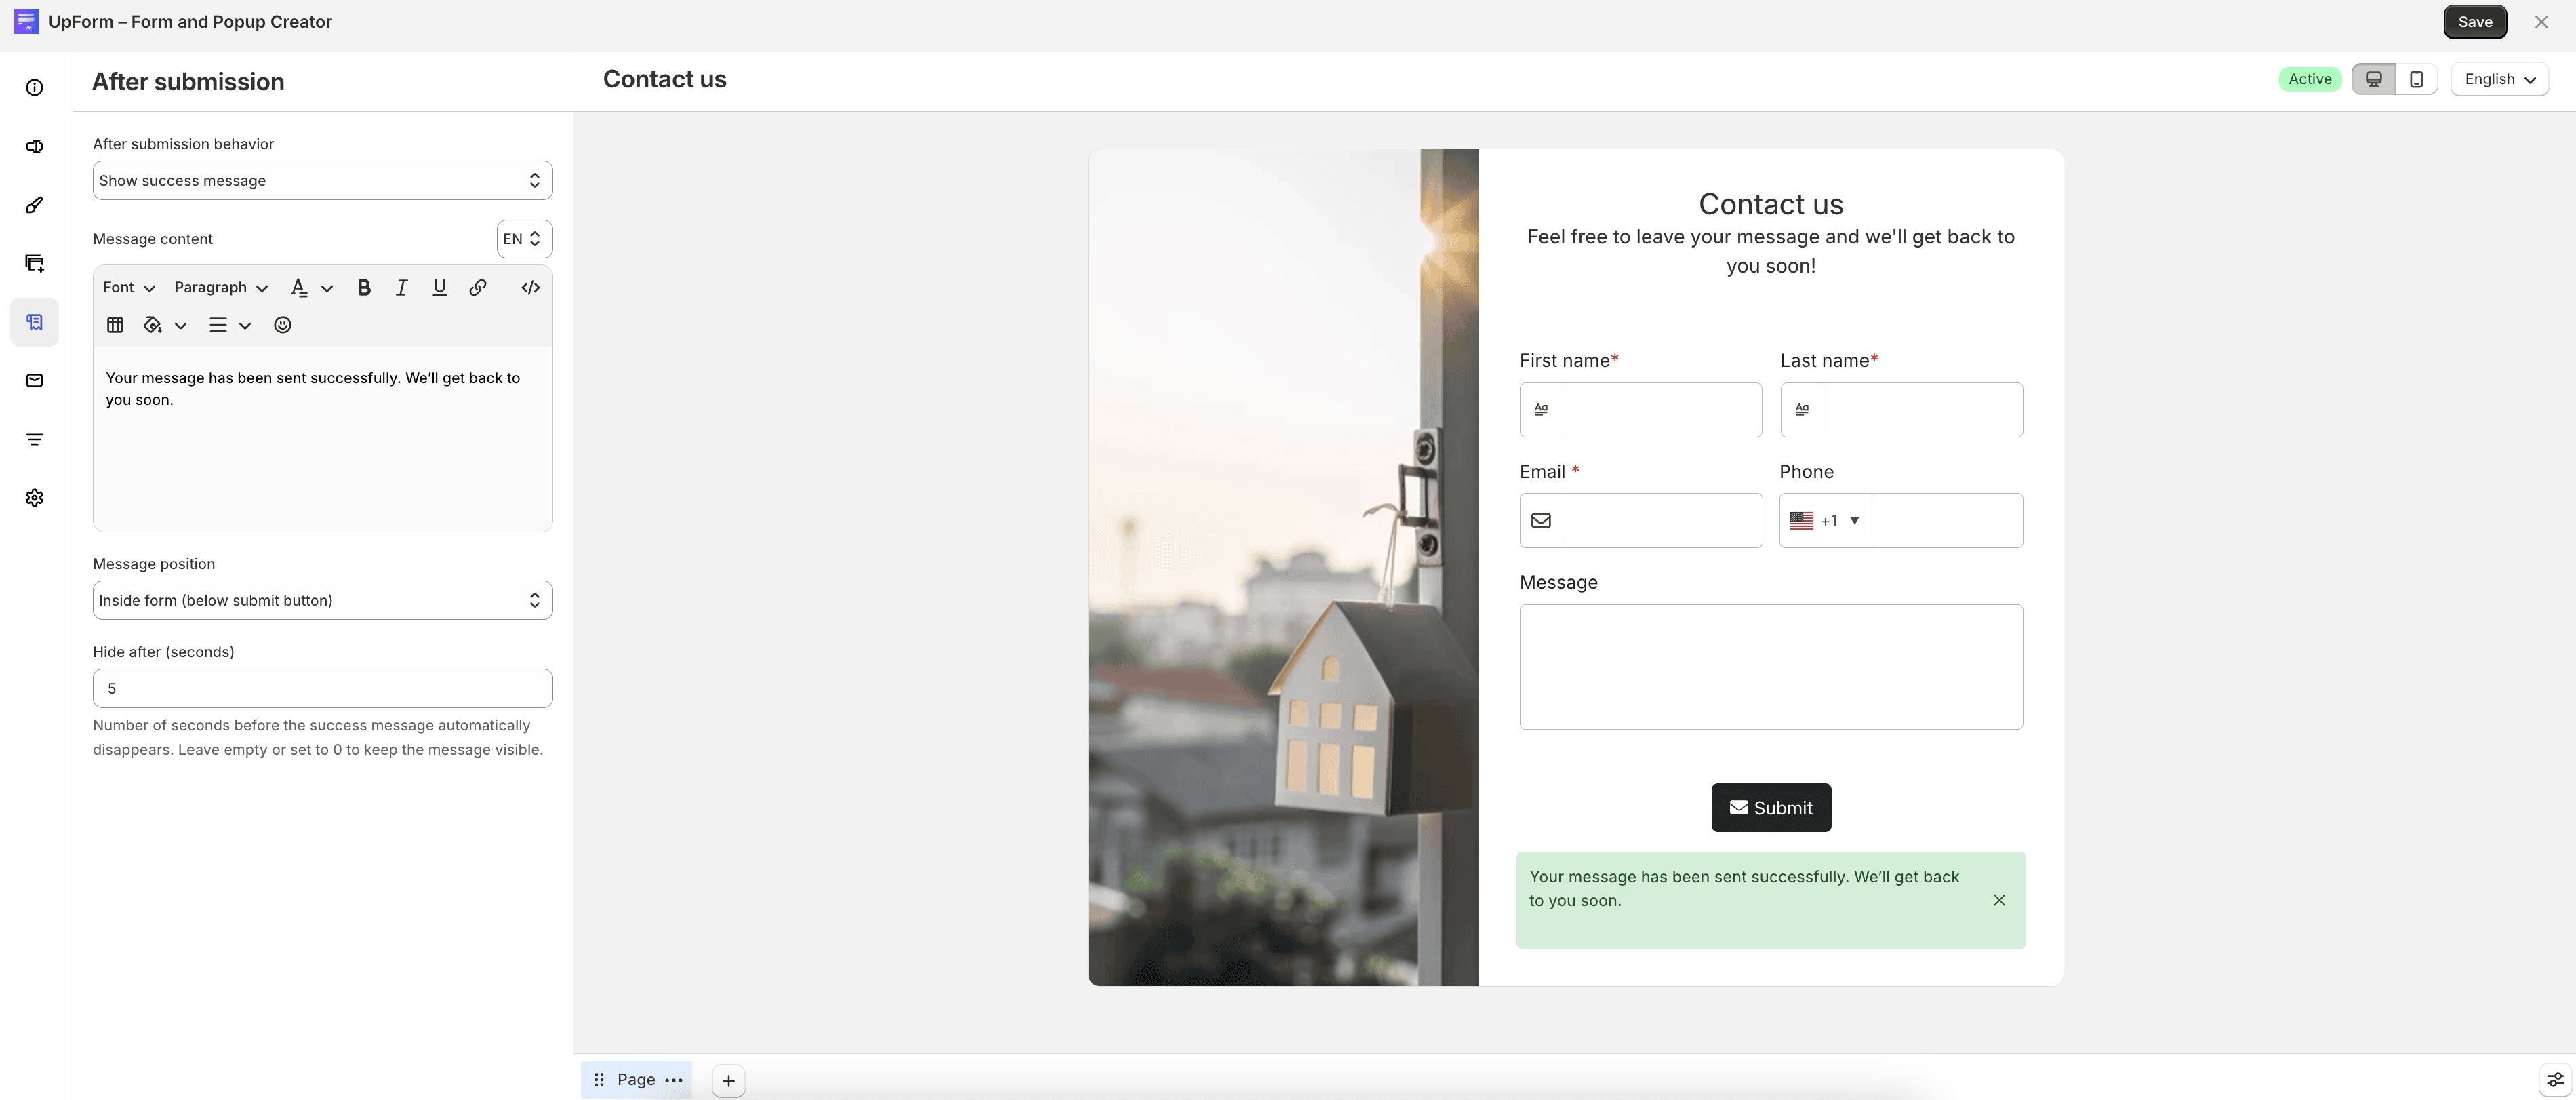
For detailed options, see After submission.
Configure email
Set up emails related to form submissions.
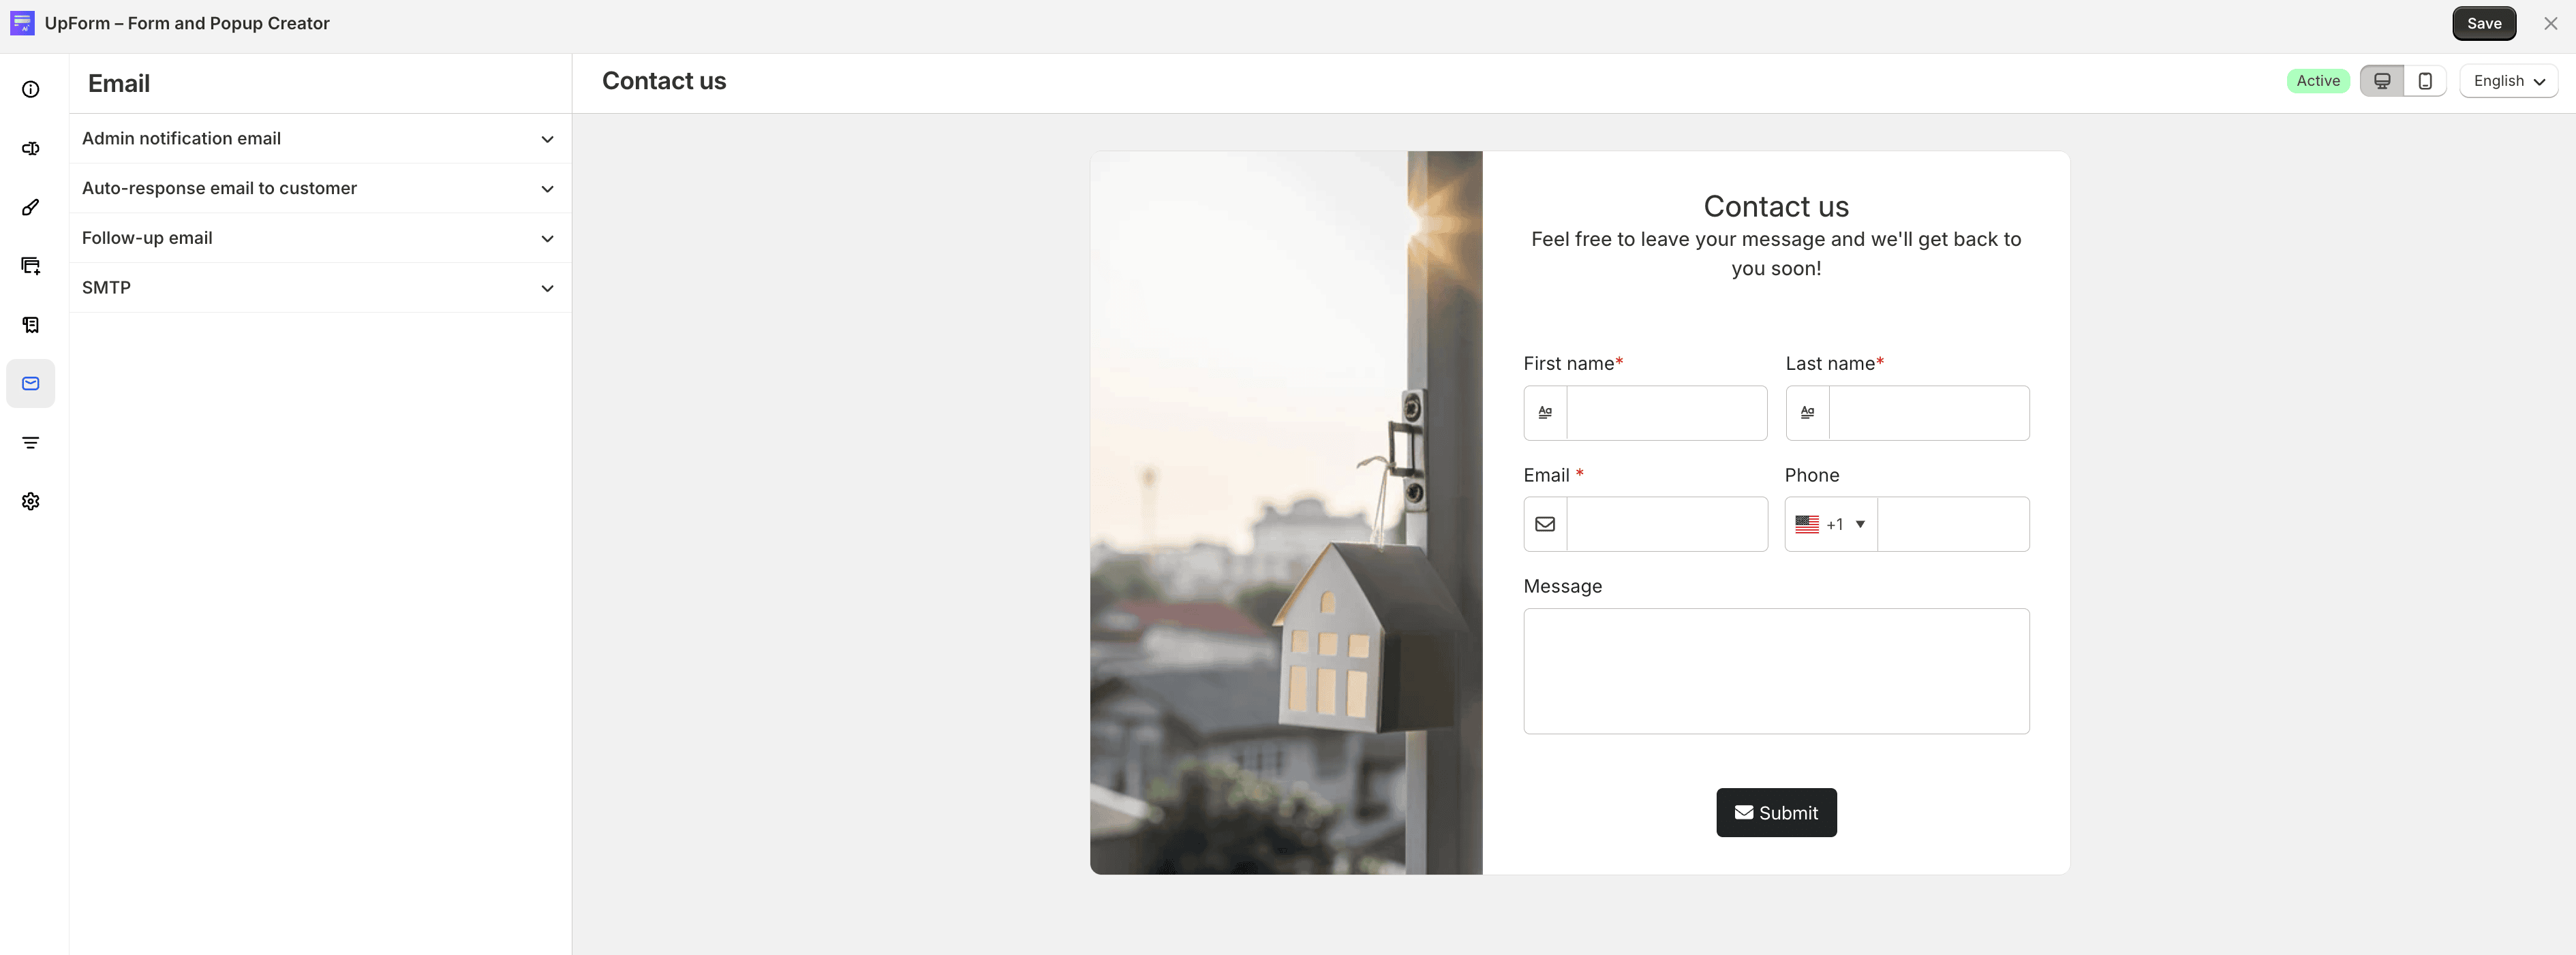
- Open the Email tab.
- Configure Admin notification email.
- Configure Auto-response email to customer, including verification options if needed.
- Optionally configure Follow-up email defaults for the Submissions page.
- Choose an email provider under SMTP.
- Click Save.
Email sending depends on Save submission data in General. For detailed email setup, see Email.
Set up conditions
Use Conditions to show or hide fields based on customer input.
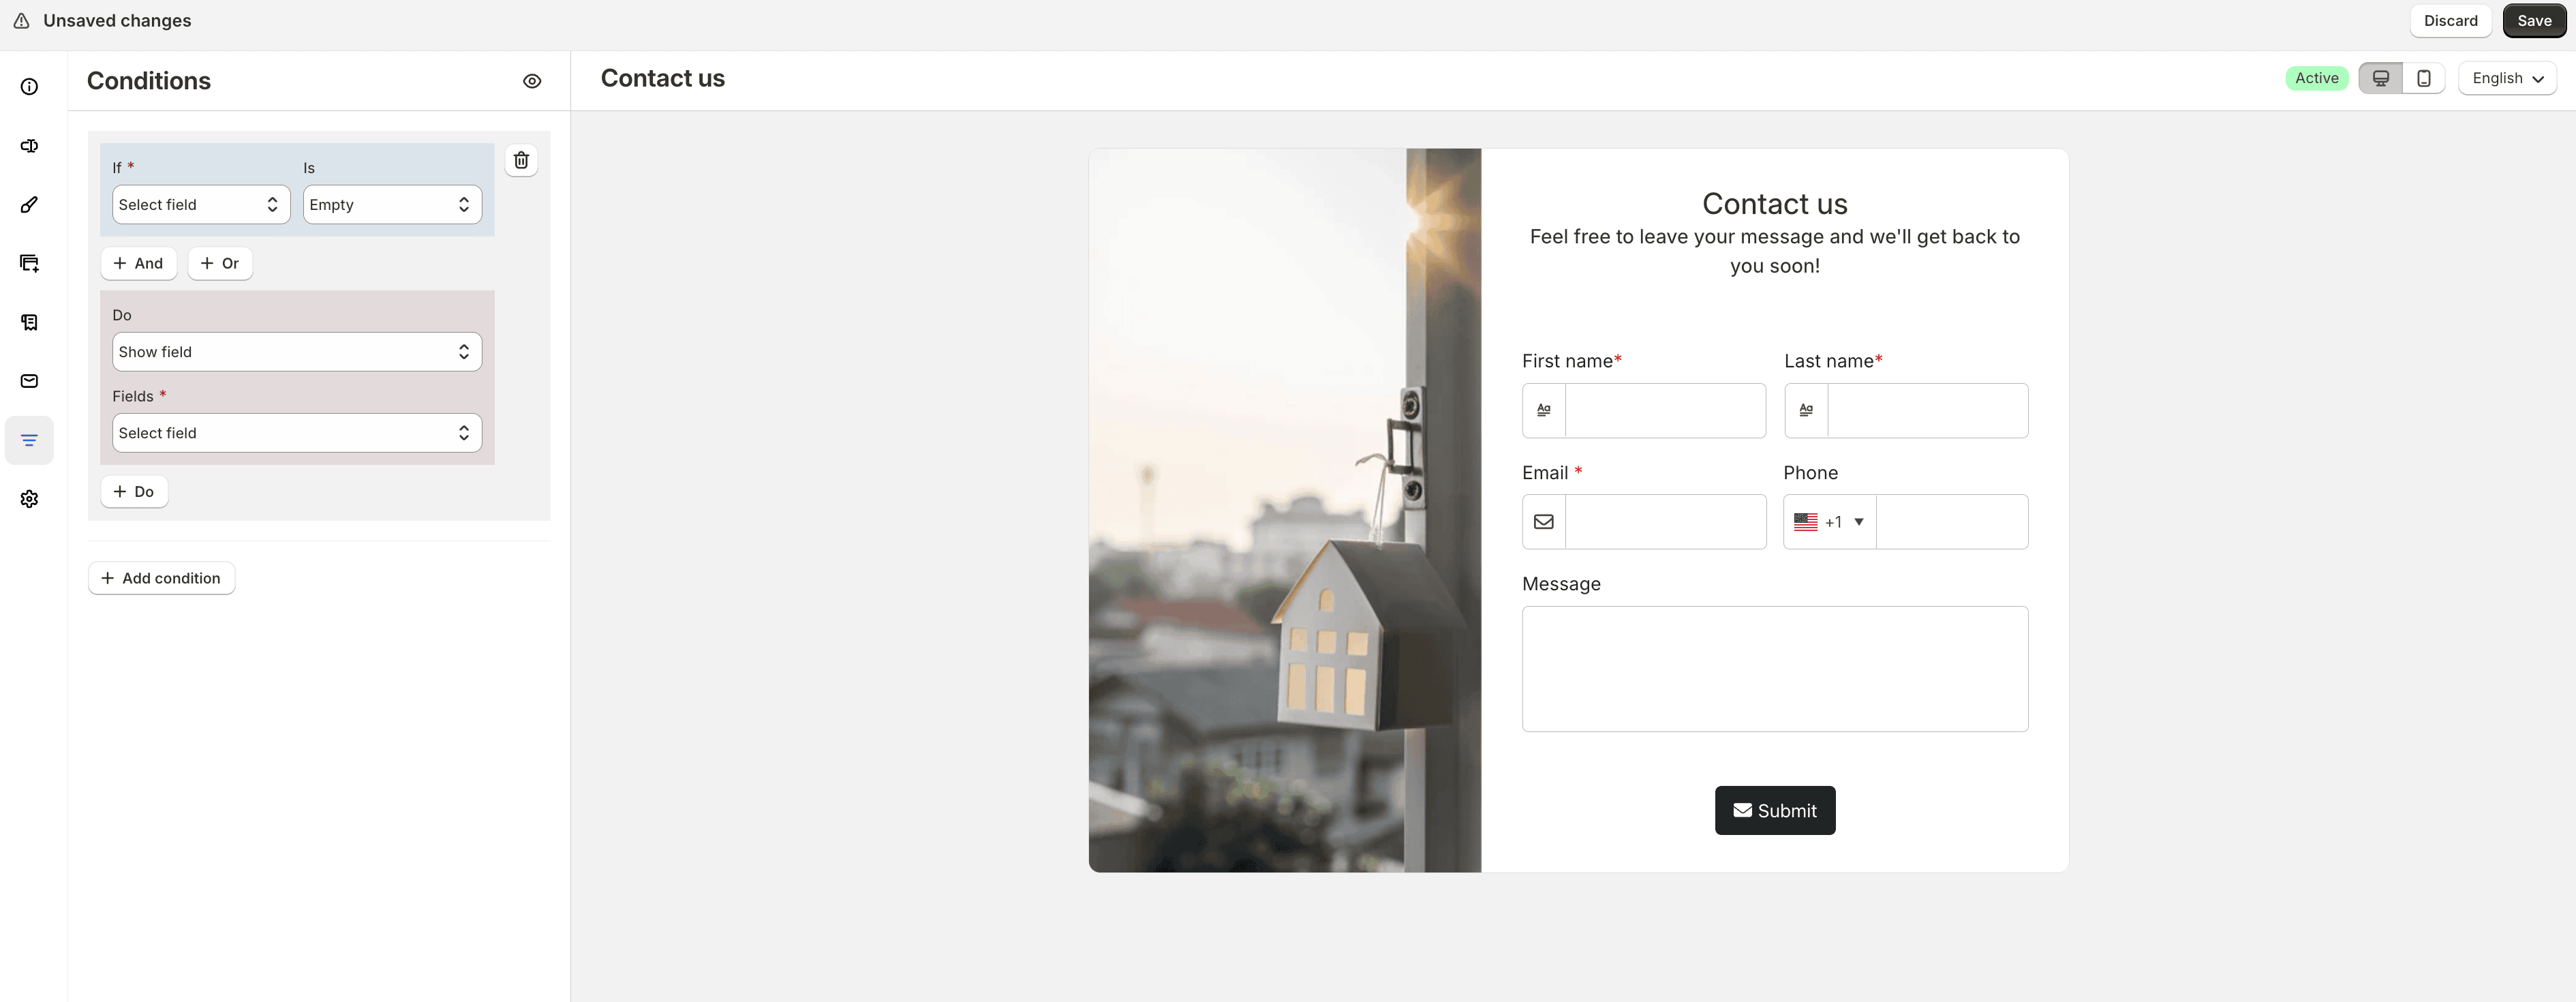
- Open the Conditions tab.
- Click Add condition.
- Define the If, Is, and Value rules, then choose a Do action.
- Add more conditions if needed.
- Click Save.
For detailed setup, see Conditions.
Configure general settings
Use the General tab for form-level behavior beyond fields and design.
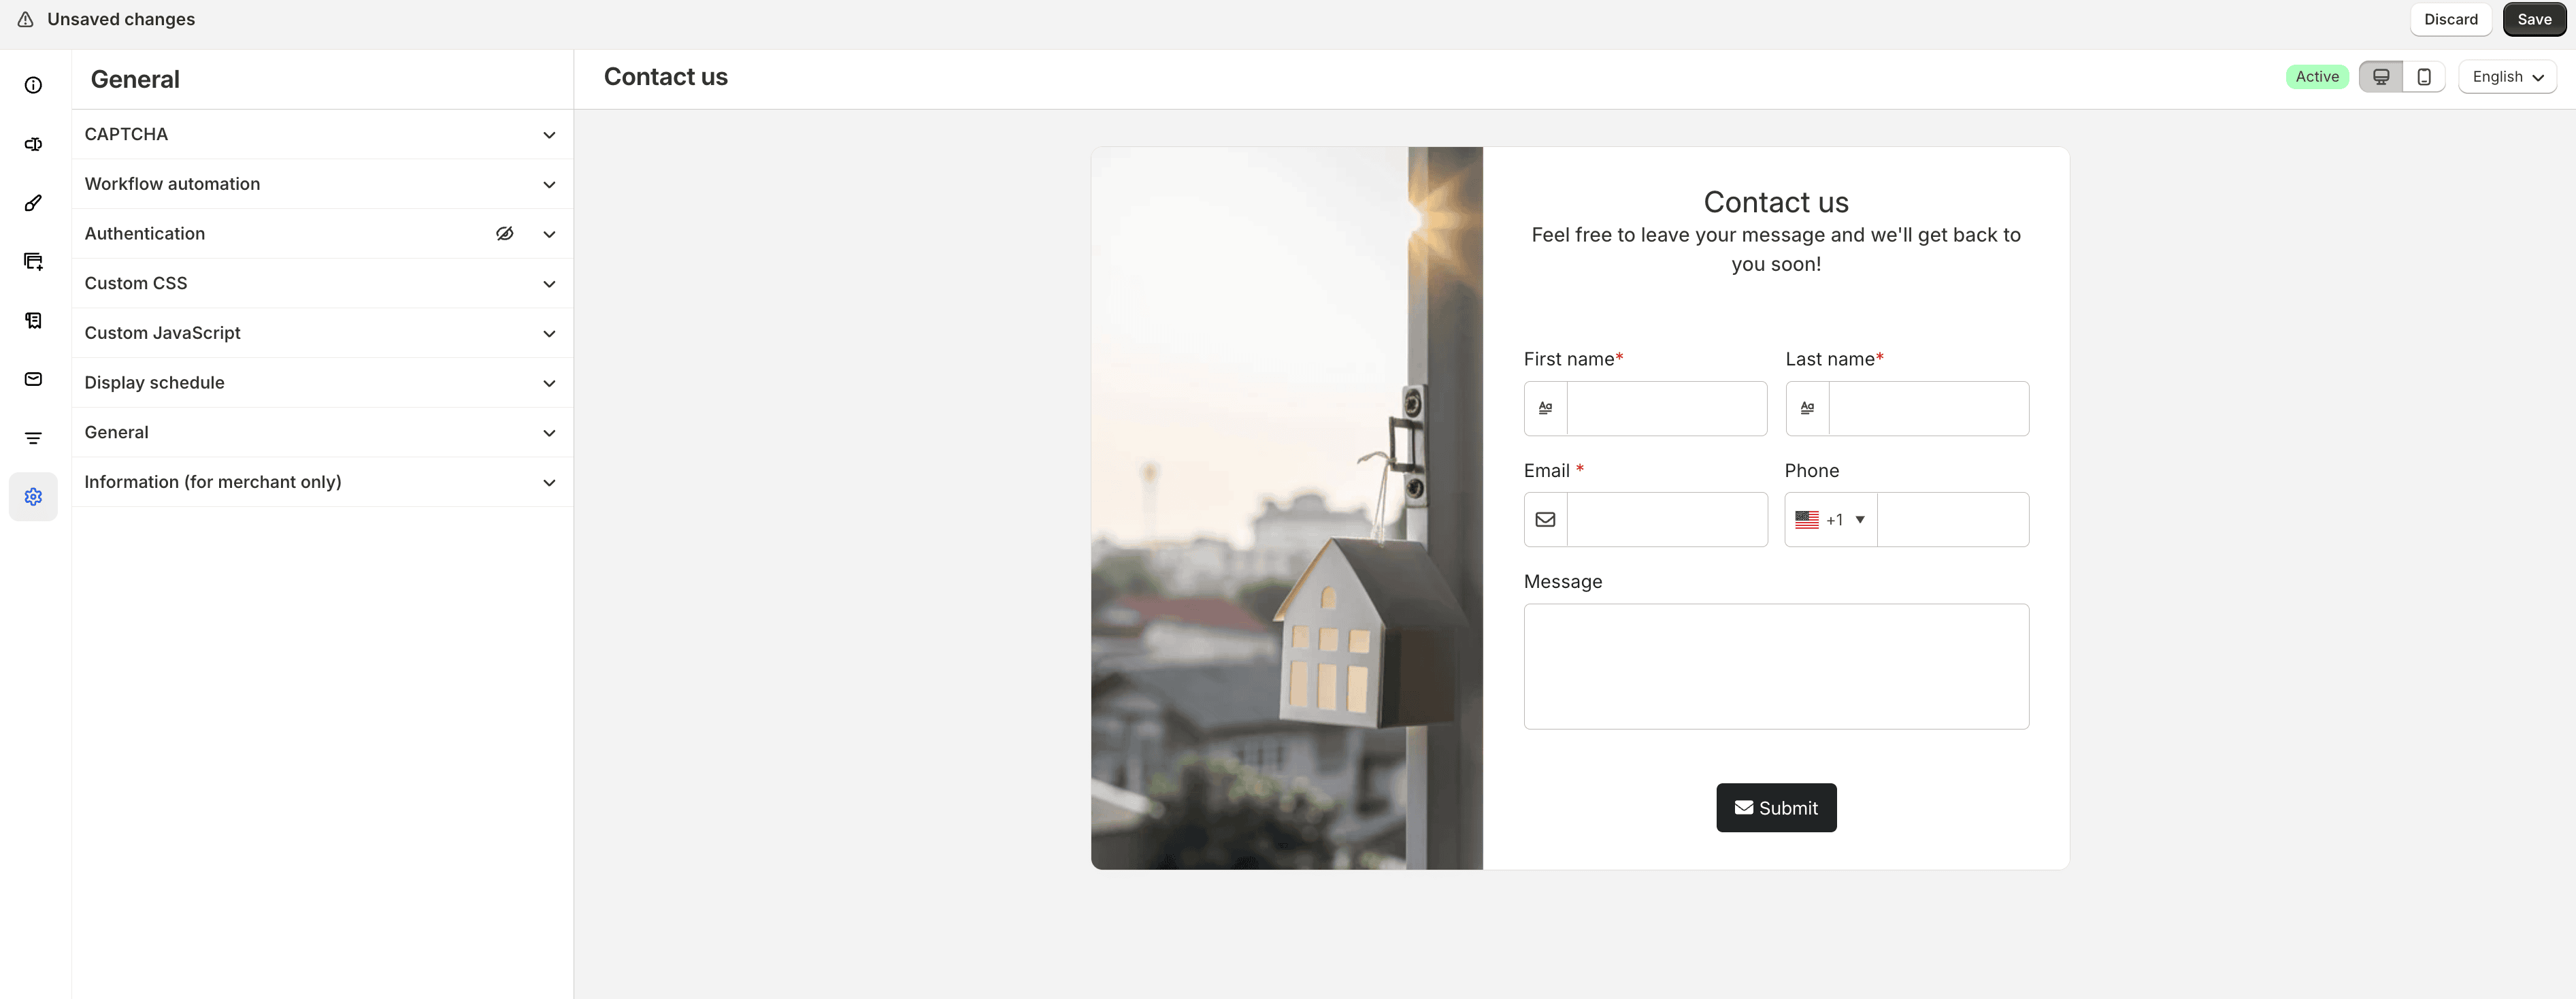
Configure the sections you need, such as CAPTCHA, Workflow automation, Authentication, Custom CSS, Custom JavaScript, Display schedule, Save submission data, and Information (for merchant only). Then click Save.
For detailed options, see General.
Save and publish
Click Save to store your changes. Saving does not publish the form to your store.
When you are ready for customers to see the form, click Publish form. In the Publish form modal, choose where the form should appear. Published forms appear on the storefront only when App Embed is enabled in your theme. See Publish a form.
You can also publish later from the Forms list with Publish form.