

Appearance
General
Use the General tab to control form-level behavior beyond fields and design. You can set CAPTCHA protection, workflow automation, login requirements, custom CSS and JavaScript, display schedules, submission handling, and internal form details.

CAPTCHA
Protect the form from spam and automated submissions.
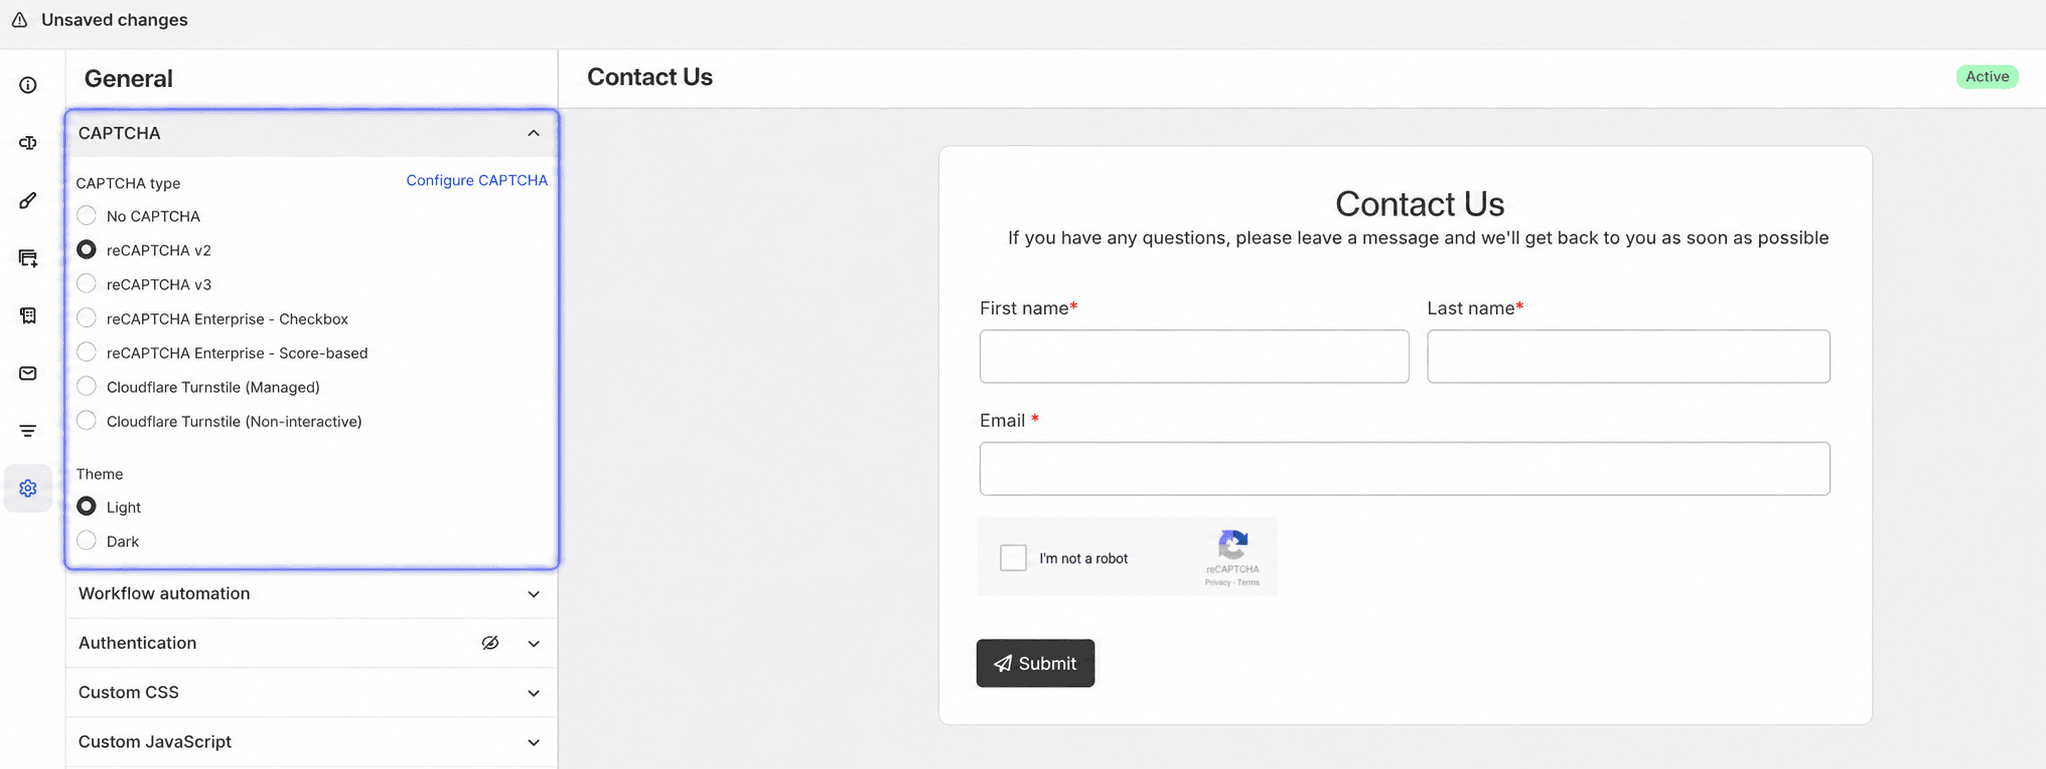
Under CAPTCHA type, choose:
- No CAPTCHA — no CAPTCHA on the form
- A configured CAPTCHA option, such as reCAPTCHA v2, reCAPTCHA v3, reCAPTCHA Enterprise - Checkbox, reCAPTCHA Enterprise - Score-based, Cloudflare Turnstile (Managed), or Cloudflare Turnstile (Non-interactive)
Only CAPTCHA types that are already set up for your store appear in the list. To add or edit credentials, click Configure CAPTCHA, enable the type you want, and enter the required keys for that provider.
When a CAPTCHA type is selected, choose a Theme of Light or Dark.
For setup details, see:
Workflow automation
Sync form submissions to email marketing and automation tools so you can add contacts to lists or start workflows without copying data manually.
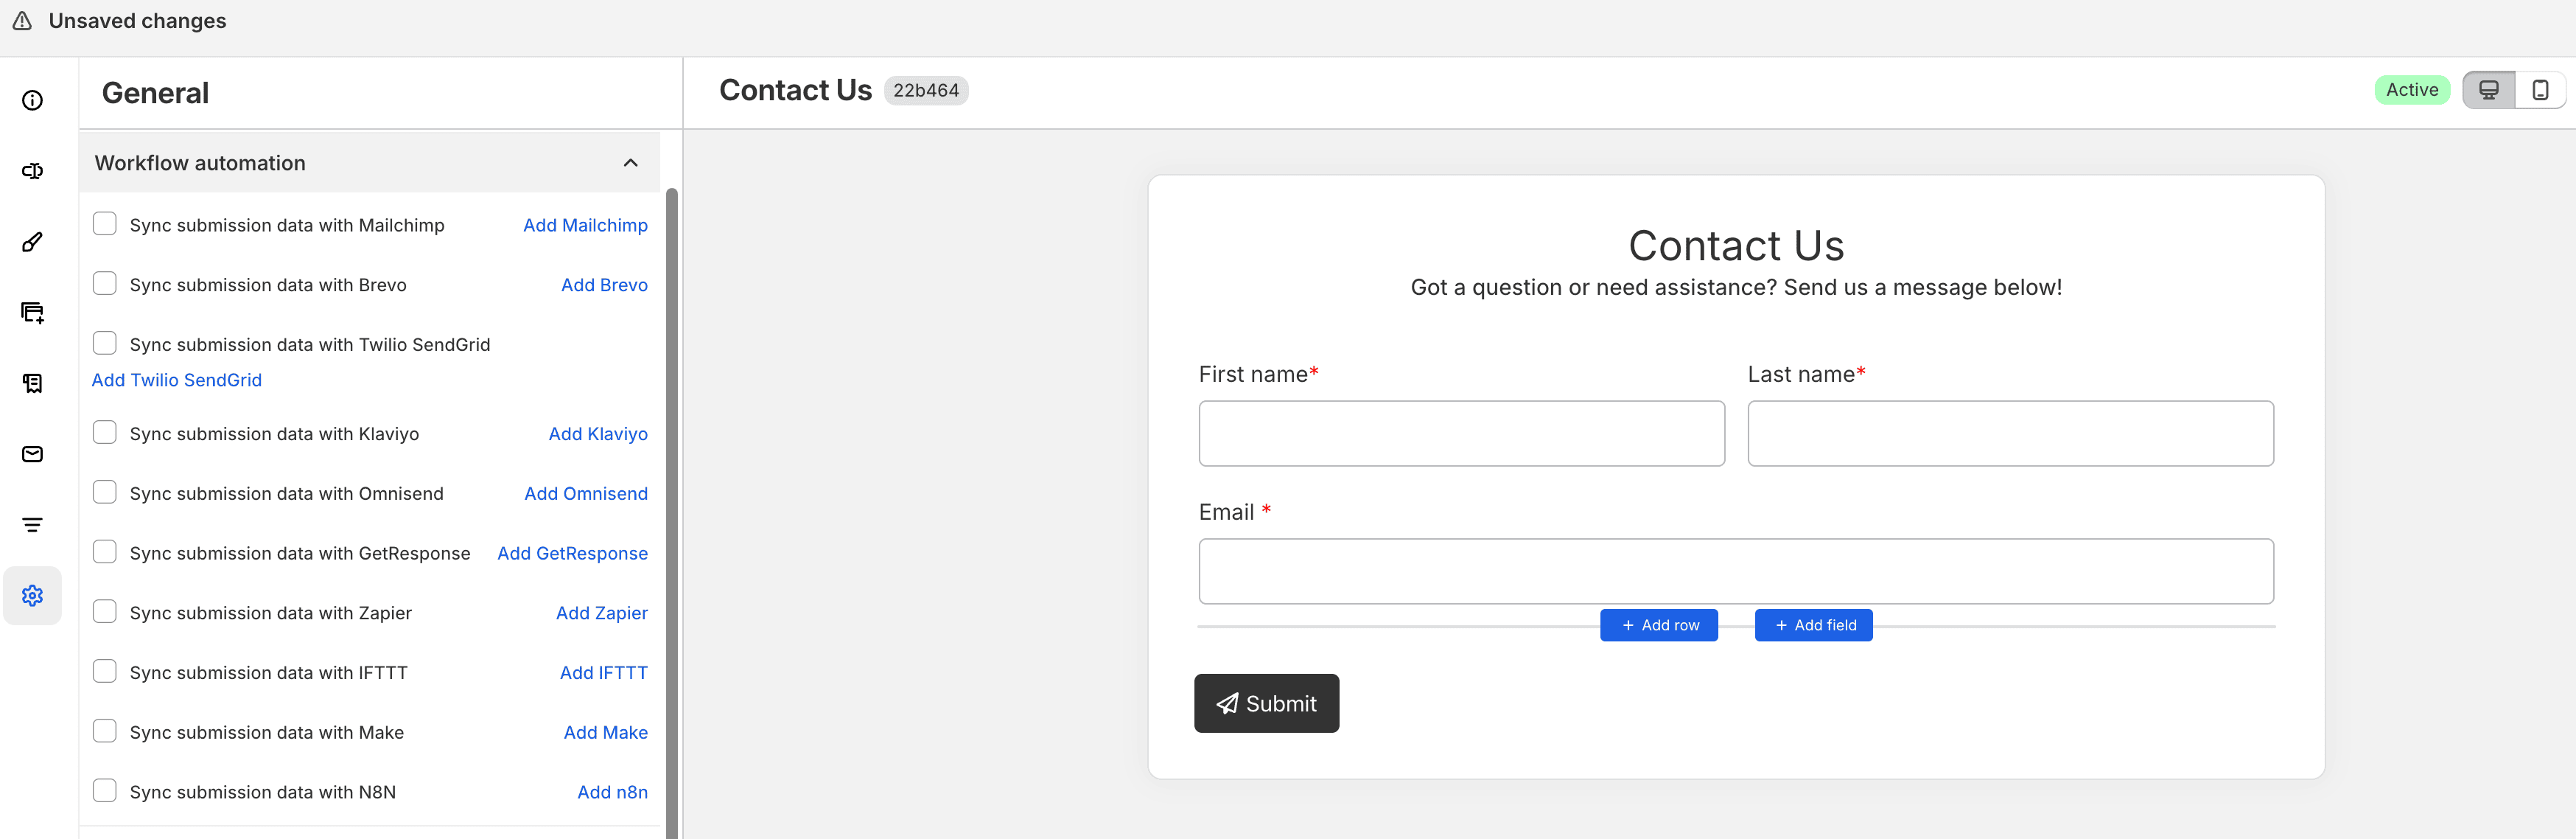
Supported services include:
- Mailchimp
- Brevo
- Twilio SendGrid
- Klaviyo
- Omnisend
- GetResponse
- Zapier
- IFTTT
- Make
- Google Sheets
- N8N
To connect a service:
- Enable Sync submission data for the provider you want to use.
- Choose the provider account and, when prompted, the contact list or audience.
- If the provider is not set up yet, click Add for that provider and enter the required details.
- Map form fields to the provider fields so values such as name, email, and phone are stored correctly.
- Click Save.
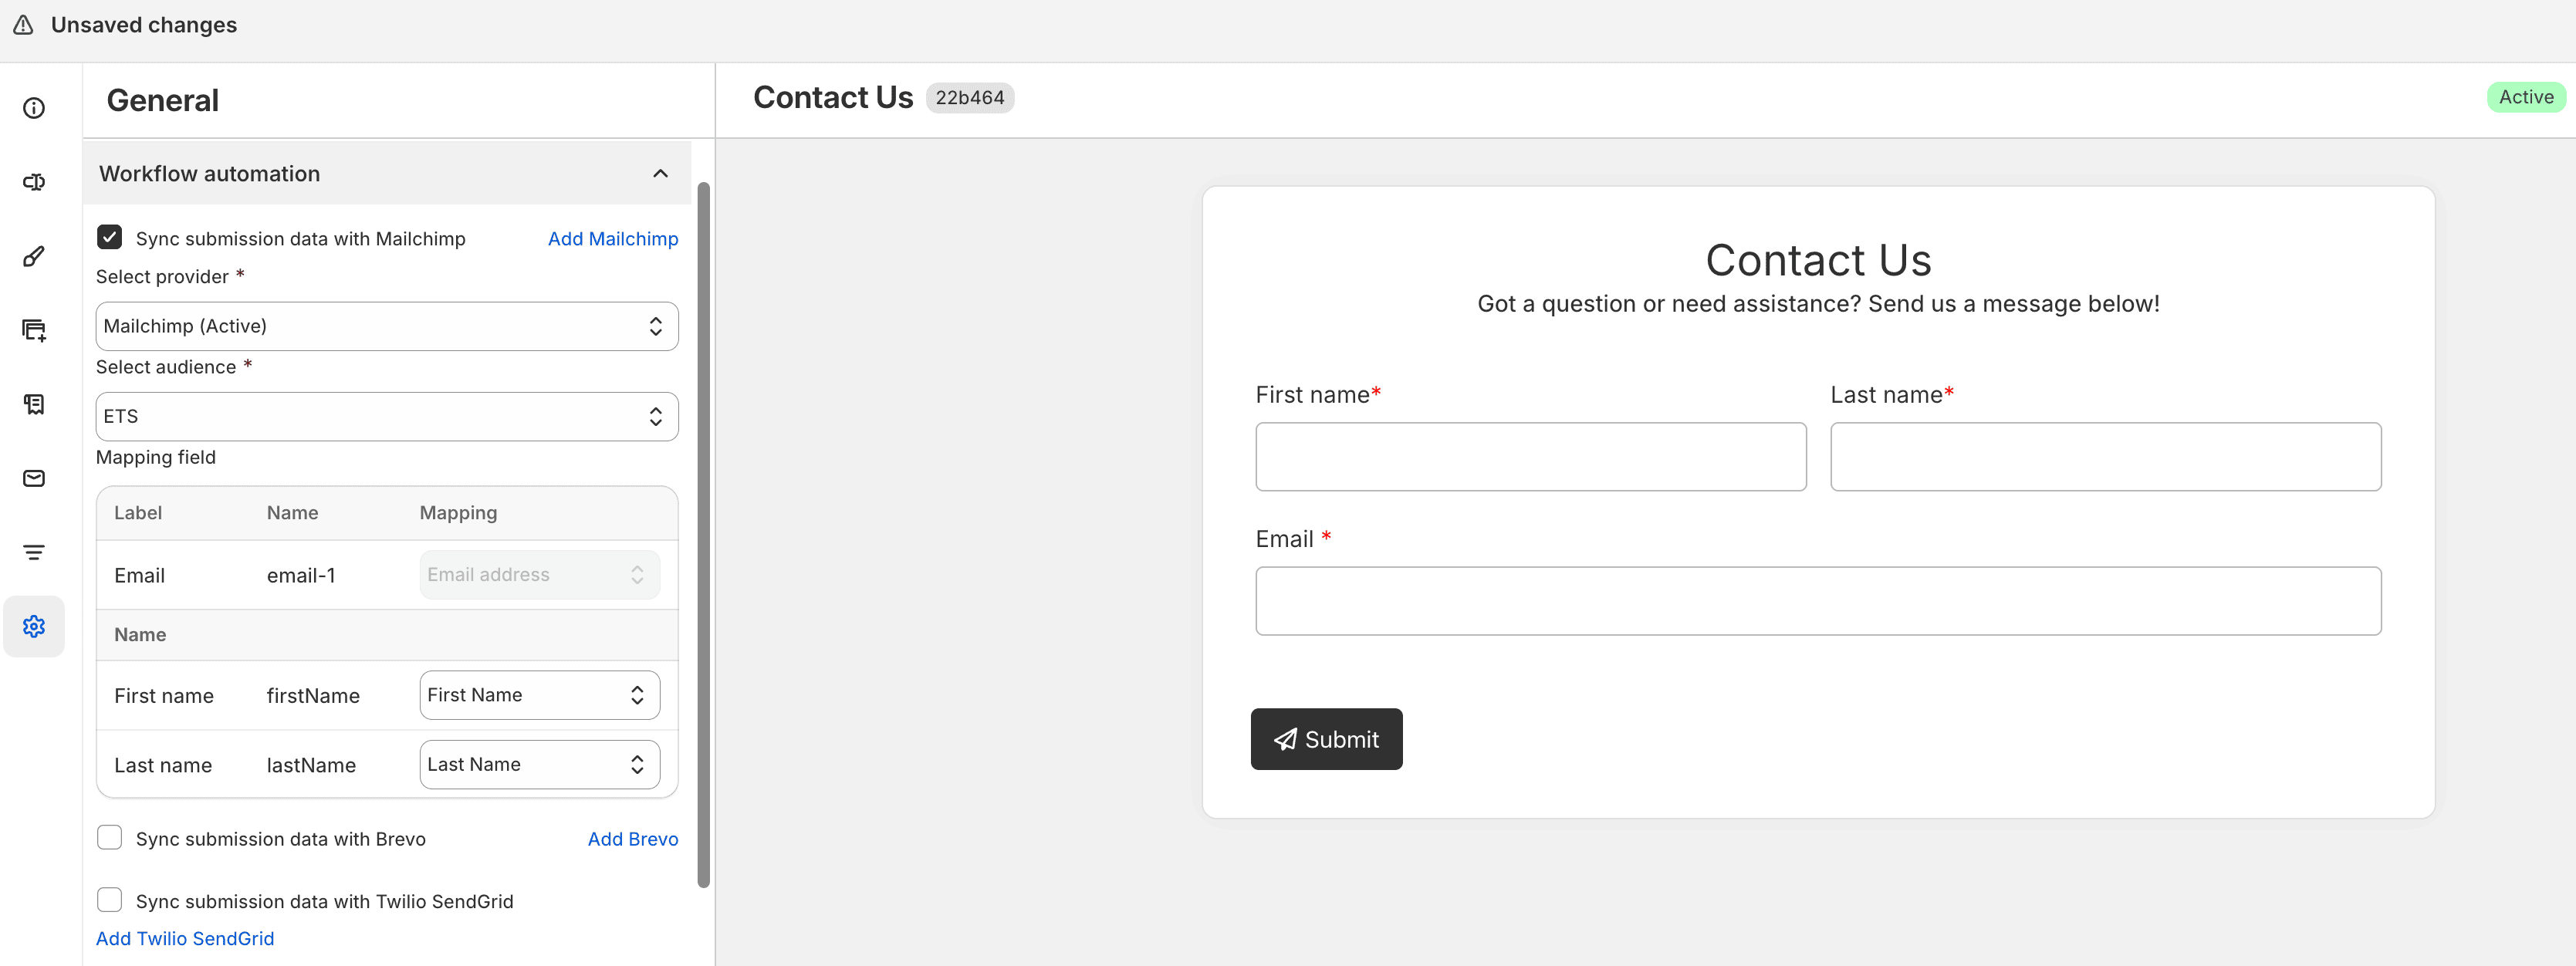
Workflow automation requires Save submission data to be enabled in the General section of this tab. After you save, publish the form, submit a test entry on the storefront, then check the provider after about 30–60 seconds.
Provider guides:
Authentication
Restrict form access to logged-in customers.
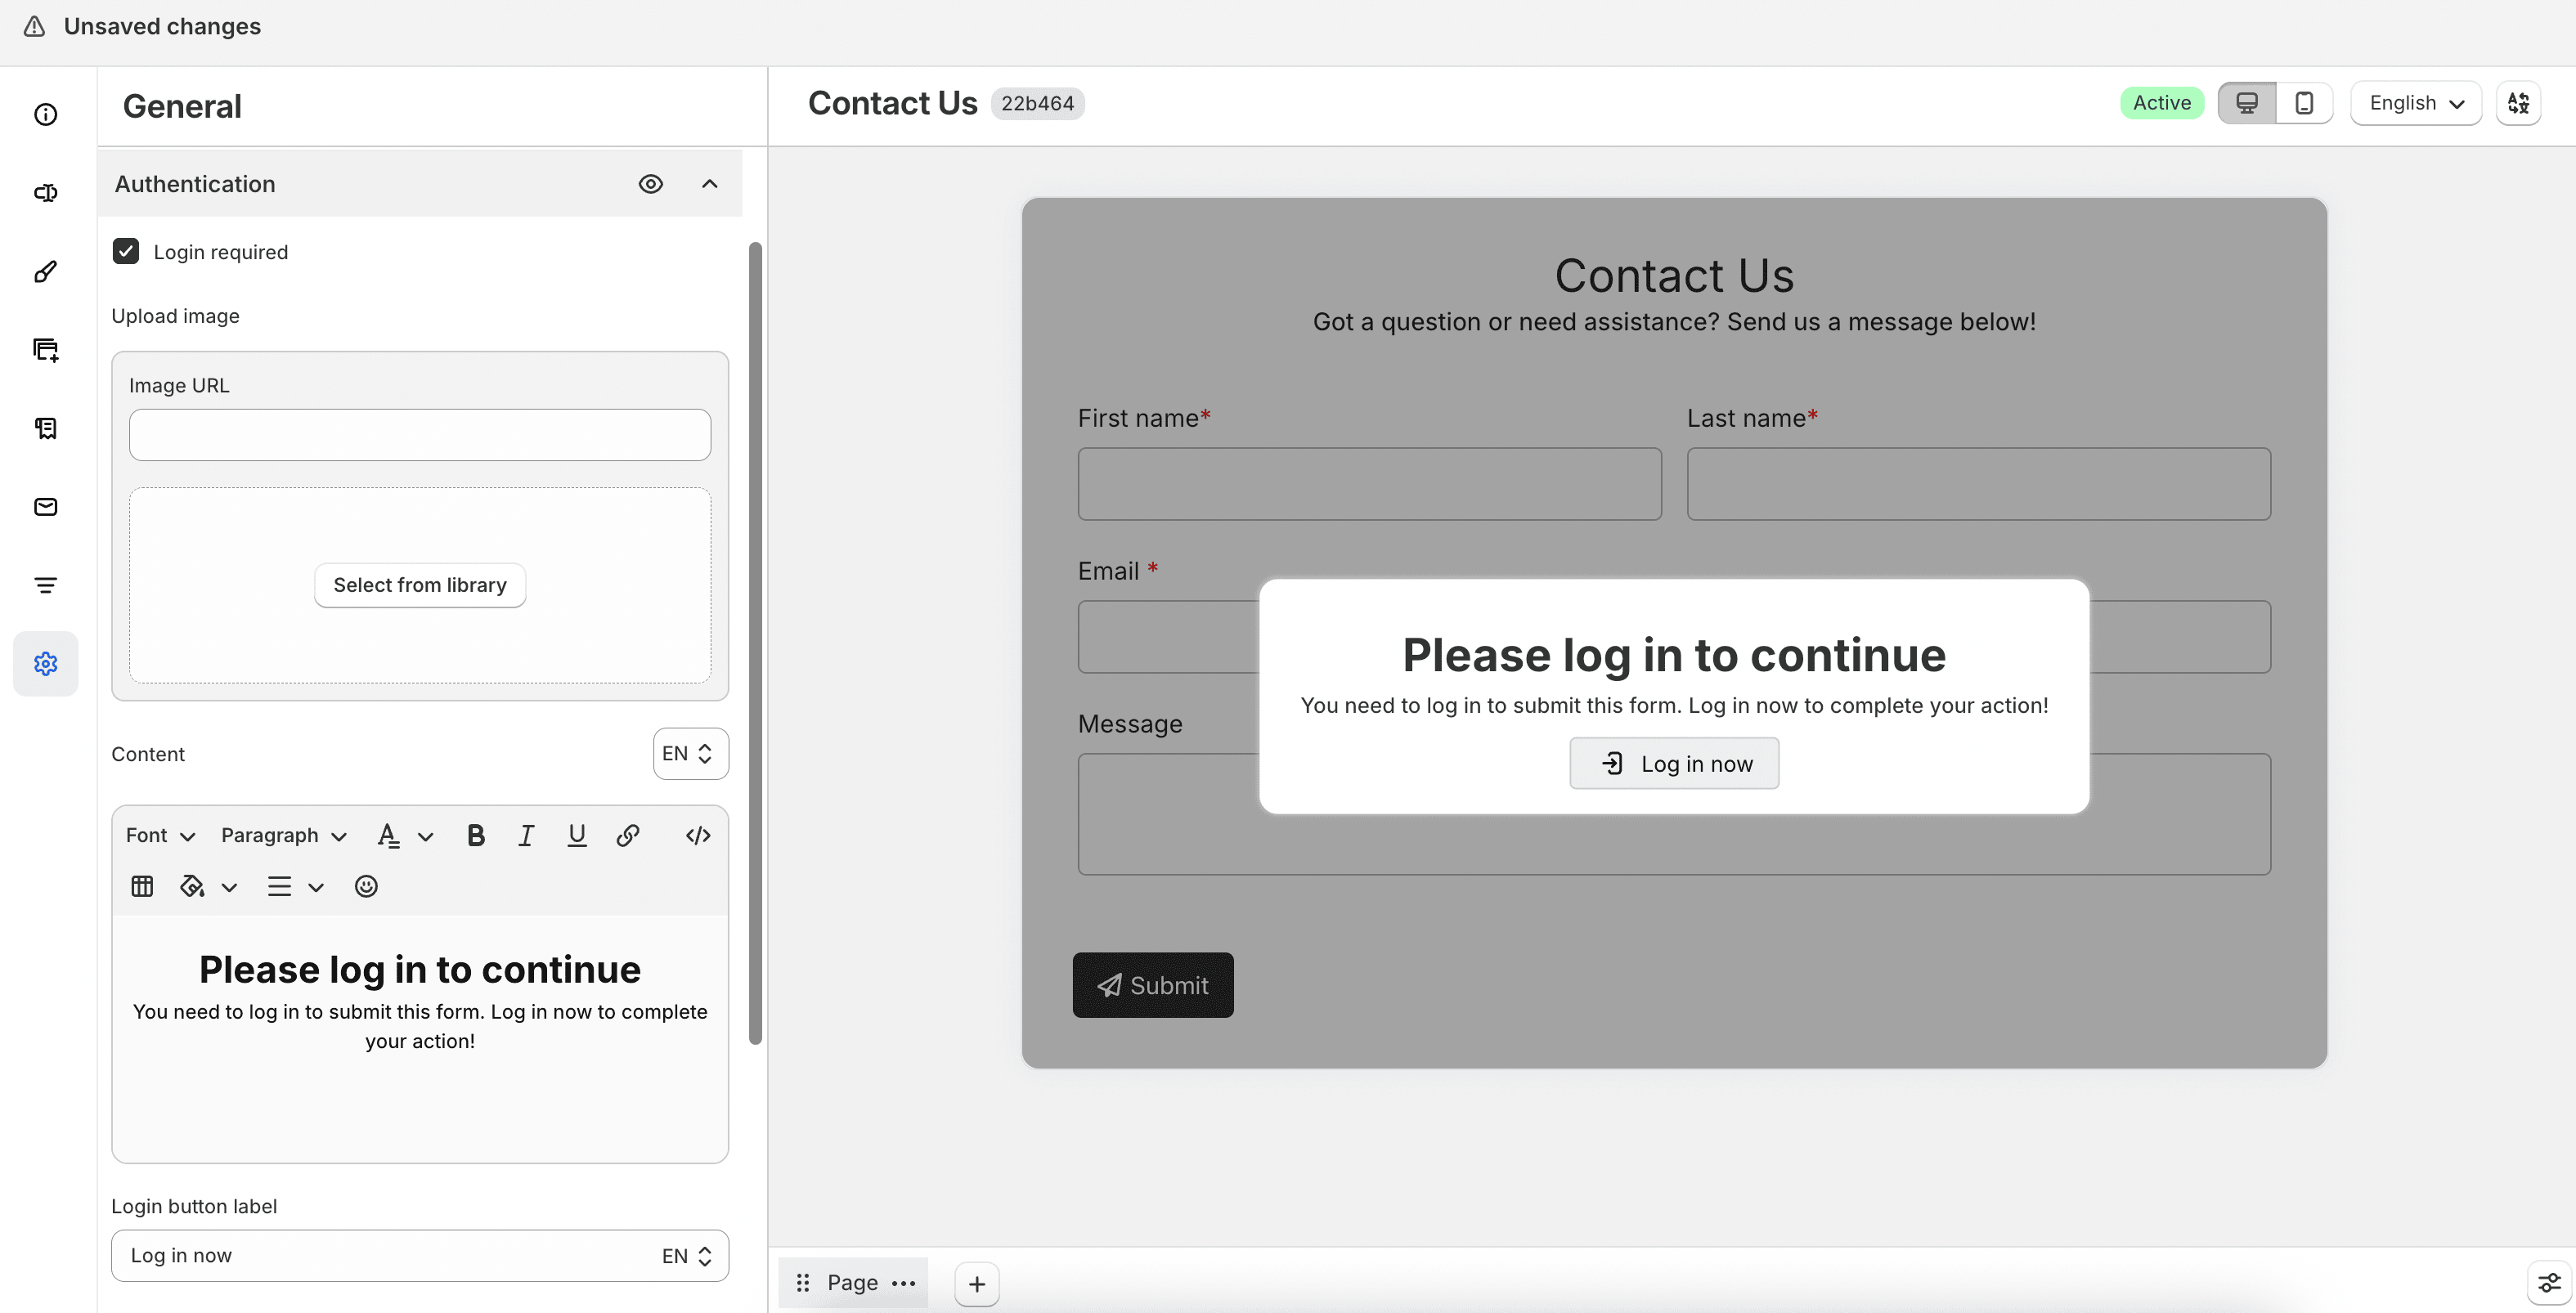
Enable Login required if customers must sign in before they can submit the form. You can also configure:
- Upload image — image shown with the login message
- Content — message shown to customers who are not logged in; supports rich text and multiple languages
- Login button label — text on the login button
- Hide the form and show a login notification — hides the form and shows only the login message; if disabled, the form layout may still appear with the login message
Custom CSS
Add your own CSS to style the form beyond the built-in design settings.
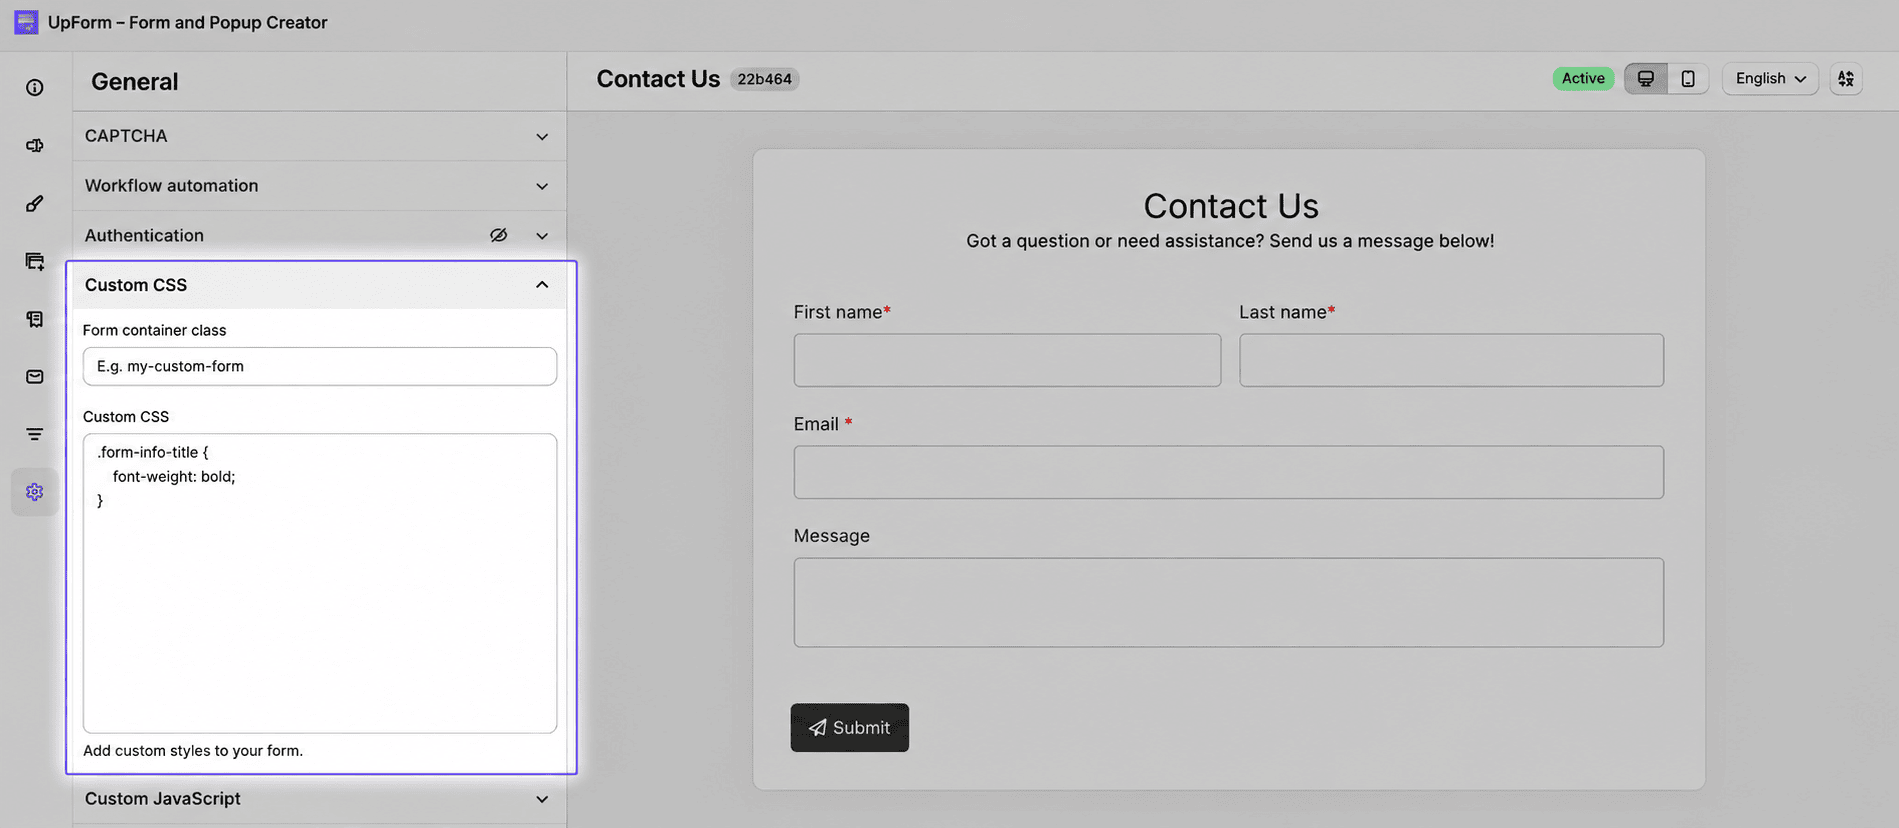
- Form container class — a class that wraps this form, for example
my-custom-form, so you can target only this form in CSS - Custom CSS — CSS rules applied to the form
If a style guide link is available in your app configuration, use Learn more for additional guidance.
Custom JavaScript
Add custom JavaScript for advanced form behavior. This is intended for advanced users.
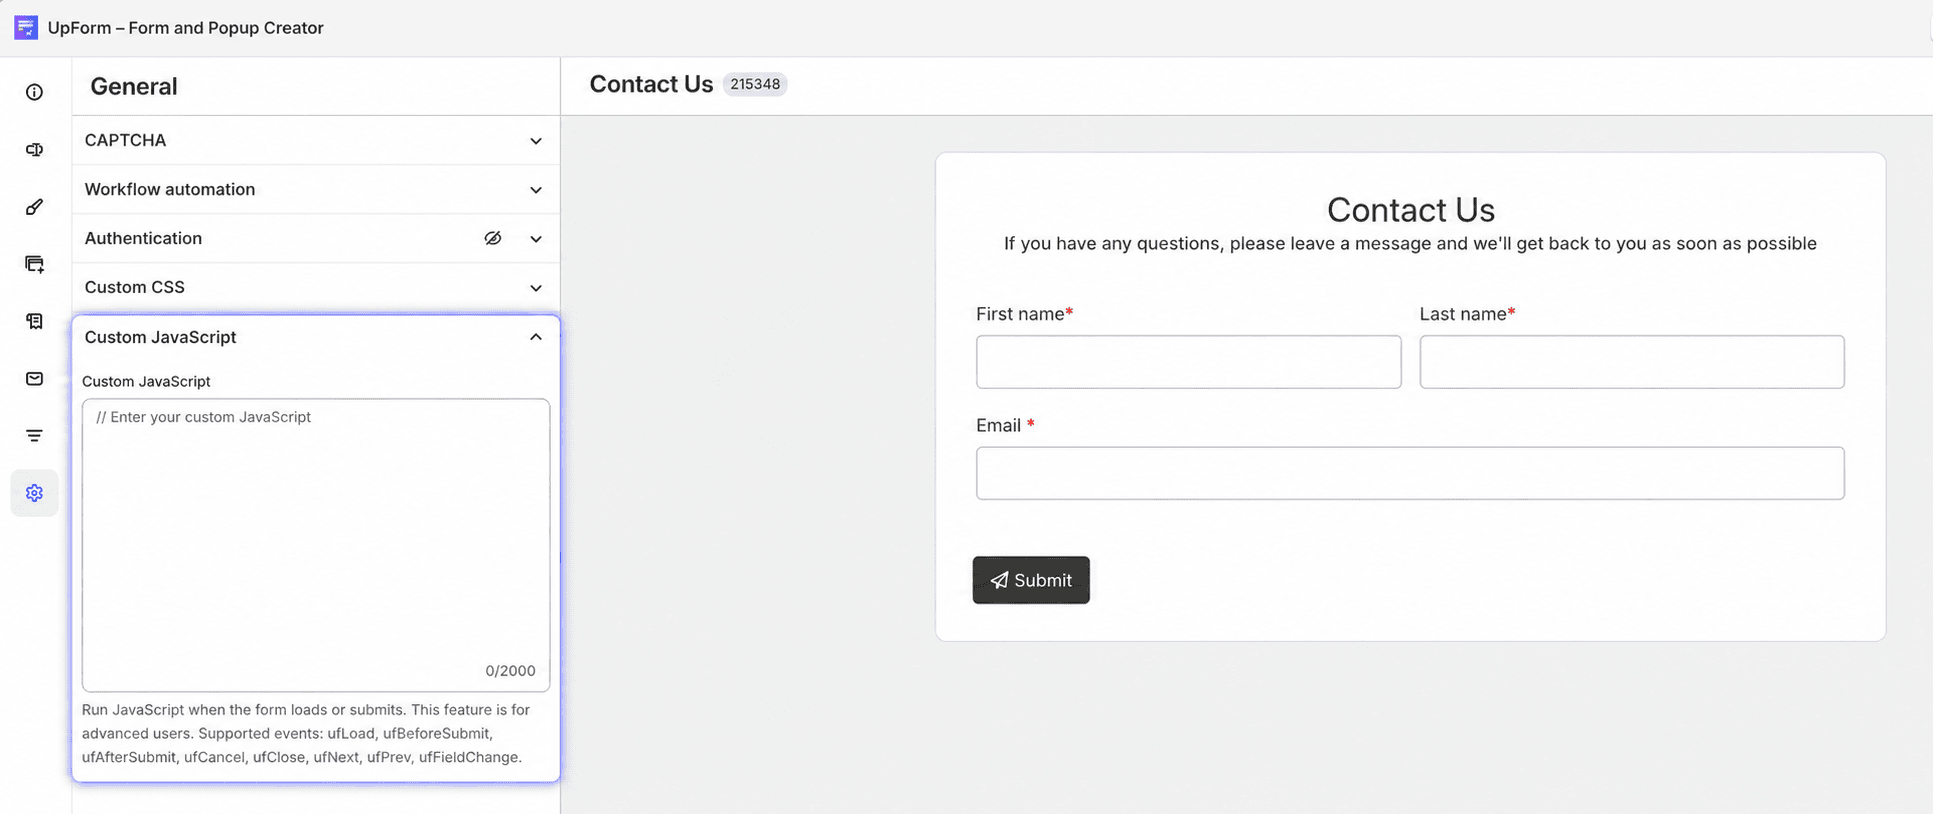
Enter your script in Custom JavaScript. Supported events include:
- ufLoad — when the form loads
- ufBeforeSubmit — before the form is submitted
- ufAfterSubmit — after a successful submission
- ufCancel — when the form action is canceled
- ufClose — when the form is closed
- ufNext — when moving to the next step in a multi-step form
- ufPrev — when returning to the previous step
- ufFieldChange — when a field value changes
Display schedule
Control when the form is visible on the storefront. Use this for campaigns or limited-time availability.
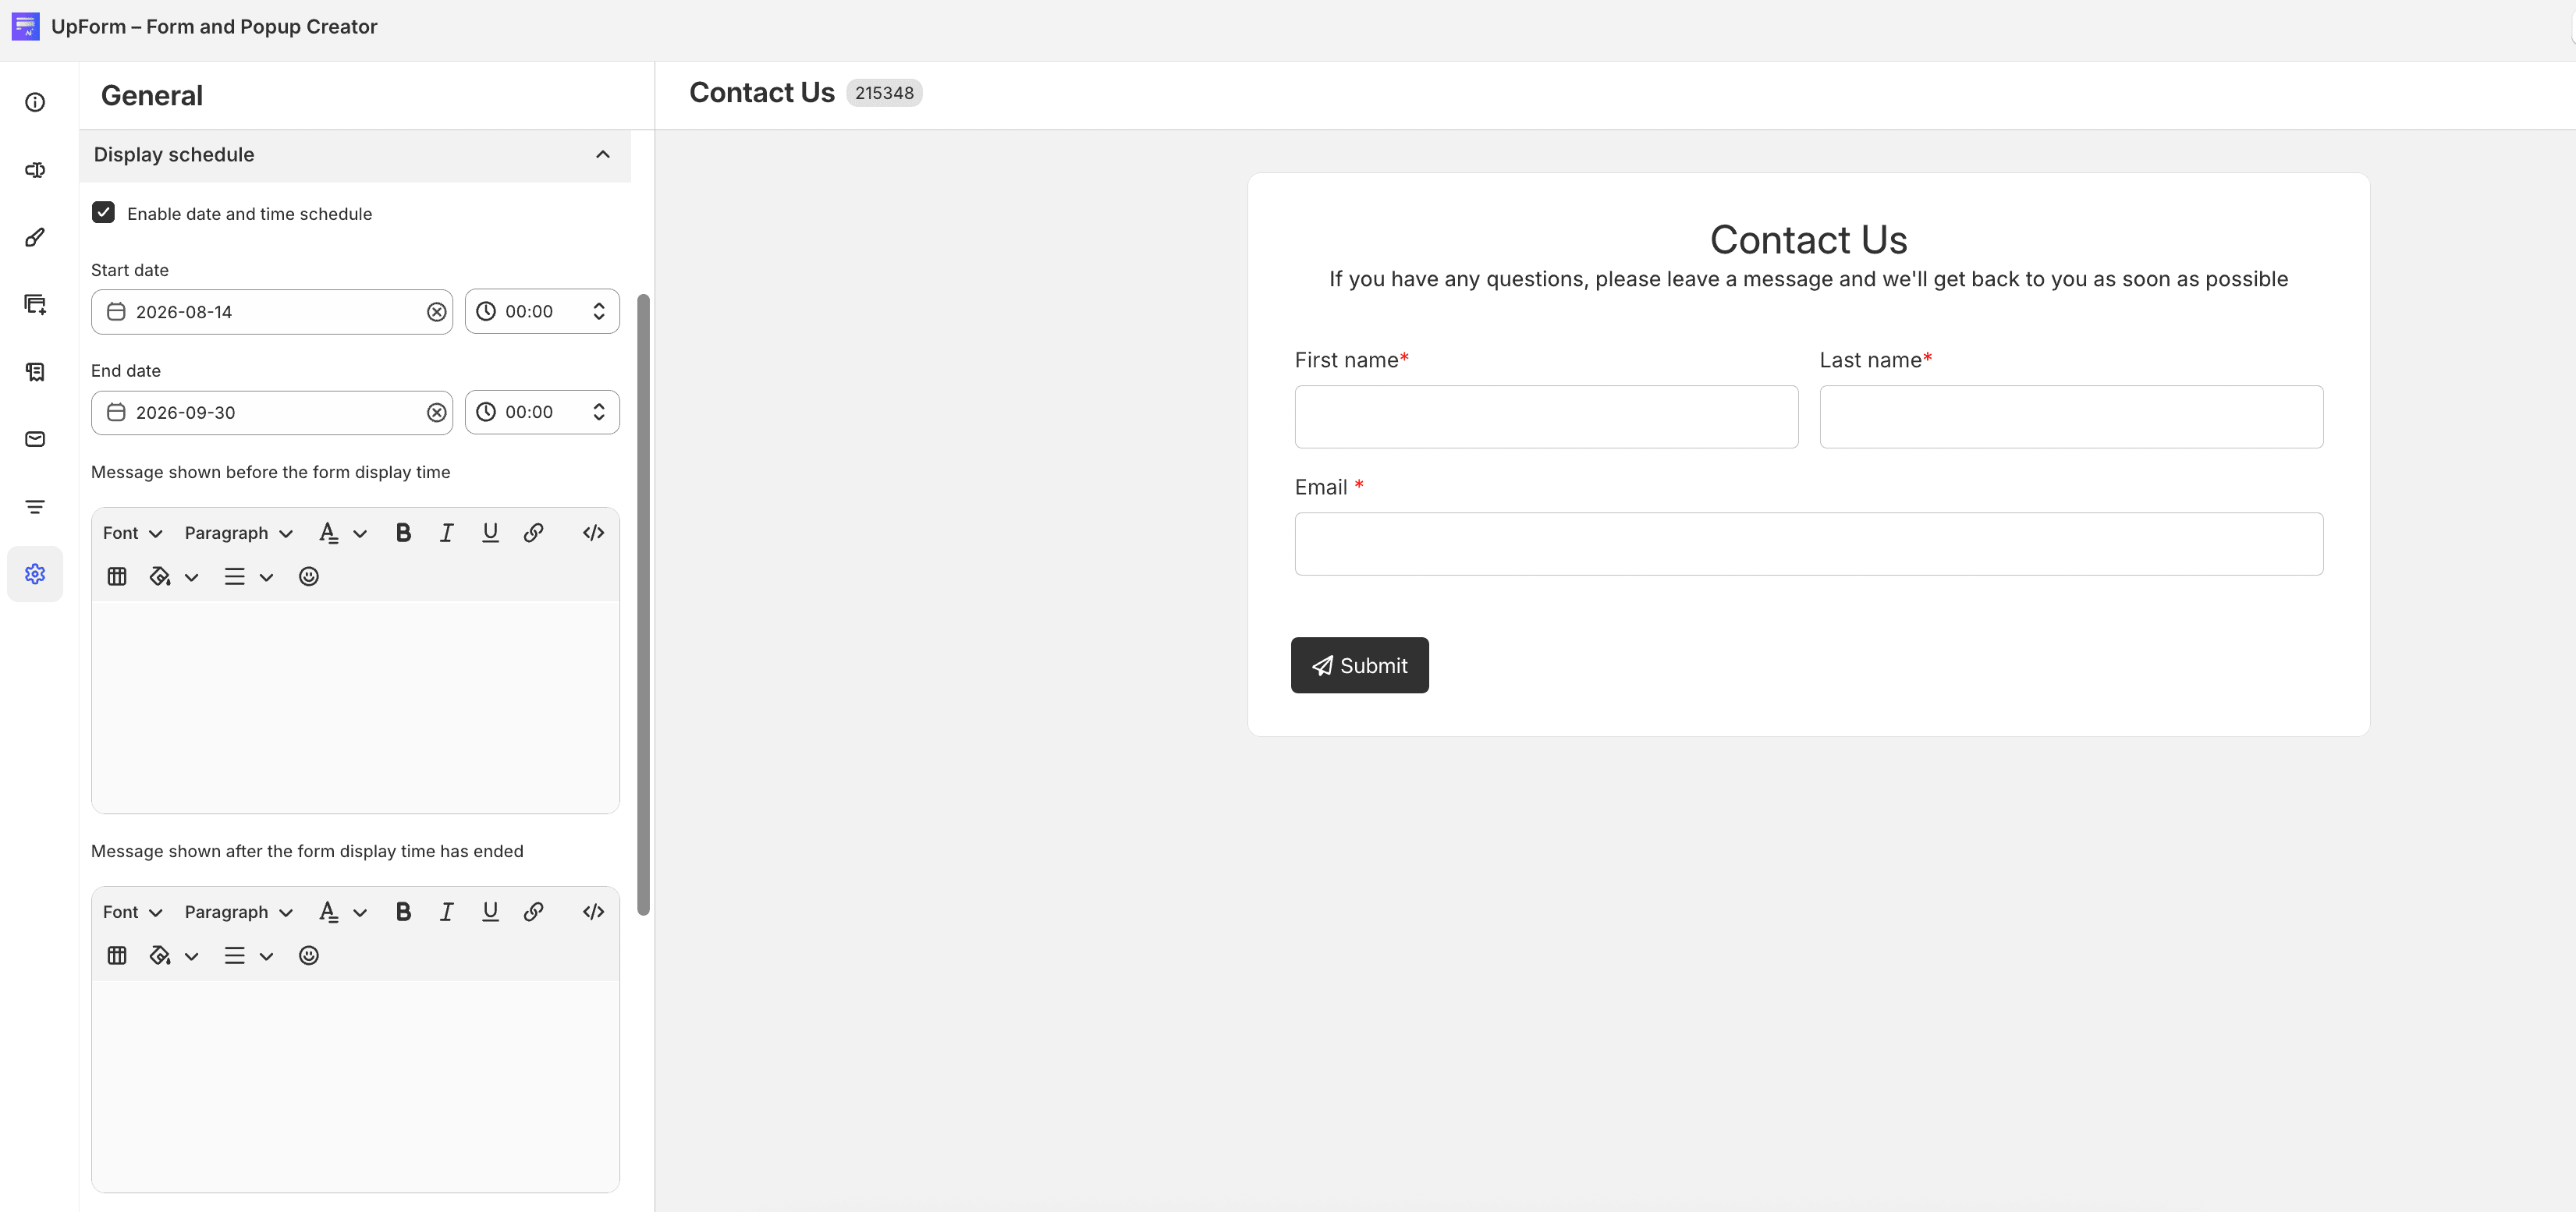
Enable Enable date and time schedule to show the form only between a Start date and End date.
For On-page forms, you can also set:
- Message shown before the form display time
- Message shown after the form display time has ended
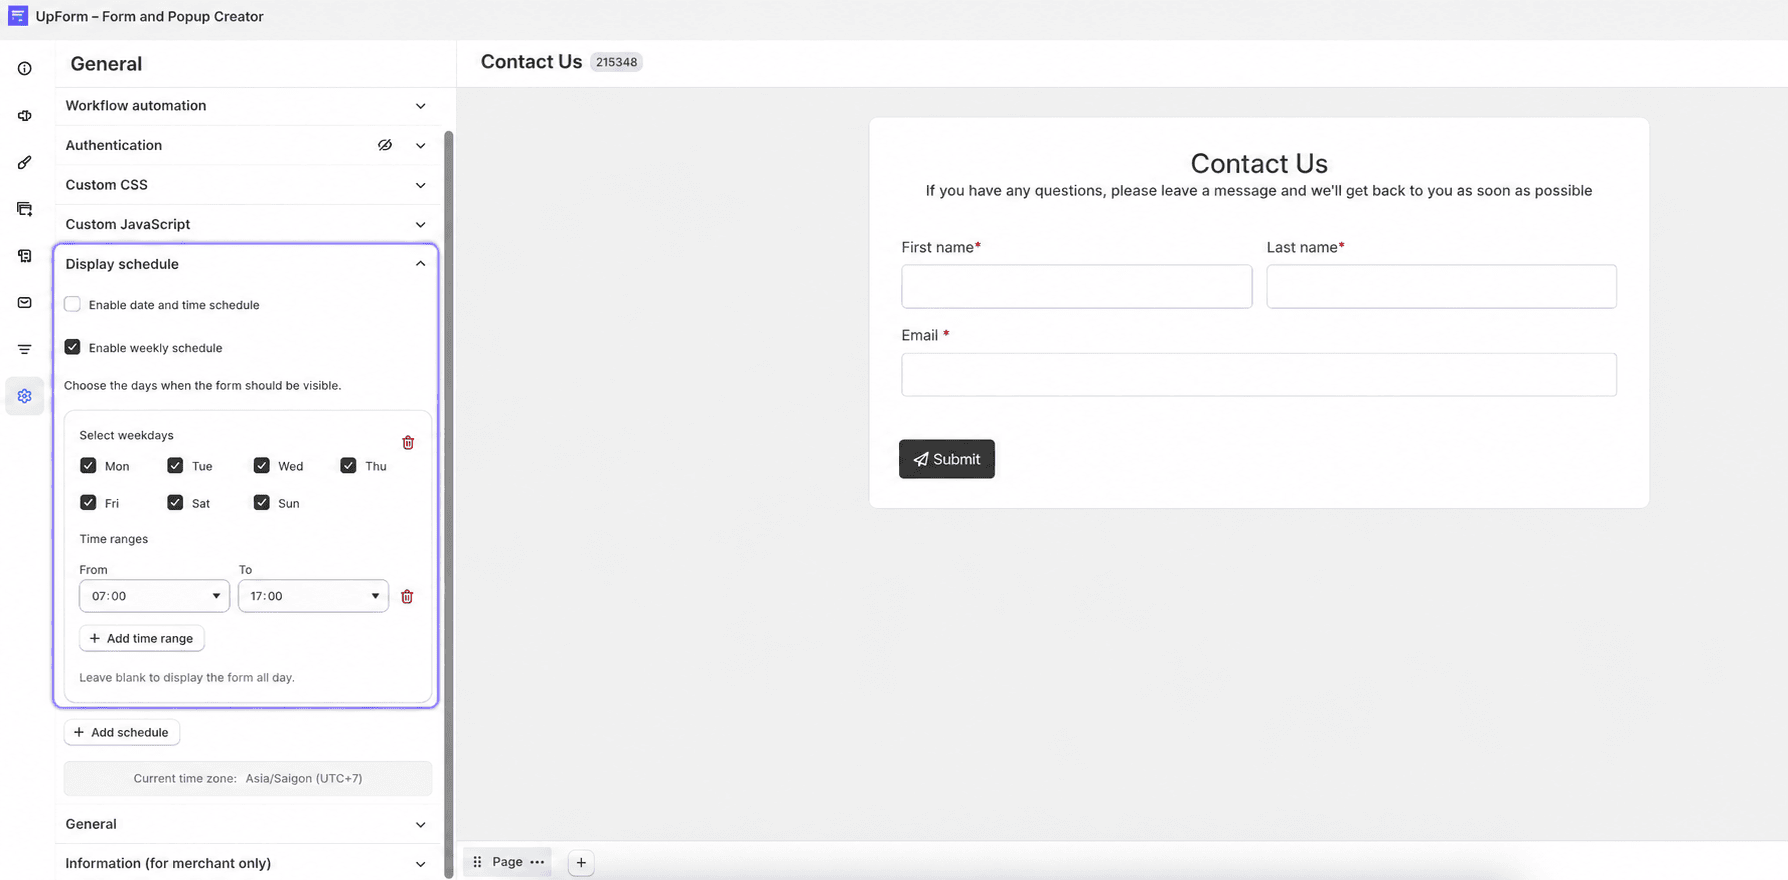
Enable Enable weekly schedule to limit visibility by weekday and time. Choose the days under Choose the days when the form should be visible. and add time ranges as needed. If you leave a day’s time range empty, the form can show all day on that day.
You can use both schedule types together, for example during a campaign period and only during selected hours.
General
Manage how submissions are handled and how the form interacts with the page.
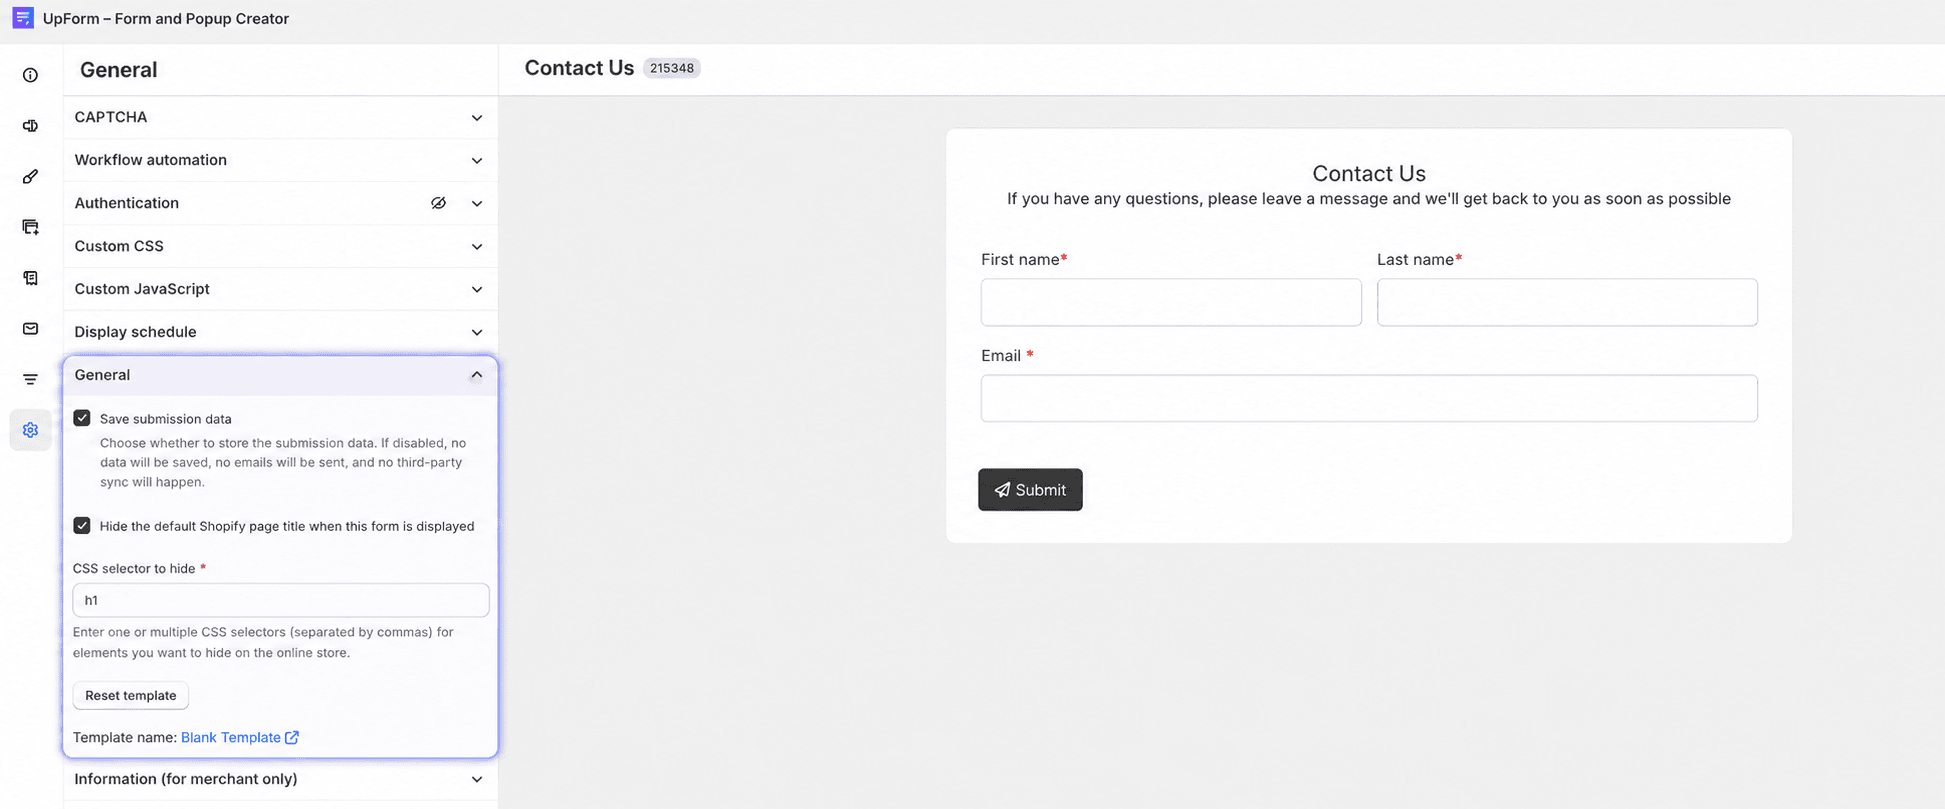
Save submission data stores submissions for later use. When enabled, emails can be sent and third-party sync can run. When disabled, no submission data is saved, no emails are sent, and no third-party sync happens. Disable this for display-only forms such as announcement popups or banners that do not collect customer input.
For On-page forms, you can enable Hide the default Shopify page title when this form is displayed. When that option is on, use CSS selector to hide to enter one or more CSS selectors, separated by commas, for page elements you want to hide on the storefront.
If the form was created from a template, Reset template restores the form content from the original template while keeping selected internal information such as the form note, primary URL, and preview image.
Information (for merchant only)
Store internal details about the form. These settings are not shown to customers.
- Primary form URL — custom URL for this form; leave blank to use the latest published URL, which points to the most recent version on your store
- Form preview image — thumbnail shown in the form list; recommended size is 100 × 100 px
- Form note — internal note for you or your team about the purpose or important details of the form