

Appearance
reCAPTCHA Enterprise
Protect UpForm forms with Google reCAPTCHA Enterprise. UpForm supports reCAPTCHA Enterprise - Checkbox and reCAPTCHA Enterprise - Score-based.
Google is moving classic reCAPTCHA (v2 and v3) toward Enterprise. Enterprise keys are managed in Google Cloud and use a Key ID, Project ID, and API key instead of only a site key and secret key.
For Cloudflare Turnstile instead, see Cloudflare Turnstile.
Before you begin
You will need:
- A Google account
- Access to Google Cloud Console
- Billing enabled on the Google Cloud project that owns the key
- Your Shopify store domain (for example,
your-store.myshopify.com), withouthttps://or a path
Google Cloud menus can change. If a path does not match exactly, search the console for reCAPTCHA, Billing, APIs & Services, or Credentials.
Create a Google Cloud project and enable billing
- Open Google Cloud Console and sign in.
- Create or select a project:
- Go to IAM & Admin → Manage Resources (or use the project picker)
- Click Create Project
- Enter a project name, then create the project
- Note the Project ID. You will enter it in UpForm later.
- Enable billing for the project:
- Open Billing
- Create or connect a billing account
- Link it to your project

Billing is required for the reCAPTCHA Enterprise API, even at low usage.
Enable the reCAPTCHA Enterprise API
- In Cloud Console, go to APIs & Services → Library.
- Search for reCAPTCHA Enterprise API.
- Click Enable.
If this API is not enabled, UpForm cannot verify CAPTCHA responses correctly.
Create a reCAPTCHA Enterprise key
- In Cloud Console, go to Security → reCAPTCHA.
- Click Create Key.
- Choose application type Website.
- Enter a key name (for example,
UpForm Shopify). - Under the domain list, add your store domain (for example,
your-store.myshopify.com). Do not includehttps://or paths. - Continue to choose the key type.
Score-based
Score-based is similar to classic reCAPTCHA v3. It is usually invisible and scores each request from 0.0 to 1.0. Use it when you want less friction on contact, newsletter, popup, or lead forms.
- Keep challenges turned off (Will you use challenges? off). This is often the default.
- Click Create key.
Only enable Will you deploy this key in a Web Application Firewall (WAF)? if you use Google Cloud Armor. If you turn this on without Cloud Armor, tokens from your storefront can be rejected and customers may not be able to submit the form.
Checkbox
Checkbox is similar to classic reCAPTCHA v2. Customers see an I’m not a robot challenge. Use it when you want visible verification.
- Turn on Will you use challenges?.
- Choose a challenge difficulty level (harder is stricter; easier shows fewer challenges).
- Click Create key.
Copy the Key ID
After the key is created, copy the Key ID. You will enter it in UpForm as Key ID (Site key).
In UpForm, choose the Enterprise type that matches how you created the key: Score-based or Checkbox.
Get your Project ID
You can find the Project ID in either place:
- In the Cloud Console header, open the project picker. The Project ID appears next to the project name.
- Or open the project dashboard and look for Project ID.
Create a Google Cloud API key
UpForm uses this API key on the server to verify CAPTCHA with the Enterprise API.
- Go to APIs & Services → Credentials.
- Click Create Credentials → API Key.
- Name the key if prompted.
- Restrict the key for safety:
- Open API restrictions
- Choose Restrict key
- Allow only reCAPTCHA Enterprise API
- Save
- Copy the API key. Keep it private.
The Key ID, Project ID, and API key must all belong to the same Google Cloud project, with billing active and the reCAPTCHA Enterprise API enabled.
Configure CAPTCHA in UpForm
- In UpForm, open Settings → CAPTCHA.
- Choose the Enterprise type that matches your Google key:
- reCAPTCHA Enterprise - Checkbox
- reCAPTCHA Enterprise - Score-based
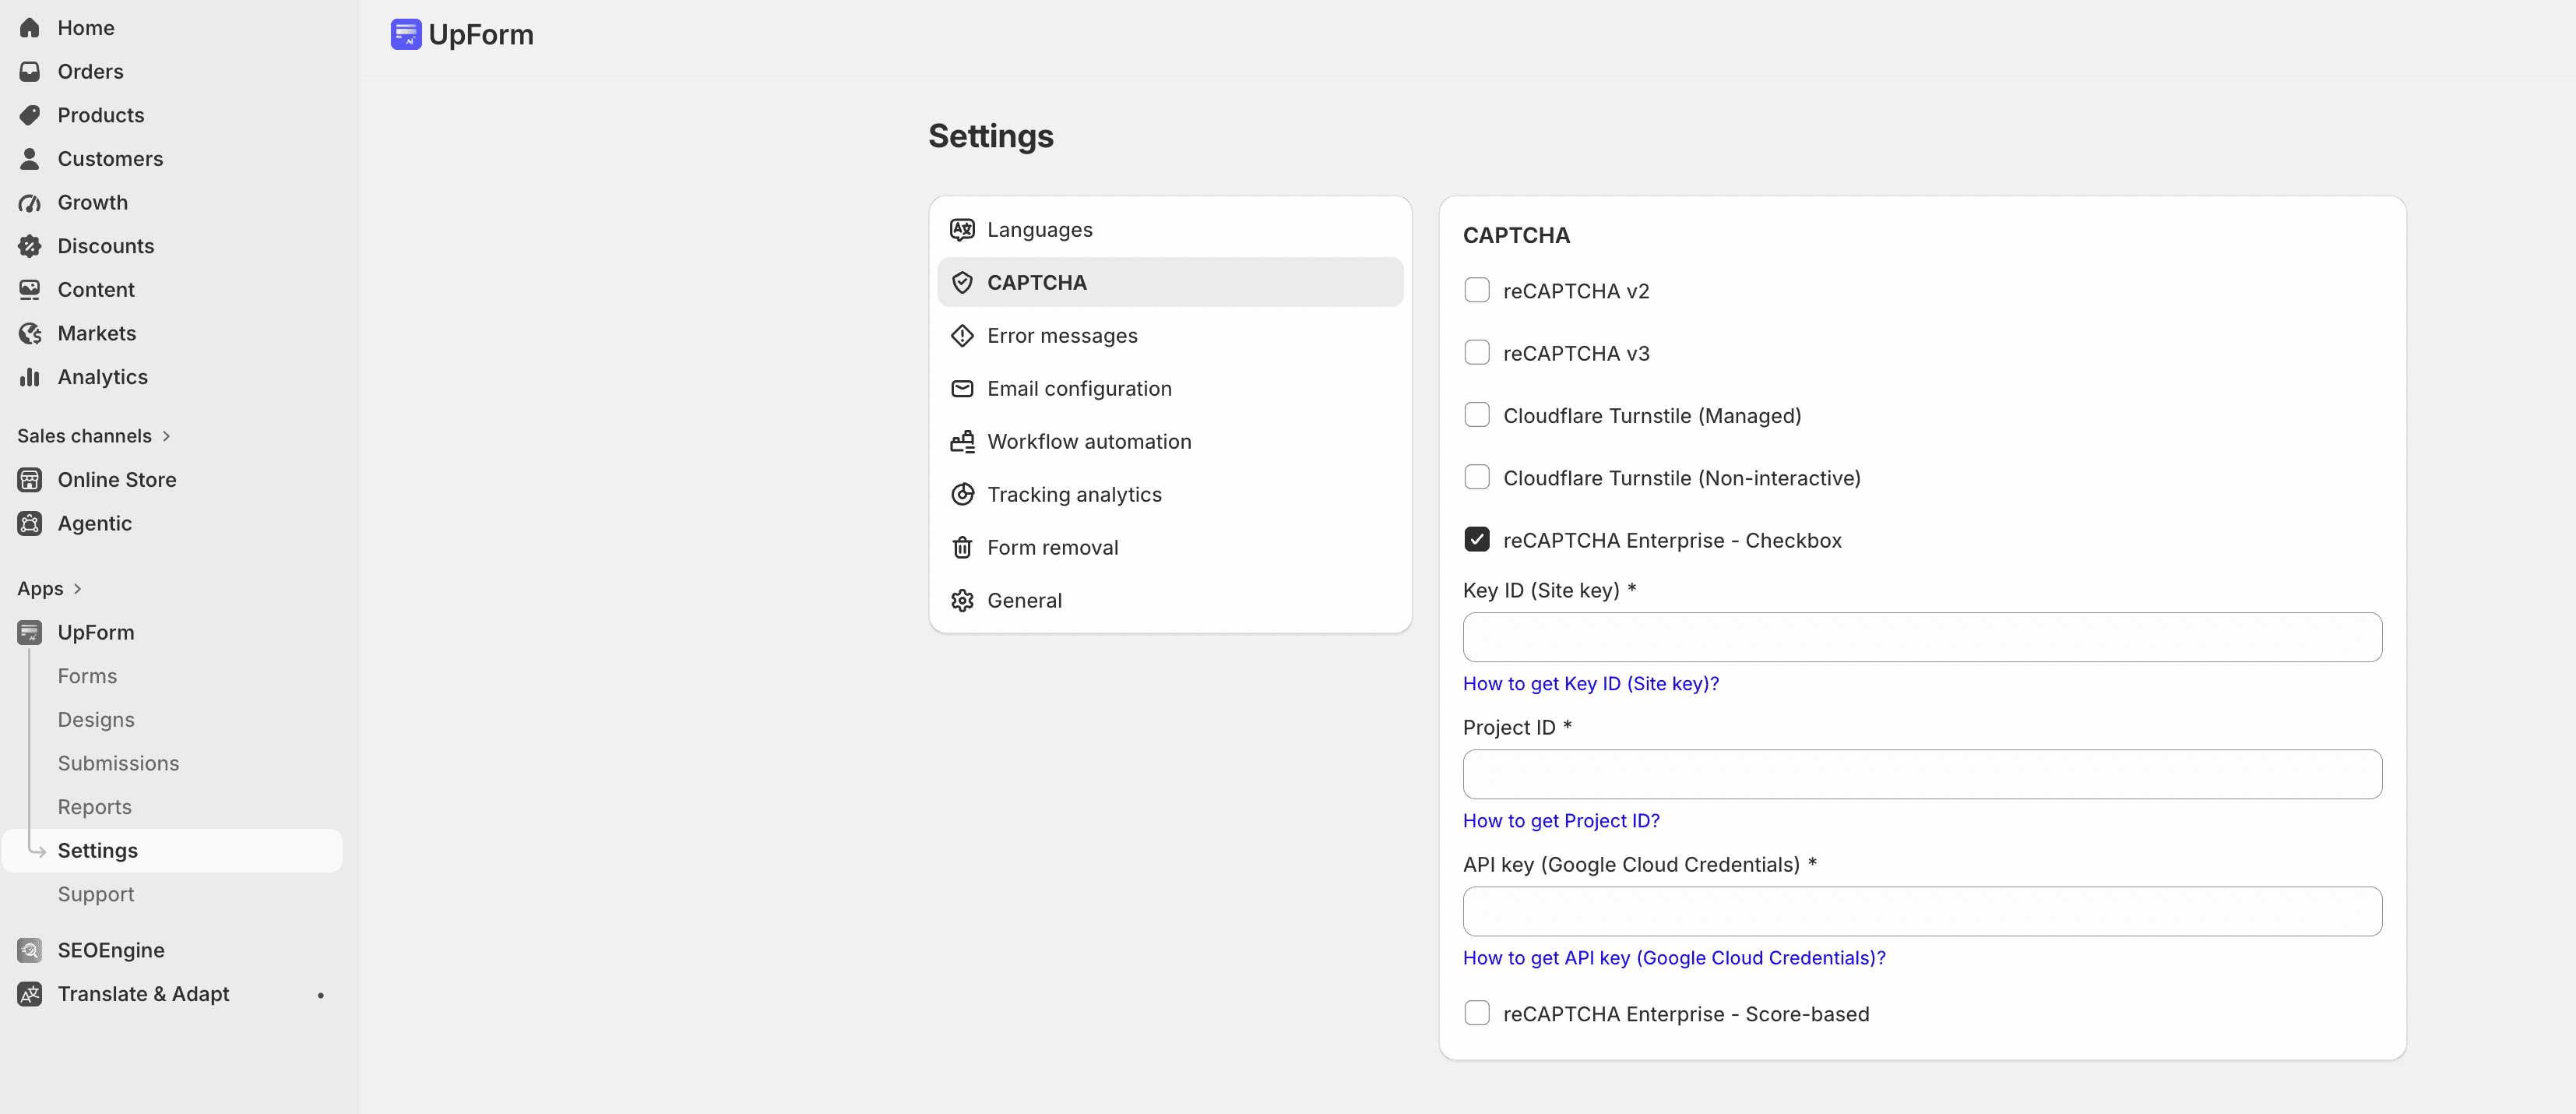
- Enter:
- Key ID (Site key) — from Google Cloud reCAPTCHA
- Project ID — from your Google Cloud project
- API key (Google Cloud Credentials) — from APIs & Services → Credentials
- Click Save.
If credentials are wrong or incomplete, verification can fail and the form may not be protected.
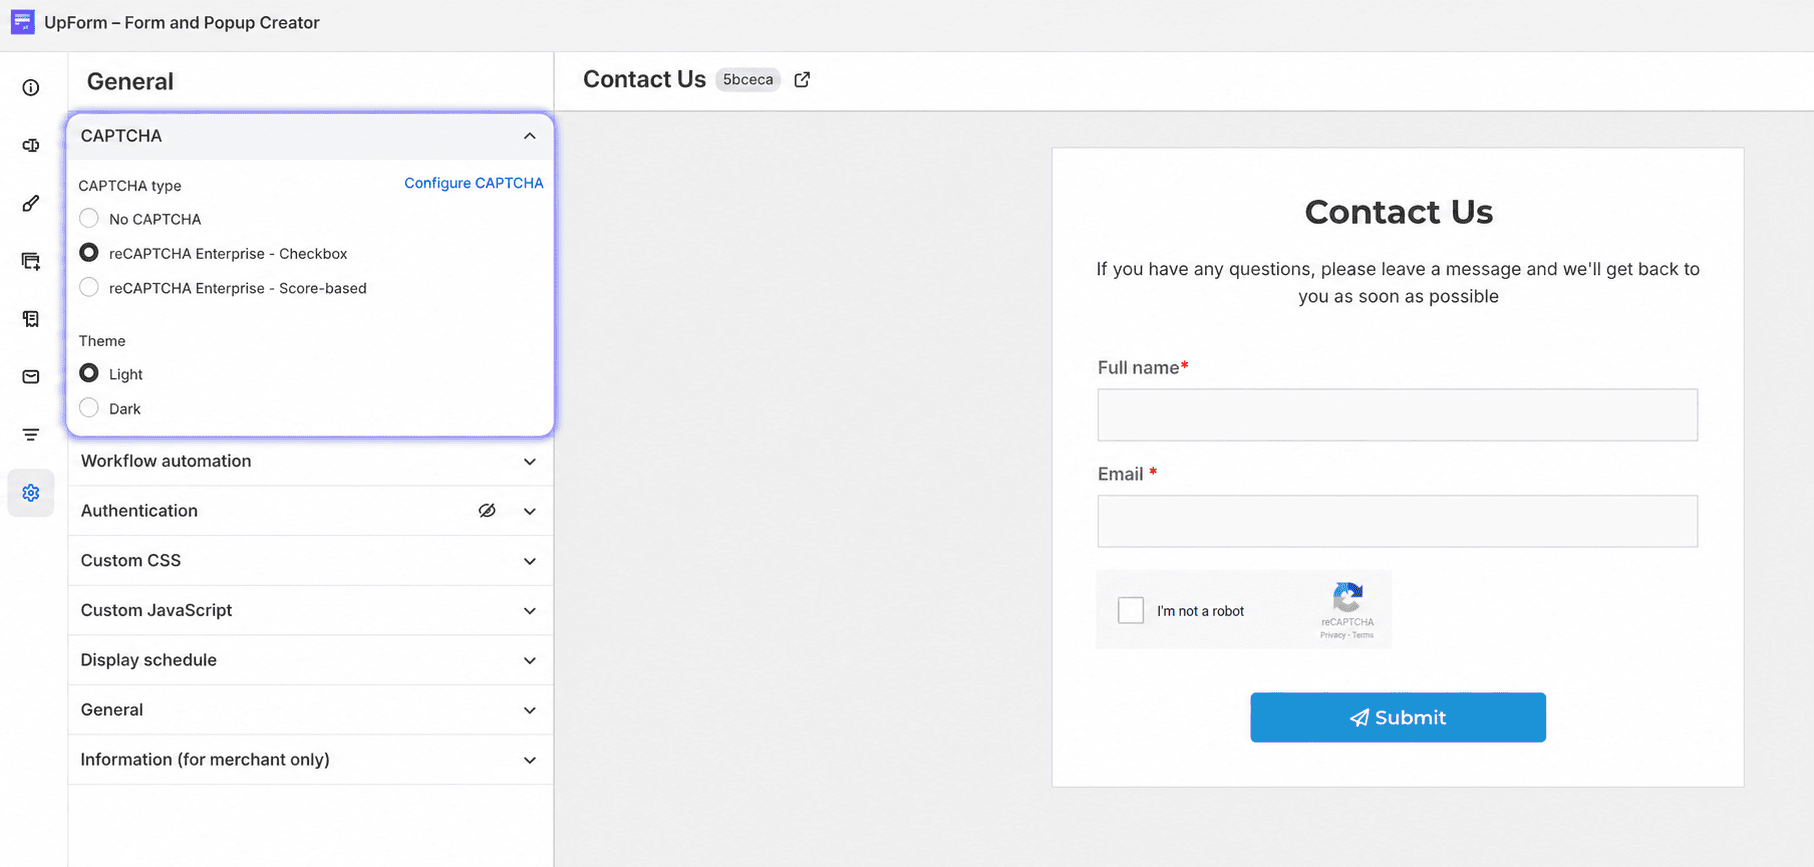
You can also open these settings from a form with Configure CAPTCHA in the General tab.
Enable CAPTCHA on a form
Credentials in Settings do not automatically protect every form. Enable CAPTCHA on each form you want to secure.
- Open the form in the form builder.
- Go to the General tab → CAPTCHA.
- Under CAPTCHA type, select reCAPTCHA Enterprise - Checkbox or reCAPTCHA Enterprise - Score-based (only configured types appear).
- Choose a Theme of Light or Dark if shown.
- Save the form.
For more form-level CAPTCHA options, see General.
If this does not work as expected, Contact for help.