

Appearance
Omnisend
Sync form submissions from UpForm to Omnisend contacts. After contacts land in Omnisend, you can run automations such as welcome emails.
Before you begin
- You need an Omnisend account.
- In UpForm, enable Save submission data for the form. Workflow sync will not run if submissions are not saved. See General.
- Omnisend needs an email to create or update a contact. Make the form’s email field required.
- Omnisend does not use a list selector in UpForm. Contacts sync to your Omnisend audience, and you map fields (including custom properties) on the form.
- Omnisend menus and labels can change. If something does not match exactly, use Omnisend’s search or help for API keys, custom properties, and automation.
Connect Omnisend in UpForm
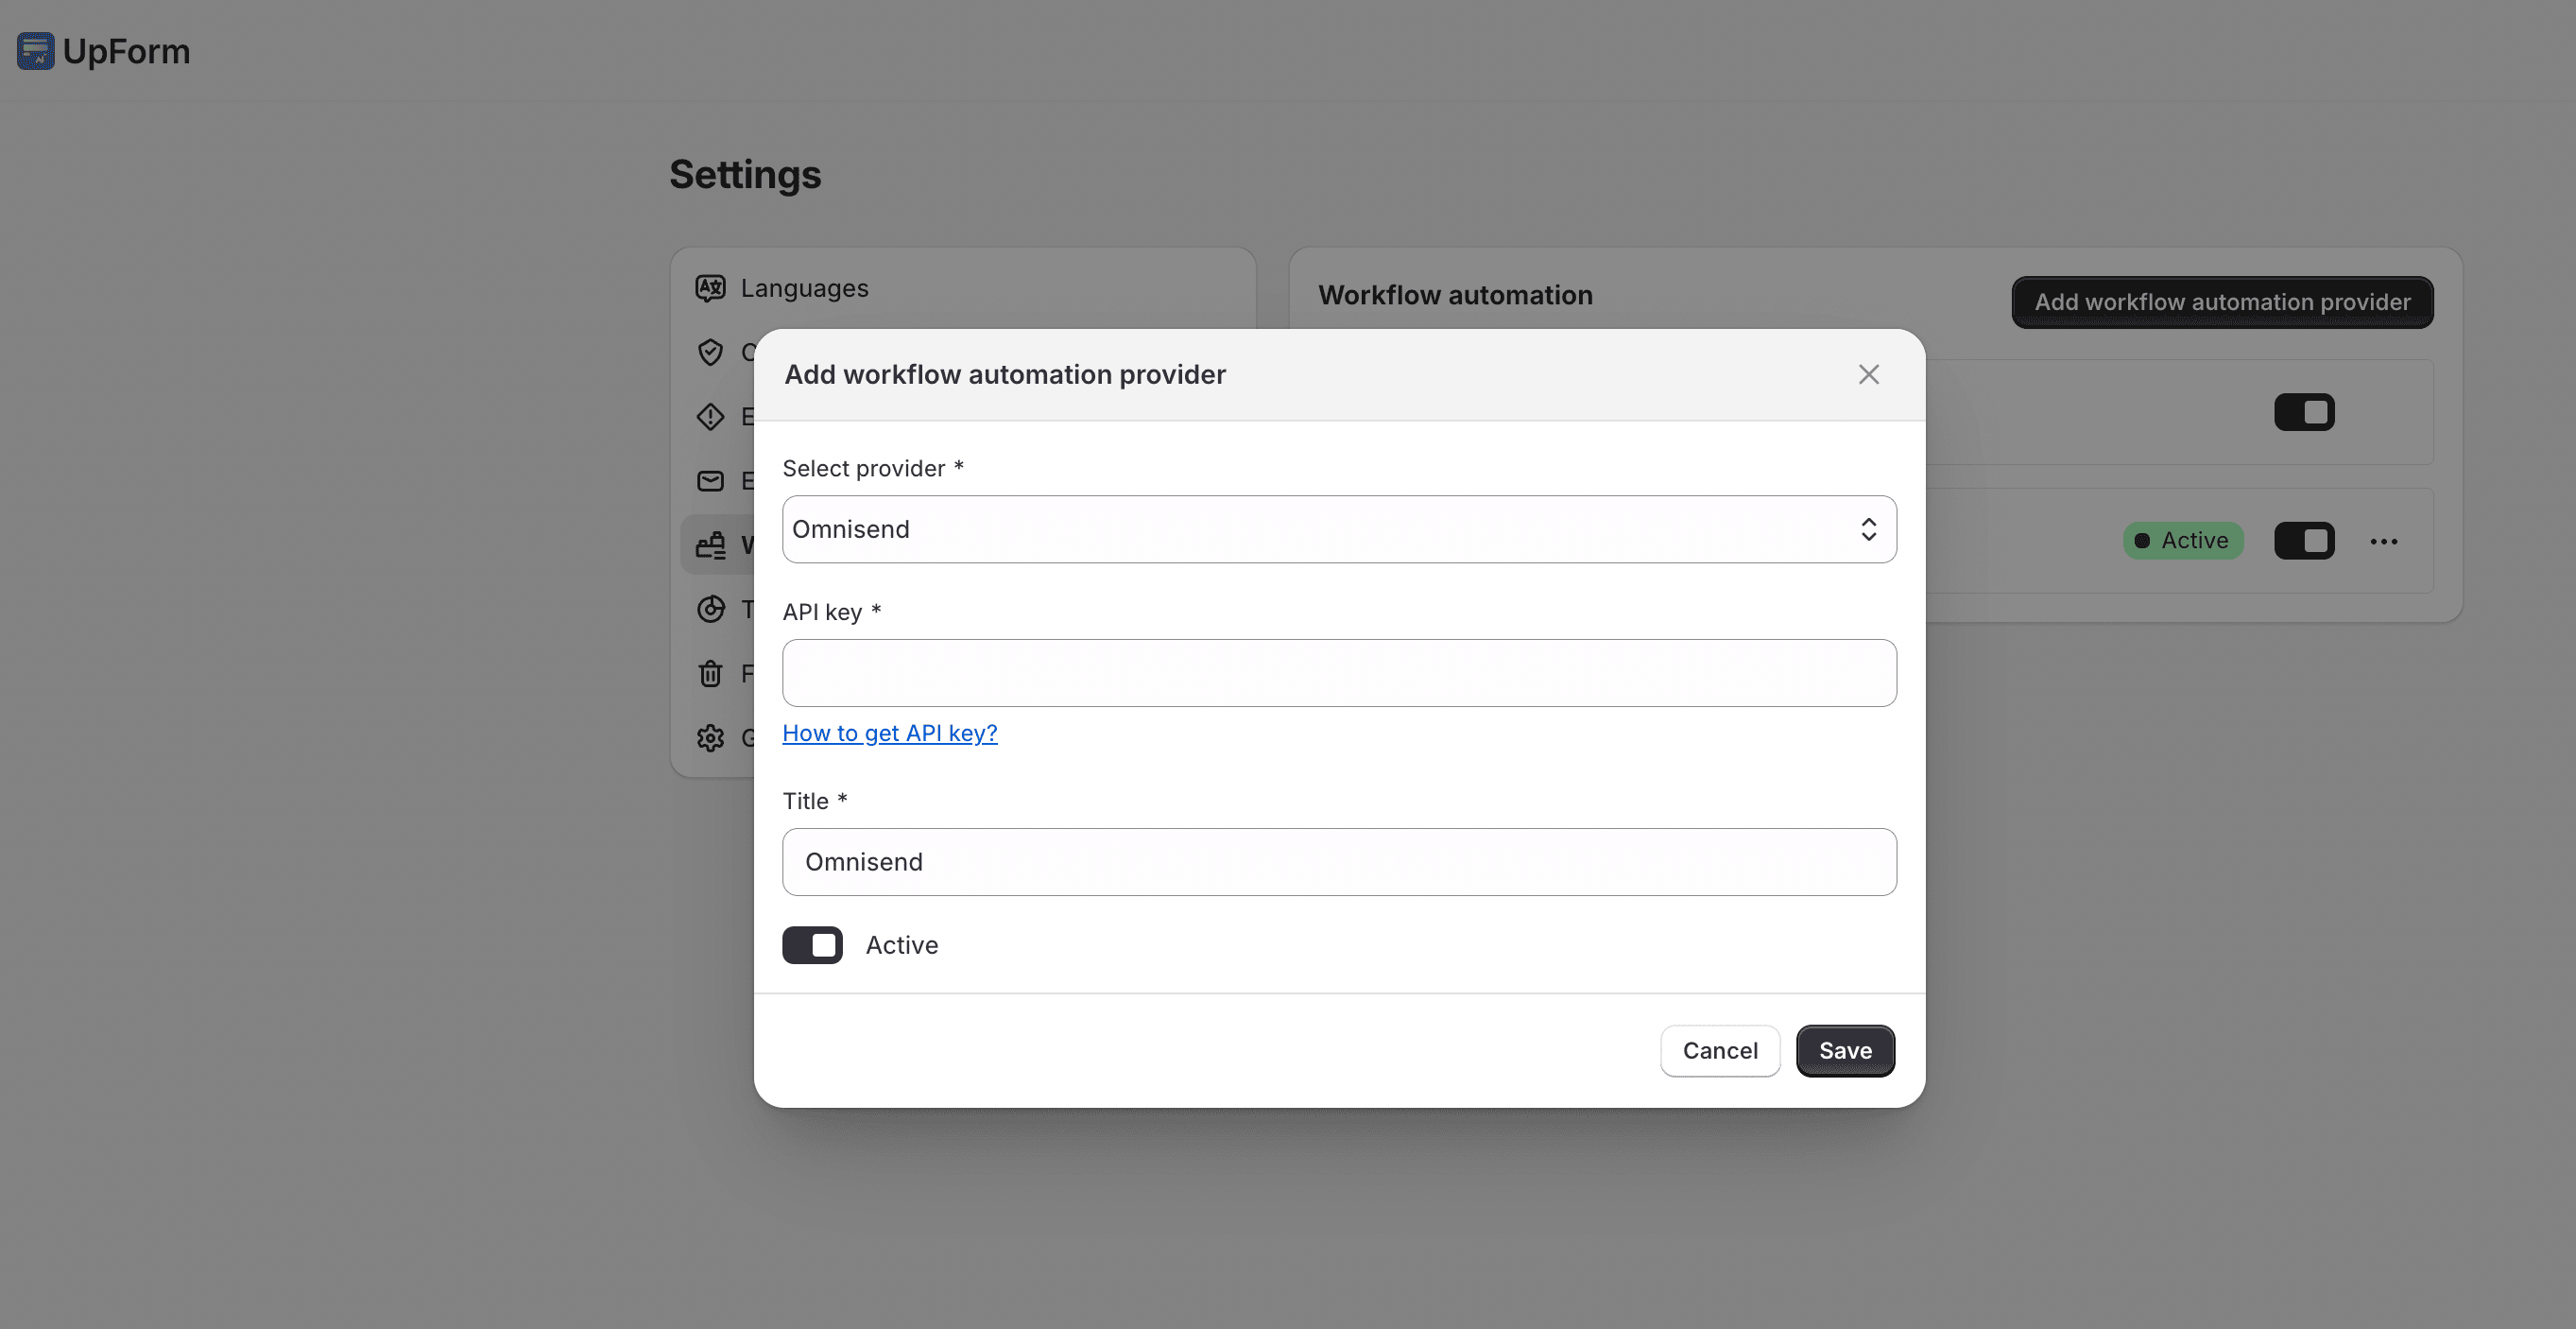
- In UpForm, open Settings → Workflow automation.
- Click Add workflow automation provider.
- Under Select provider, choose Omnisend.
- Enter a Title for this connection (for example,
Main Omnisend Account). - Leave the modal open (or return after you create the key), then continue to generate an API key in Omnisend.
Generate an Omnisend API key
- Sign in to your Omnisend dashboard.
- Go to Store Settings → API.
- Click Create API key.

- Name the key (for example,
UpForm Connection). - Enable Contacts permission so UpForm can add or update subscribers.
- Click Create API key.
- Copy the key immediately. Omnisend typically shows it only once.
- Return to UpForm, paste the key into API key, enable Active if shown, then click Save.
Prepare custom properties
You can sync any UpForm form. The screenshots below use an example contact form with fields such as full name, email, phone, message, and product interests.
Standard Omnisend fields cover common values such as email, name, and phone. Create custom properties for answers that do not already have a matching field (for example, a long message or multi-select interests).
- In Omnisend, go to Audience → Contacts.
- Open any contact profile.
- In Details, click Edit.
- Open the Custom tab, then click + Add property.
Single-value property (for textareas)
- Enter a Property name (for example,
Message). - Set Value type to Single value.
- Click Save.
List-value property (for checkboxes)
- Click + Add property again.
- Enter a Property name (for example,
Interest). - Set Value type to List value.
- Add values that match your form options.
- Click Save.
Use the same property names later when you map fields in UpForm.
Enable Omnisend on a form
- Open the form in the form builder (or create one from a template).
- Open the General tab → Workflow automation.
- Enable Sync submission data with Omnisend.
- Select the Provider you connected earlier.
You can also click Add for Omnisend from this section if you have not connected a provider yet.
Map form fields
In the mapping table, match each form field (Label / Name) to an Omnisend property under Mapping.
Standard Omnisend fields
Choose a property from the dropdown when available. Example:
- Email address → Email
- Full name → First Name (UpForm sends the full name value into First Name)
- Phone number → Phone
Custom properties
For other fields:
- In the Mapping column, open the dropdown.
- Choose Custom property.
- Type the property name you created in Omnisend (for example,
MessageorInterest).
Example:
| Form field | Mapping (example) |
|---|---|
| How can we help? | Custom property: Message |
| Products you are interested in | Custom property: Interest |
Then Save the form and Publish it to your storefront.
Test the sync
- On the live storefront, submit the form with complete test data.
- Wait about 30–60 seconds.
- In Omnisend, open Audience → Contacts and confirm the new contact and mapped values.
Optional: Create an Omnisend automation
After contacts sync successfully, you can automate follow-up. Example: send a welcome email when someone subscribes.
- In Omnisend, open Automation.
- If needed, connect your Shopify store first.
- Browse templates and customize a Welcome workflow (or build your own).
- Open the trigger and set it to Subscribed to Marketing (or the closest equivalent for new subscribers).
- Adjust any wait/delay block if you want the email sooner or later.
- Edit the email subject, sender, and content, then save.
- Review the workflow, then click Start workflow and confirm.
If this does not work as expected, Contact for help.