

Appearance
LLMs.txt
An llms.txt file is a structured text file at the root of your store that helps AI systems understand your brand, products, and key pages. Shopify generates an llms.txt file automatically. Use LLMs.txt in SEOEngine when you want to publish a custom version that controls which store content is included and how it is presented.
To get started, open LLMs.txt, review the status banner, configure your store details and content options, then publish the file to your live theme.
Before you begin
- SEOEngine is installed and open in your Shopify admin.
- You know which products, collections, pages, posts, and important URLs should appear in the custom file.
llms.txt status
The status banner shows whether your store is using Shopify’s default file or a custom file published by the app.
- Shopify-managed: Shopify currently generates your
llms.txtautomatically. Create a custom file if you want to control which store content is included. - Published: Your custom
llms.txtfile is active on the published theme. The banner also shows the last generated date when available.
Select Open current llms.txt to view the live file on your storefront at /llms.txt.
Website overview
Use Website overview to introduce your store at the top of the generated file.
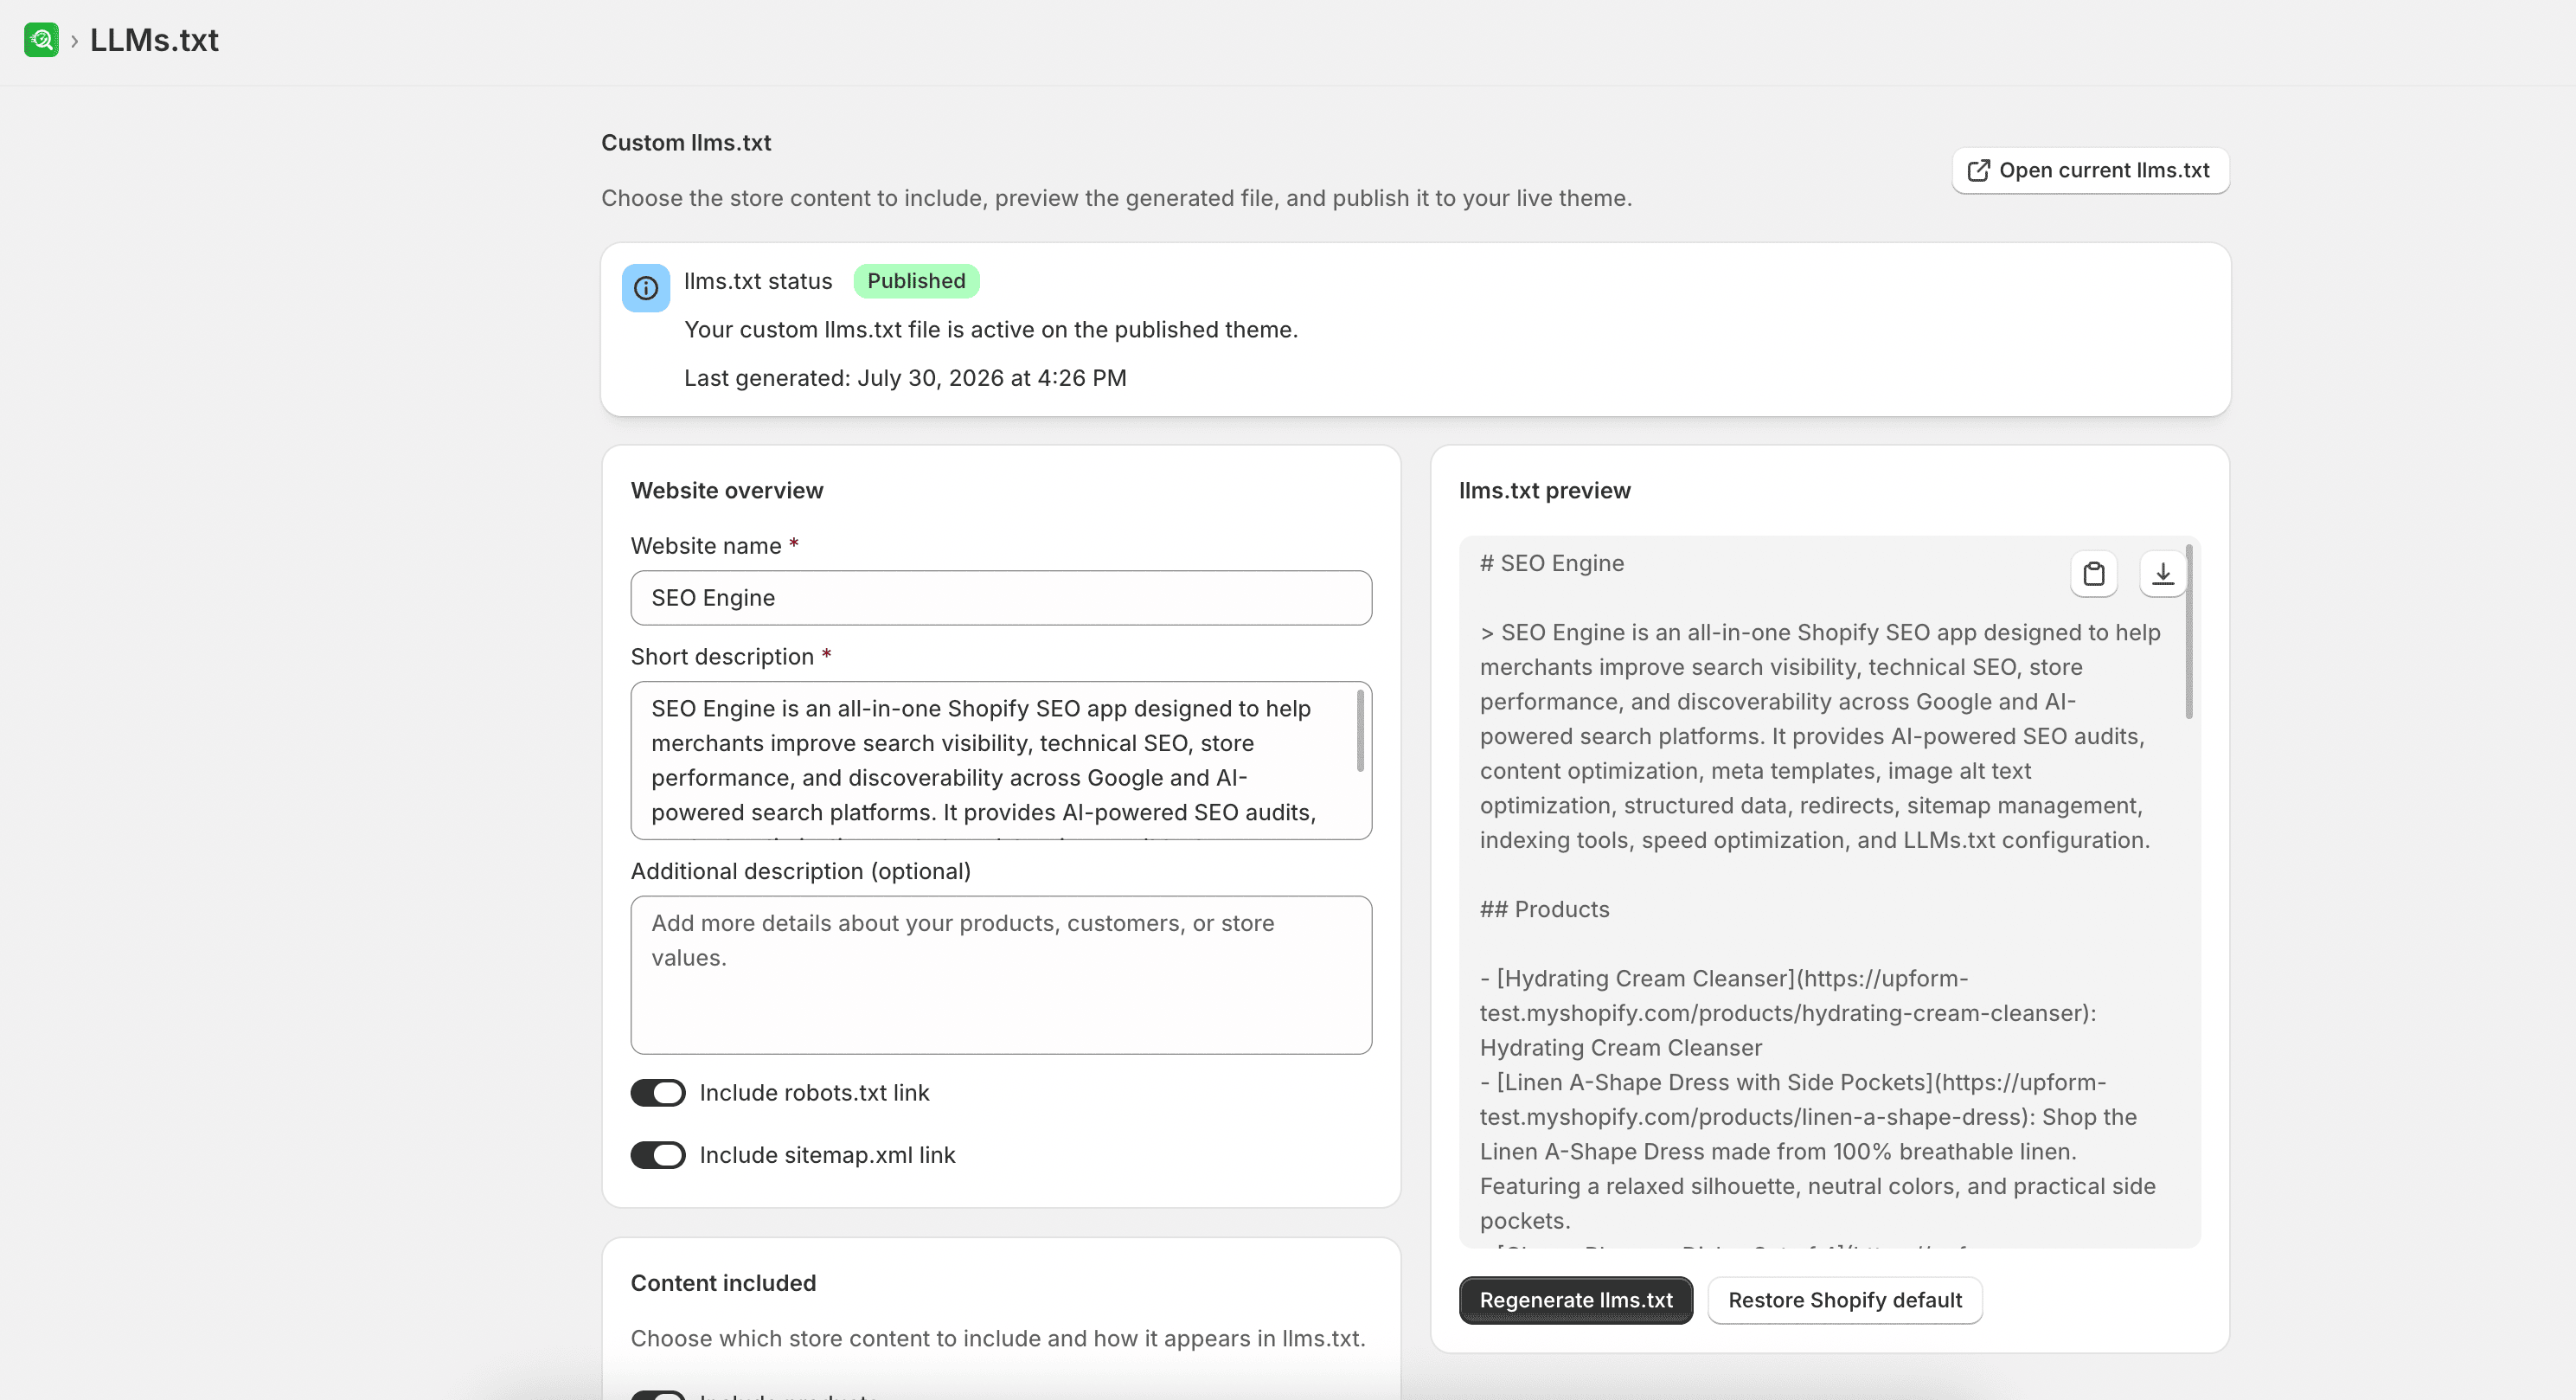
- Enter a Website name. This field is required.
- Enter a Short description that briefly explains what your store offers. This field is required.
- Optionally add an Additional description with more detail about your products, customers, or brand values.
- Choose whether to include links to supporting files:
- Include robots.txt link
- Include sitemap.xml link
These links appear in an optional section at the end of the generated file when enabled.
Content included
Content included lets you choose which store content appears in llms.txt and in what order.
For each content type, turn on the include toggle and configure the options that apply:
- Include products: Exclude specific products, optionally exclude out-of-stock products, and set an Item limit. Leave the limit empty to use the maximum of 2,000 items.
- Include collections: Exclude specific collections.
- Include pages: Exclude specific pages.
- Include posts: Select blogs to include. If no blogs are selected, all blogs are included. You can also set an Item limit (empty uses the maximum of 2,000).
Use Position to control where each enabled section appears in the file:
- First
- Standard
- Later
Sections with the same position follow a default order of products, collections, posts, then pages.
Important URLs for AI
Use Important URLs for AI to highlight pages that AI systems should prioritize, such as return policies, FAQs, or contact pages.
- Select Add URL.
- Enter the URL. This field is required.
- Optionally add a Name and Description.
- Repeat for each important page, or remove an entry if it is no longer needed.
llms.txt preview
The llms.txt preview panel updates as you change your settings so you can review the generated content before publishing.
- Select Copy preview to copy the preview text.
- Select Download llms.txt to download the preview as a file.
When you are ready to publish:
- Select Publish custom llms.txt to write the file to your published theme.
- If a custom file already exists, select Regenerate llms.txt to update it with your latest settings.
Website name and Short description must be filled in before publishing. After a successful publish, the status changes to Published.
If you edit settings, use the save bar to save your changes and publish, or discard them to revert to the last saved configuration.
Restore Shopify’s default llms.txt
If you no longer want a custom file, you can return to Shopify’s automatically generated version.
- Select Restore Shopify default.
- Confirm the action when prompted.
WARNING
Restoring permanently deletes templates/llms.txt.liquid from your theme. This action cannot be undone.